

Overview
This guide provides step-by-step instructions for setting up and using the Recruitee Partner API integration with StackOne. It covers how to request and activate the integration, configure settings within StackOne, connect your Recruitee integration, and how users can access and utilize your integration’s features.Partner Requirements
To become a Marketplace Technology Partner of Recruitee, navigate to Marketplace integrations. Click on Become a Marketplace Technology Partner, then click onTechnology partnership request to request a partnership with Recruitee.
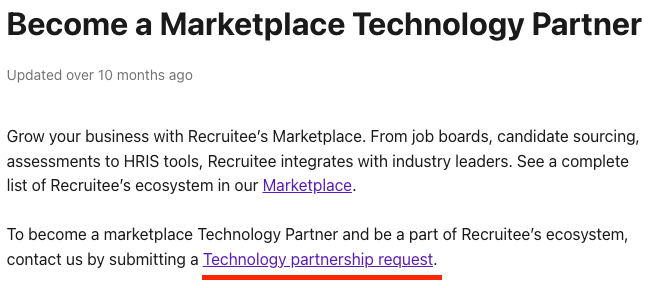
Once you have obtained the Recruitee partnership, follow the steps below to connect your integration with StackOne for Assessment & Background Check.
Provider Side Setup
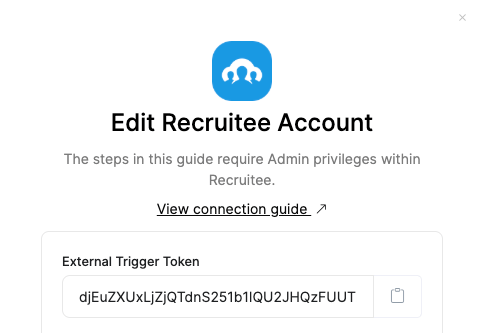
You need to submit a request for Recruitee Integration Partner as mentioned in Partner Requirements. Once approved, you can utilize the External Trigger Token to activate your integration app if you wish to test the app via the Recruitee Sandbox.To obtain the External Trigger Token, please follow these steps:
StackOne Configuration
The deletion of a partner integration on Recruitee is currently not supported through StackOne configuration. To delete an integration, please contact the StackOne support team.
1
Navigate to enable the Recruitee at StackOne
Go to the ATS category on the Integrations page and enable Recruitee.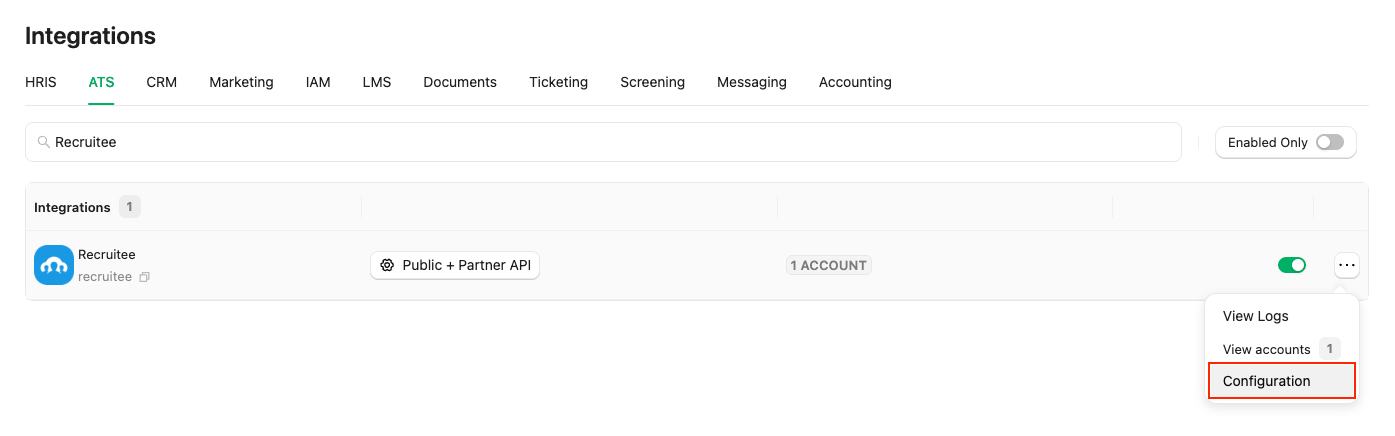
2
Enable and Configure Recruitee in StackOne
Complete the necessary fields in the Recruitee - Configuration modal: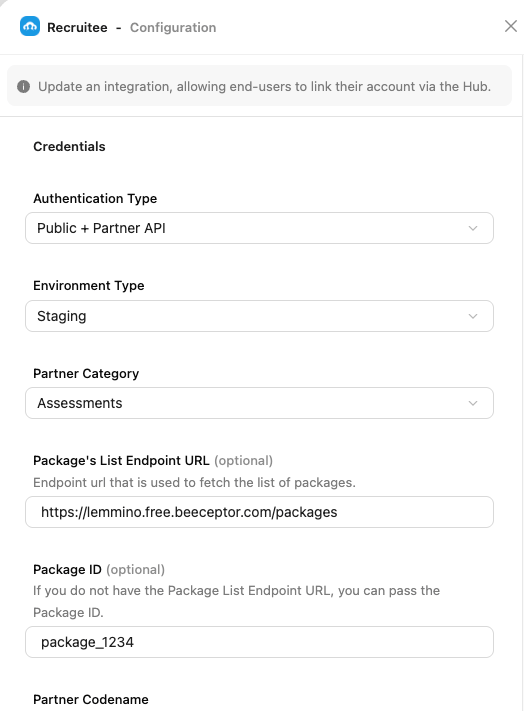
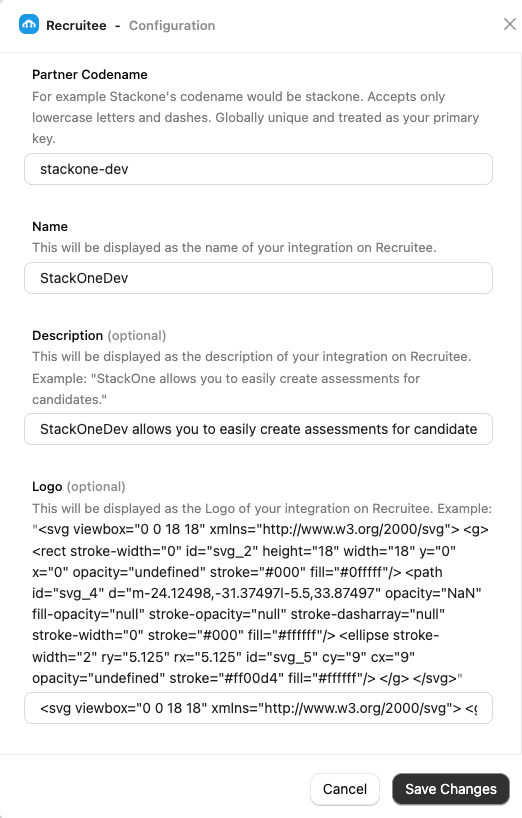
-
Authentication Type: Select
Public + Partner APIto integrate with Recruitee (for Assessment/Background Check integration). - Environment Type: If you have a Release Candidate (RC) environment account on Recruitee, select Staging as the environment type; otherwise, select Production.
-
Partner Category: Select the appropriate category based on your integration’s classification as a partner for Recruitee, e.g.
AssessmentsorBackground Checks. -
Package’s List Endpoint URL: Implement and provide an endpoint to StackOne that StackOne will use to retrieve the list of packages when the recruiter wants to send a test to a candidate.
Implement the following POST endpoint:
The expected response of the POST endpoint (list of packages). Refer to: Enter the endpoint into the designated field:
-
Package ID: If you do not have the Package’s List Endpoint URL, you can specify a particular package ID that will be visible to the recruiter when they wish to send the test to the candidate.
How is the Package's List Endpoint URL different from a Static Package ID?
The Package’s List Endpoint URL allows StackOne to fetch a list of available packages from your system, while the Static Package ID is fixed and available for users to select on the provider’s side.- When you have a Package’s List Endpoint URL, a list of packages will be available to select in Recruitee.
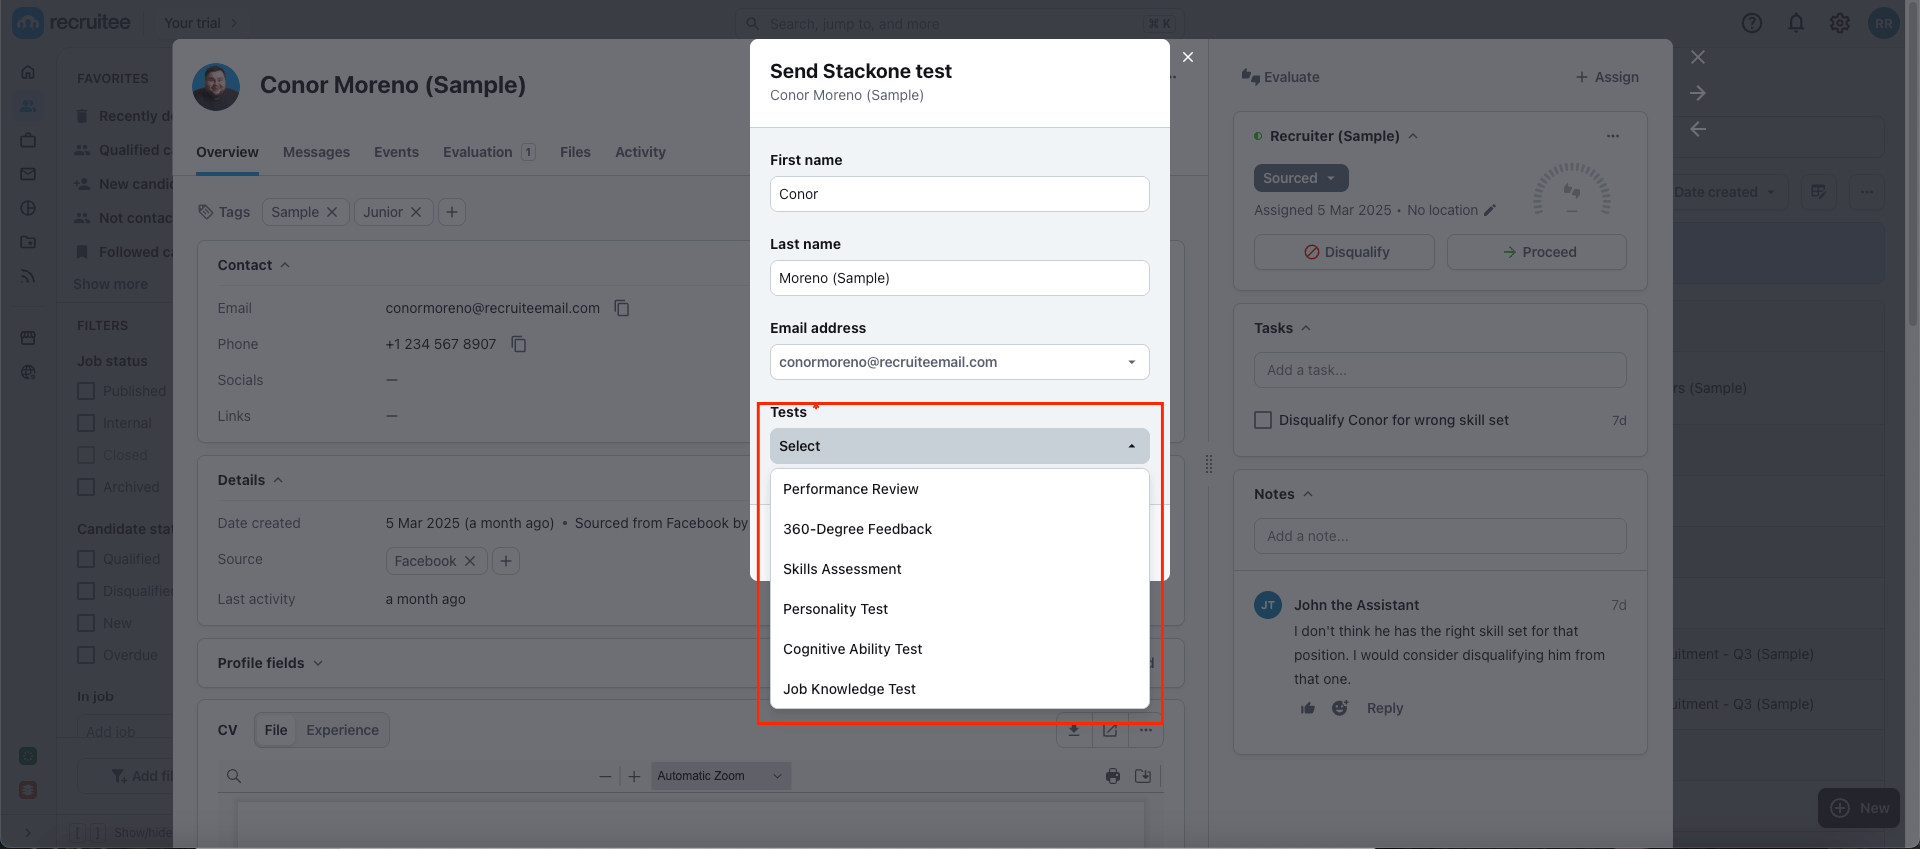
- When you have a Static Package ID, a static package ID will be available to select in Recruitee.
At least one field is necessary for making packages available in the provider’s UI. Preference will be given to the Package’s List Endpoint URL if both fields are configured. - Partner Codename: A unique identifier for the partner, used to identify your integration on the Recruitee marketplace. It must consist of lowercase letters and dashes (-) and be globally unique.
- Name: The name of your integration that will be displayed on the Recruitee dashboard.
- Description: A brief overview of your integration that will be displayed on the Recruitee dashboard.
- Logo: The logo of your integration that will be displayed on Recruitee.
Confirm or Save Changes button to enable Recruitee, which allows end-users to link their accounts via the StackOne Connector Hub.3
Add a Webhook
Navigate to the Webhooks page, click on 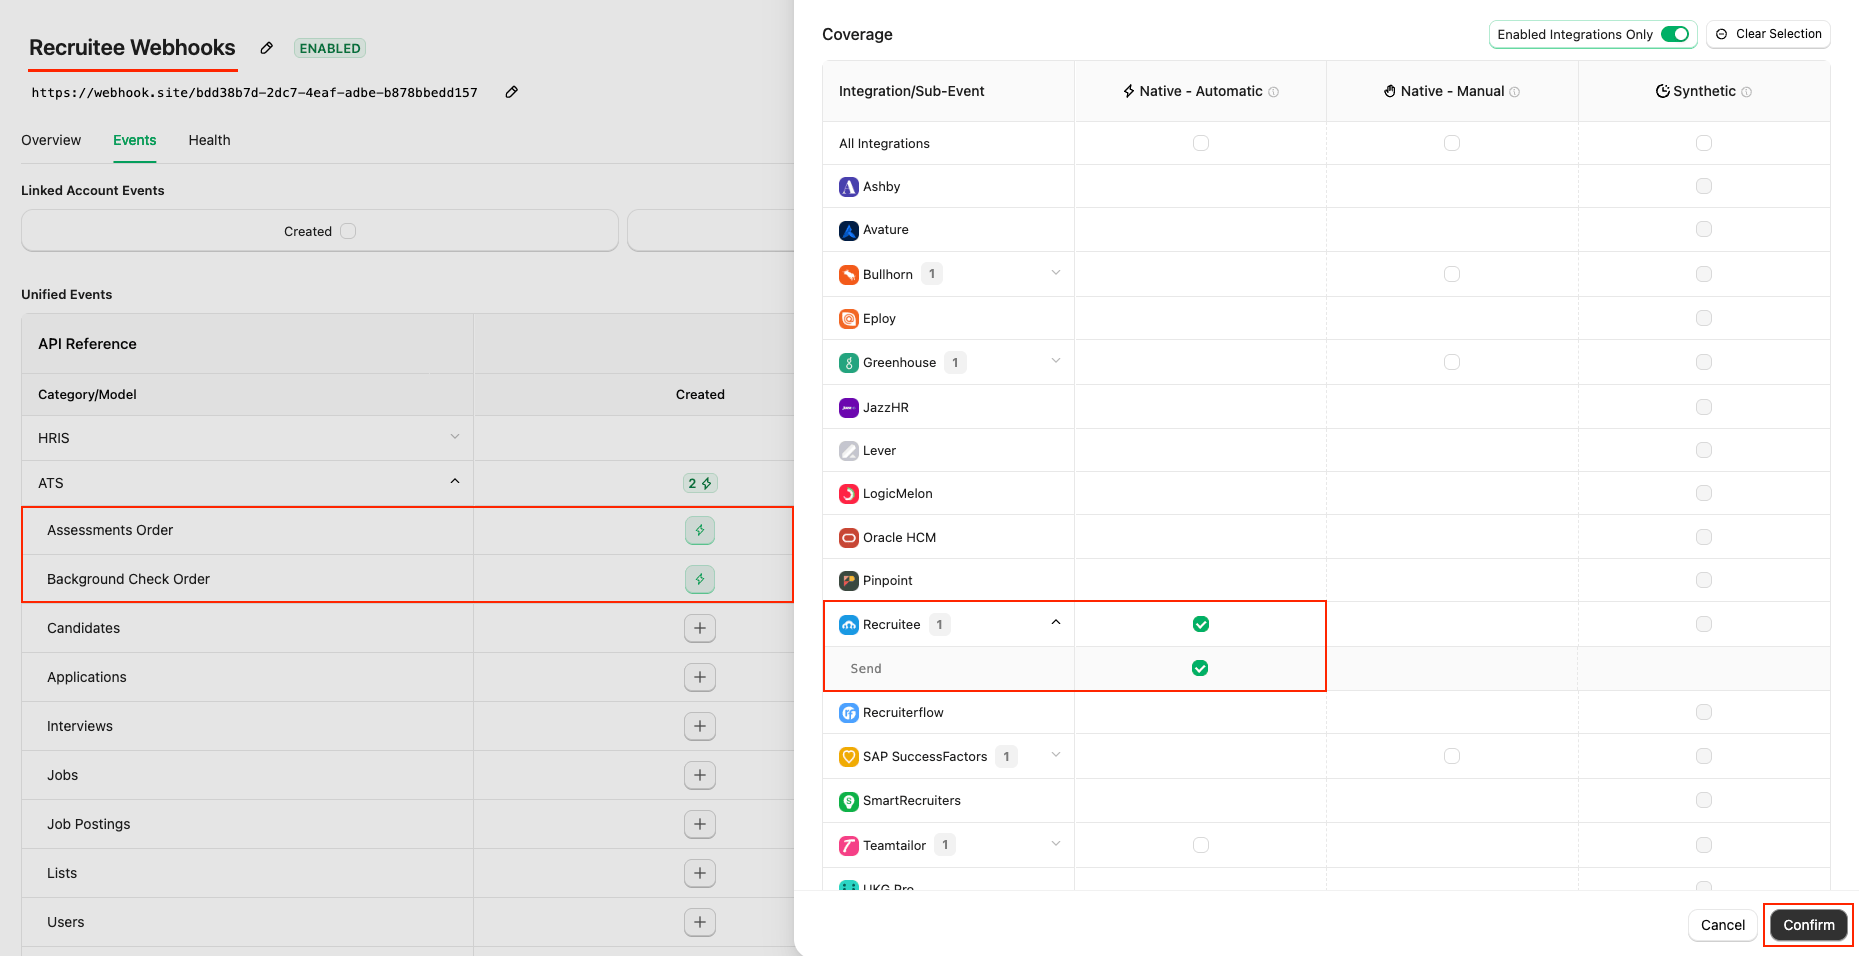
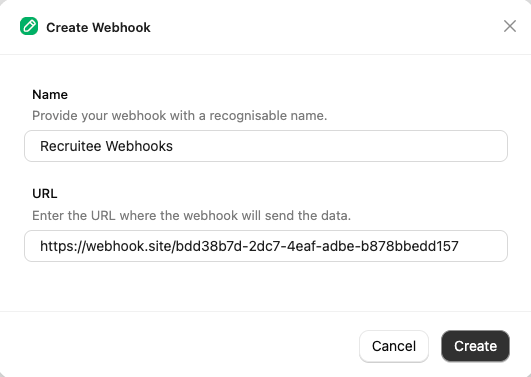
Add webhook and fill out the form:- Name: Enter a recognisable name for your webhook.
-
URL: Enter the URL where the webhook will send notifications for the enabled events.
Events tab for Assessment and Background Check, such as Assessments Order and Background Check Order.Confirm and Save buttons to add the webhook.ATS User Enablement
1
To obtain the External Trigger Token
Navigate to the Accounts page or the StackOne Connector Hub to link your Recruitee account with StackOne.
2
Go to Recruitee Marketplace
Navigate to Marketplace page, select either 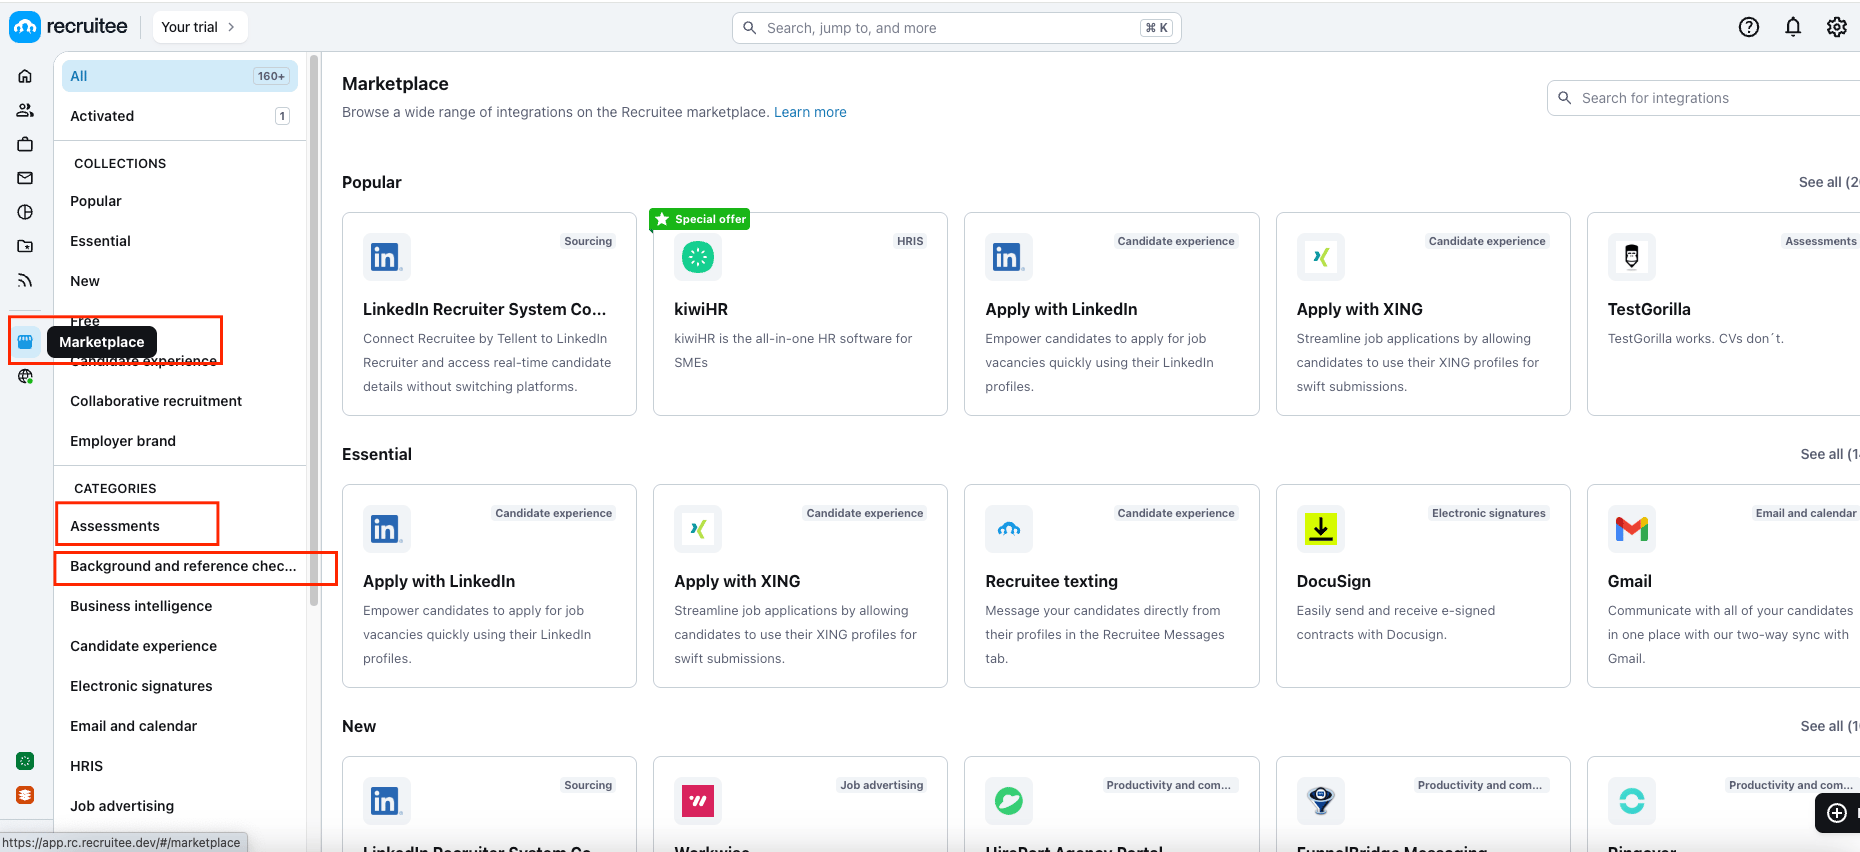
Assessments or Background Checks from Categories.3
To activate the integration
Search for your integration partner’s name in the search bar.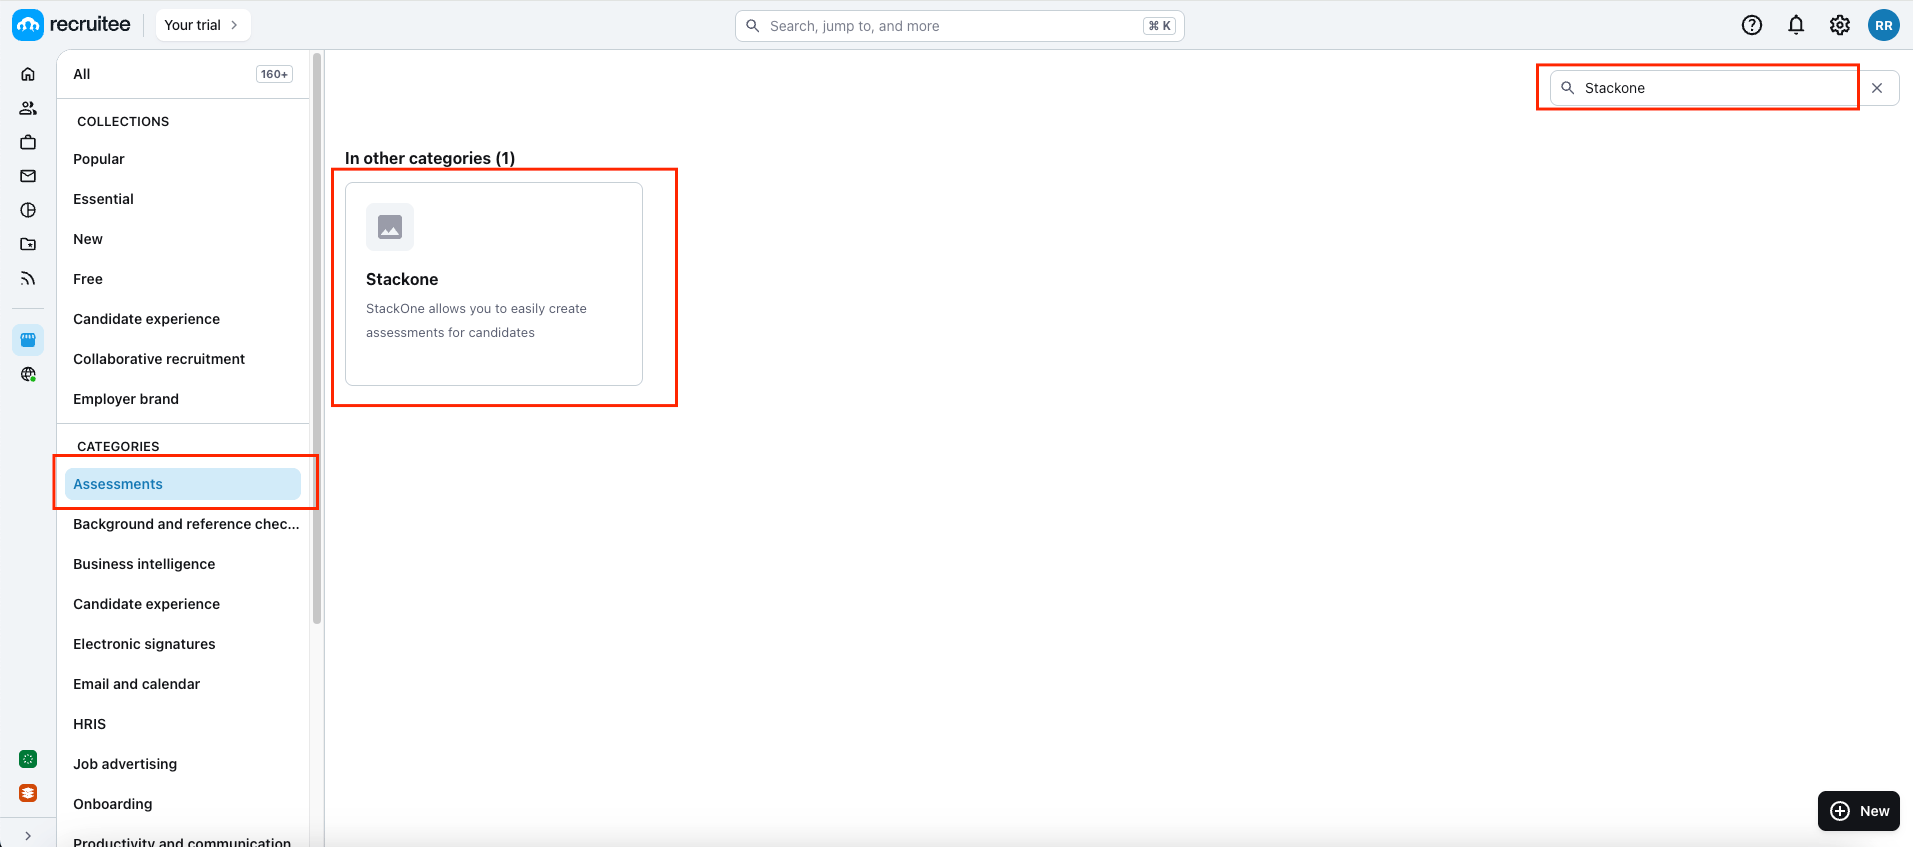
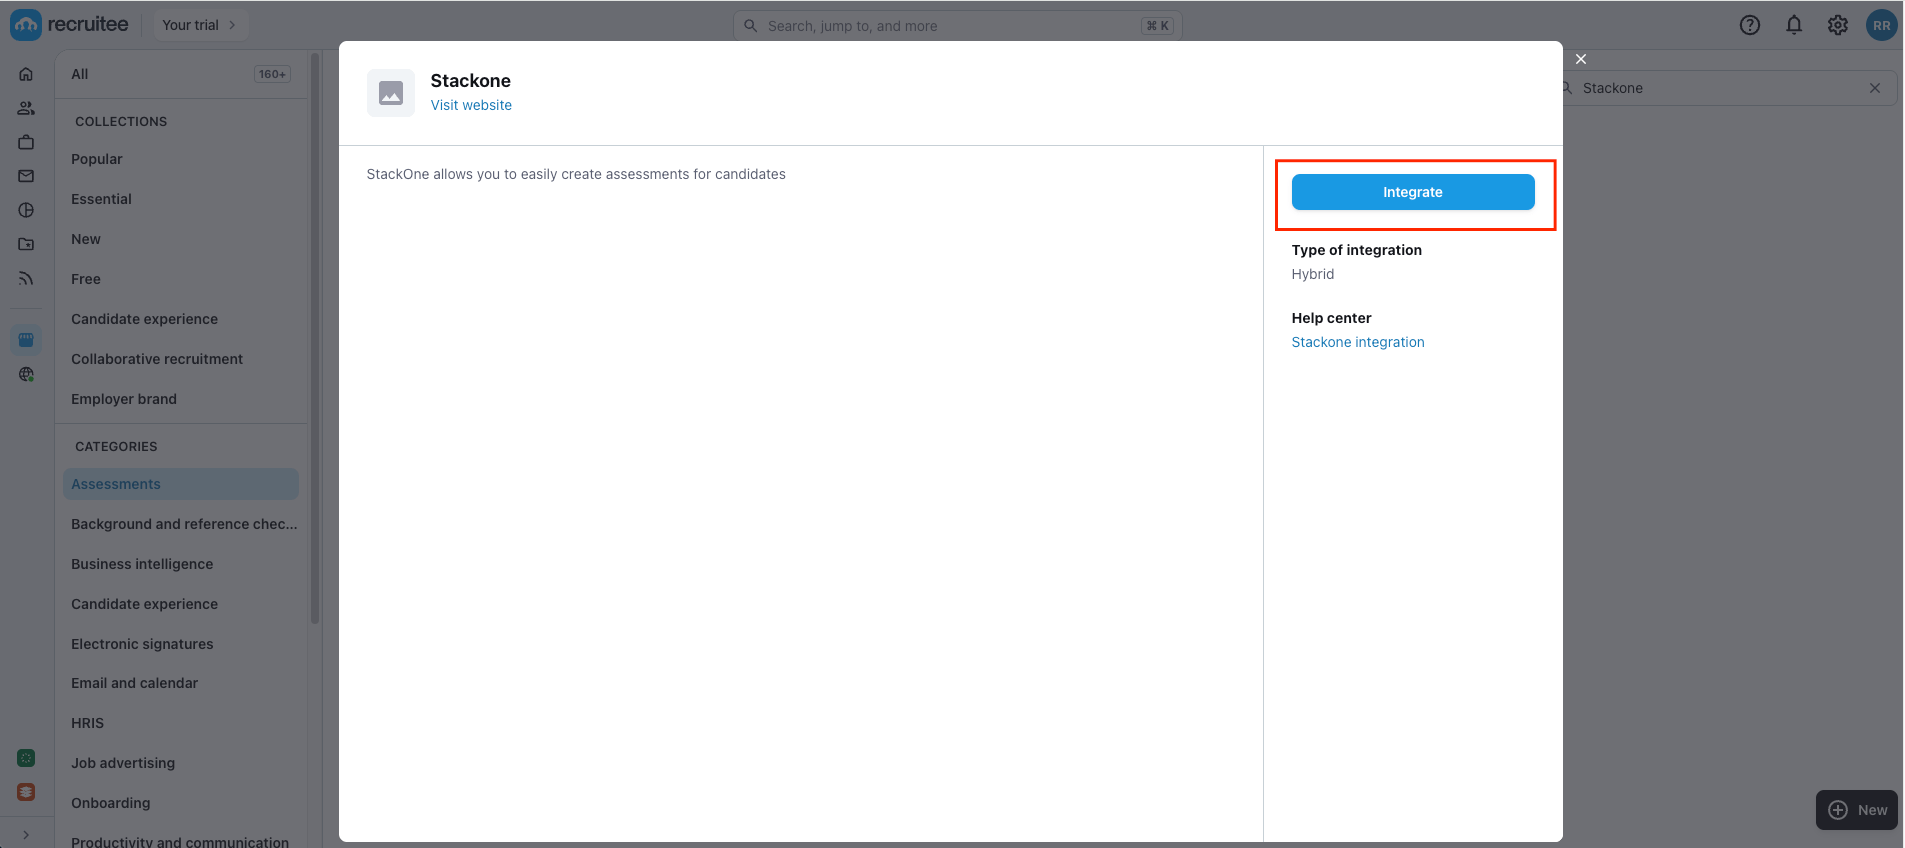
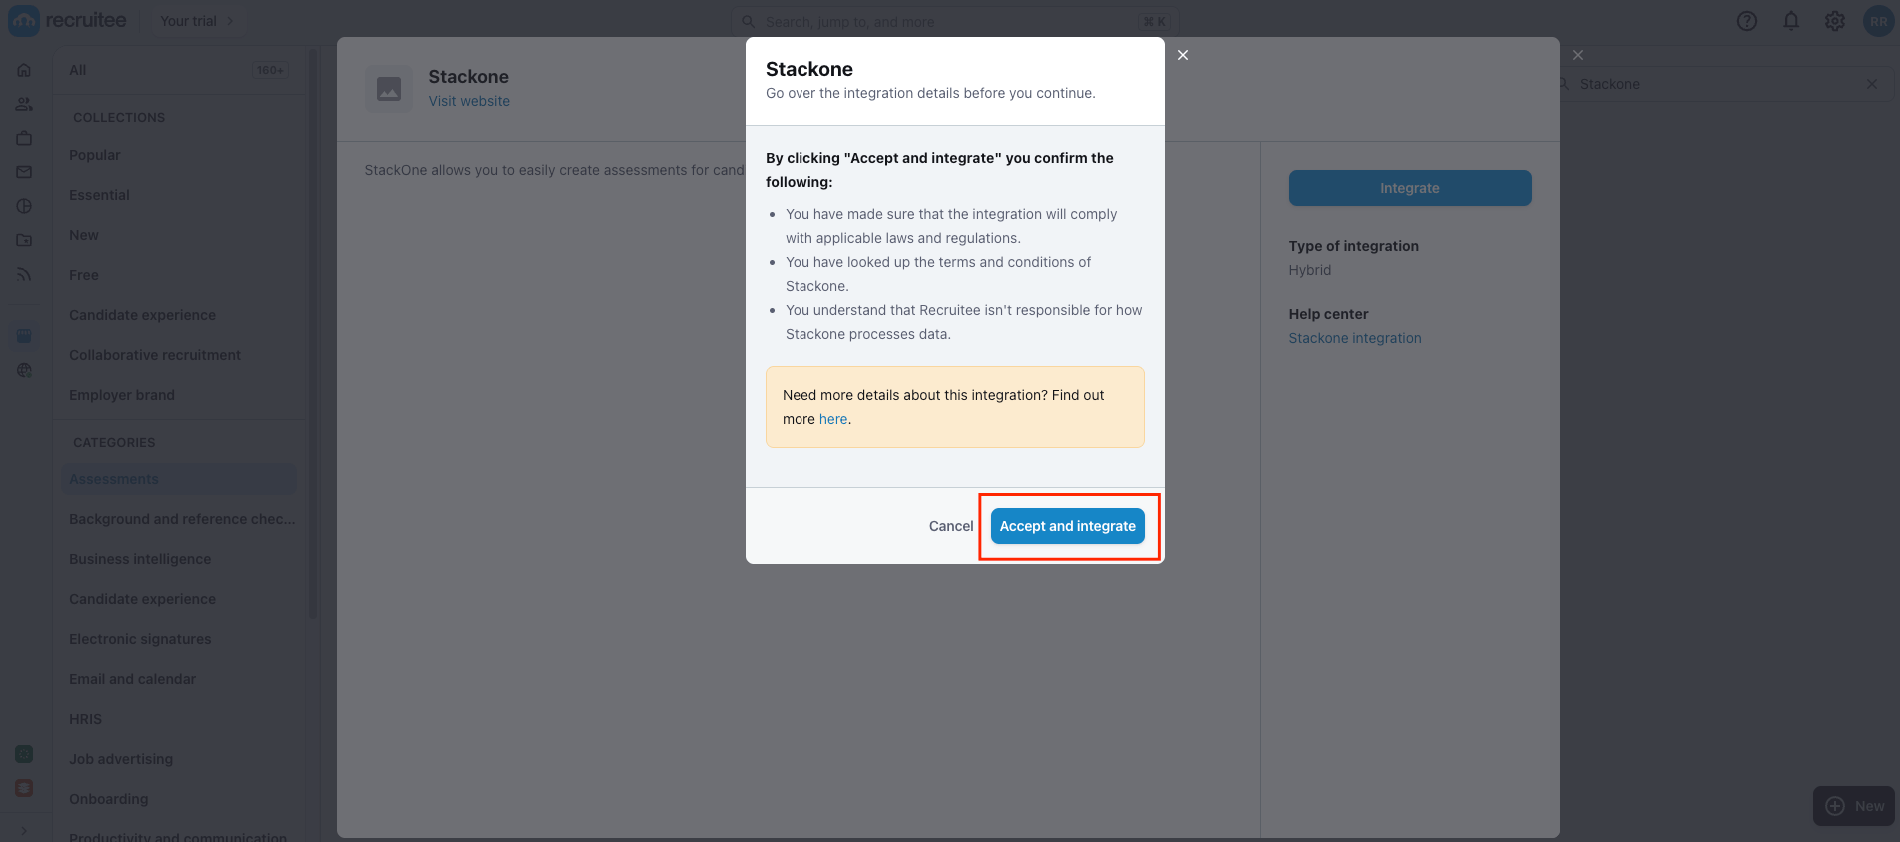
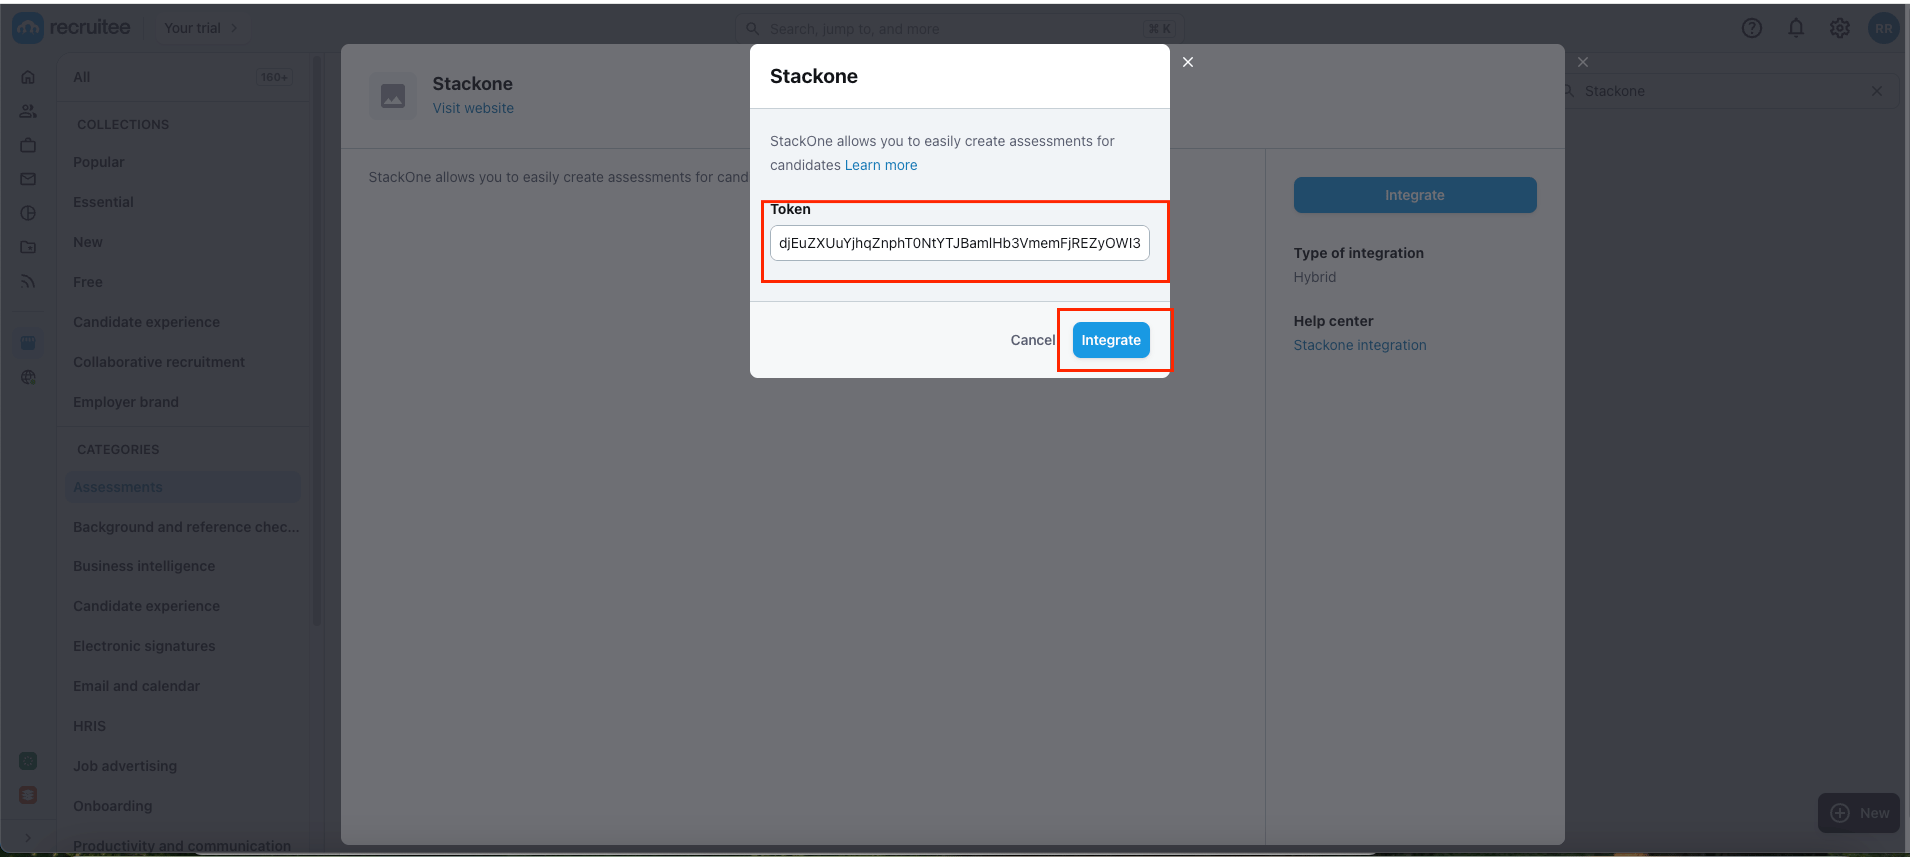
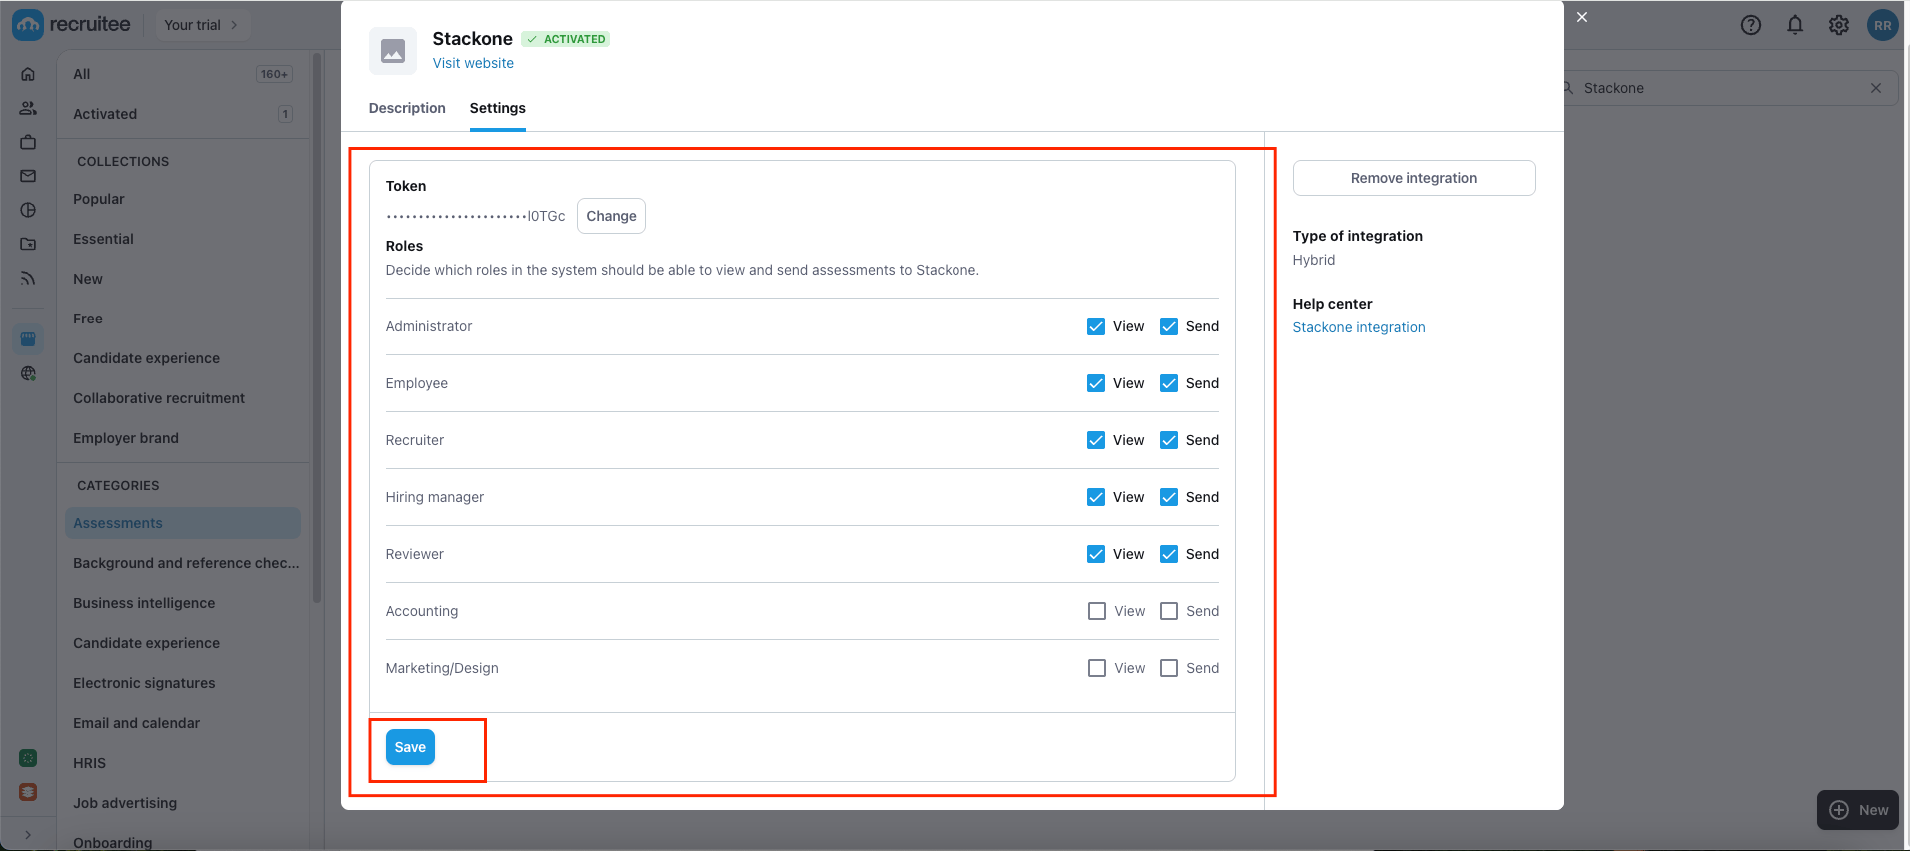
Integrate button to proceed further,Accept and Integrate button. Click on the button to proceed to the next step.For Partners: To test your integration using the Recruitee Sandbox, you need to input an External Trigger Token into the integration from the marketplace to integrate.For Users: Each user needs to input an External Trigger Token to connect with your integration.
External Trigger Token retrieved from the StackOne Connector Hub as mentioned in the above steps, then click on Integrate to activate the integration app.Save button to apply the changes.The user can refer to the Recruitee Assessment or Background Check Guide for instructions on how to activate the Recruitee integration app from the Marketplace.
ATS User Experience
1
Select Candidate from the Candidates
Navigate to the Candidates page and select the candidate.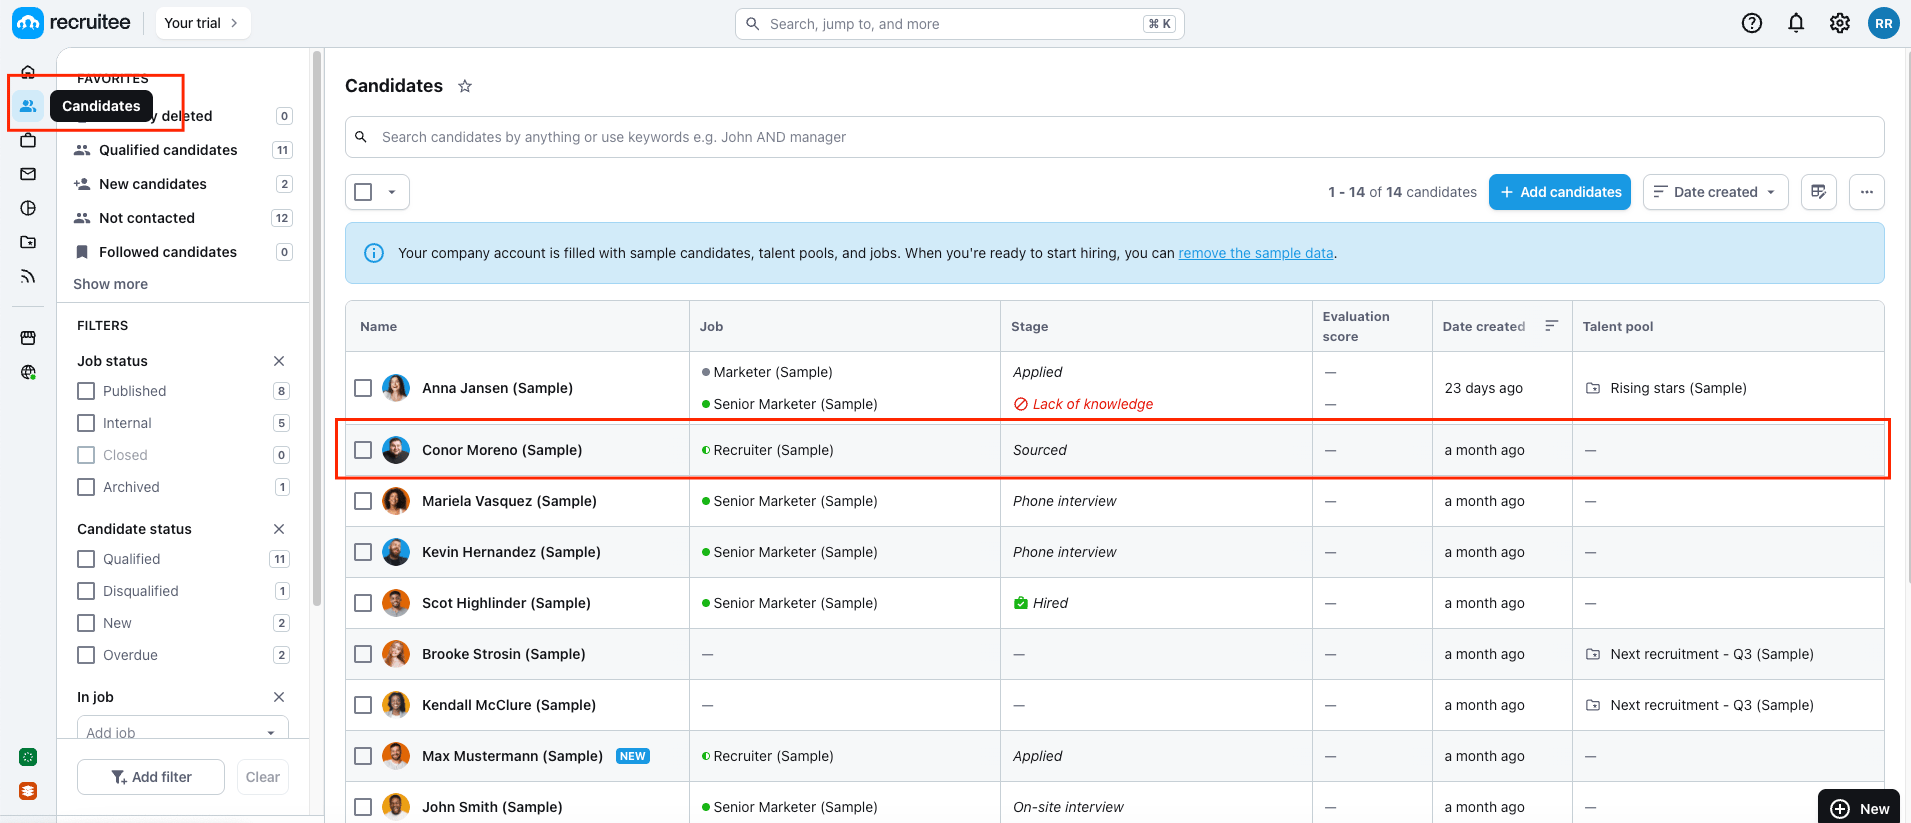
2
Send test notification
Click on the 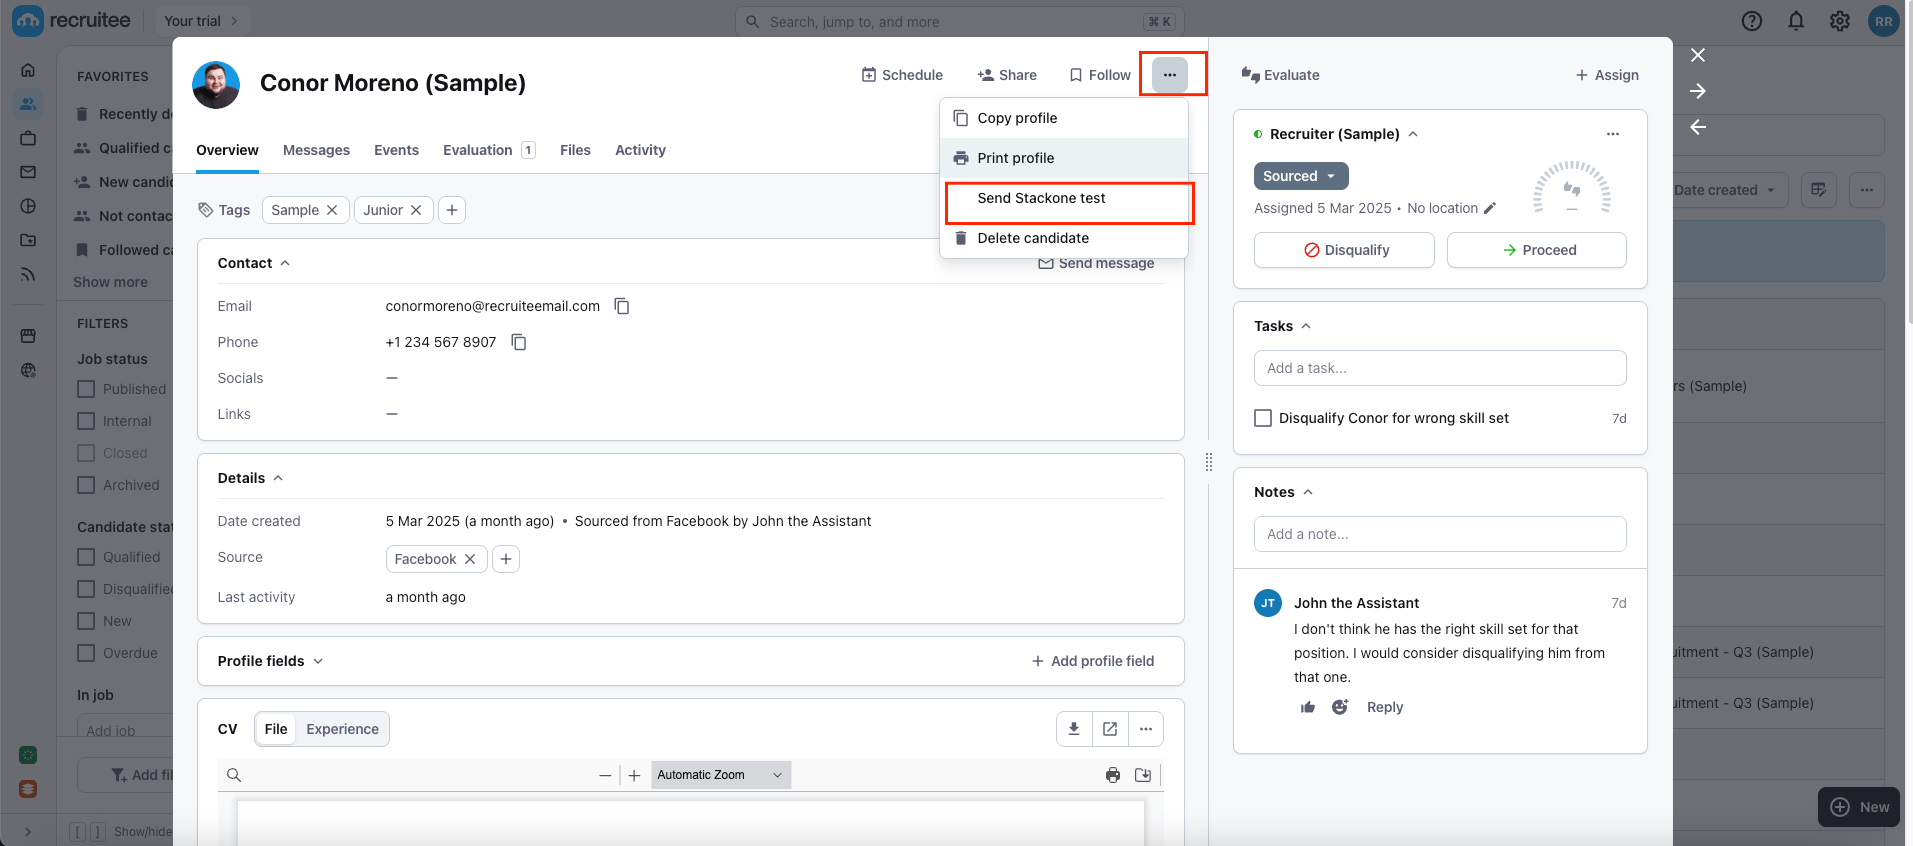
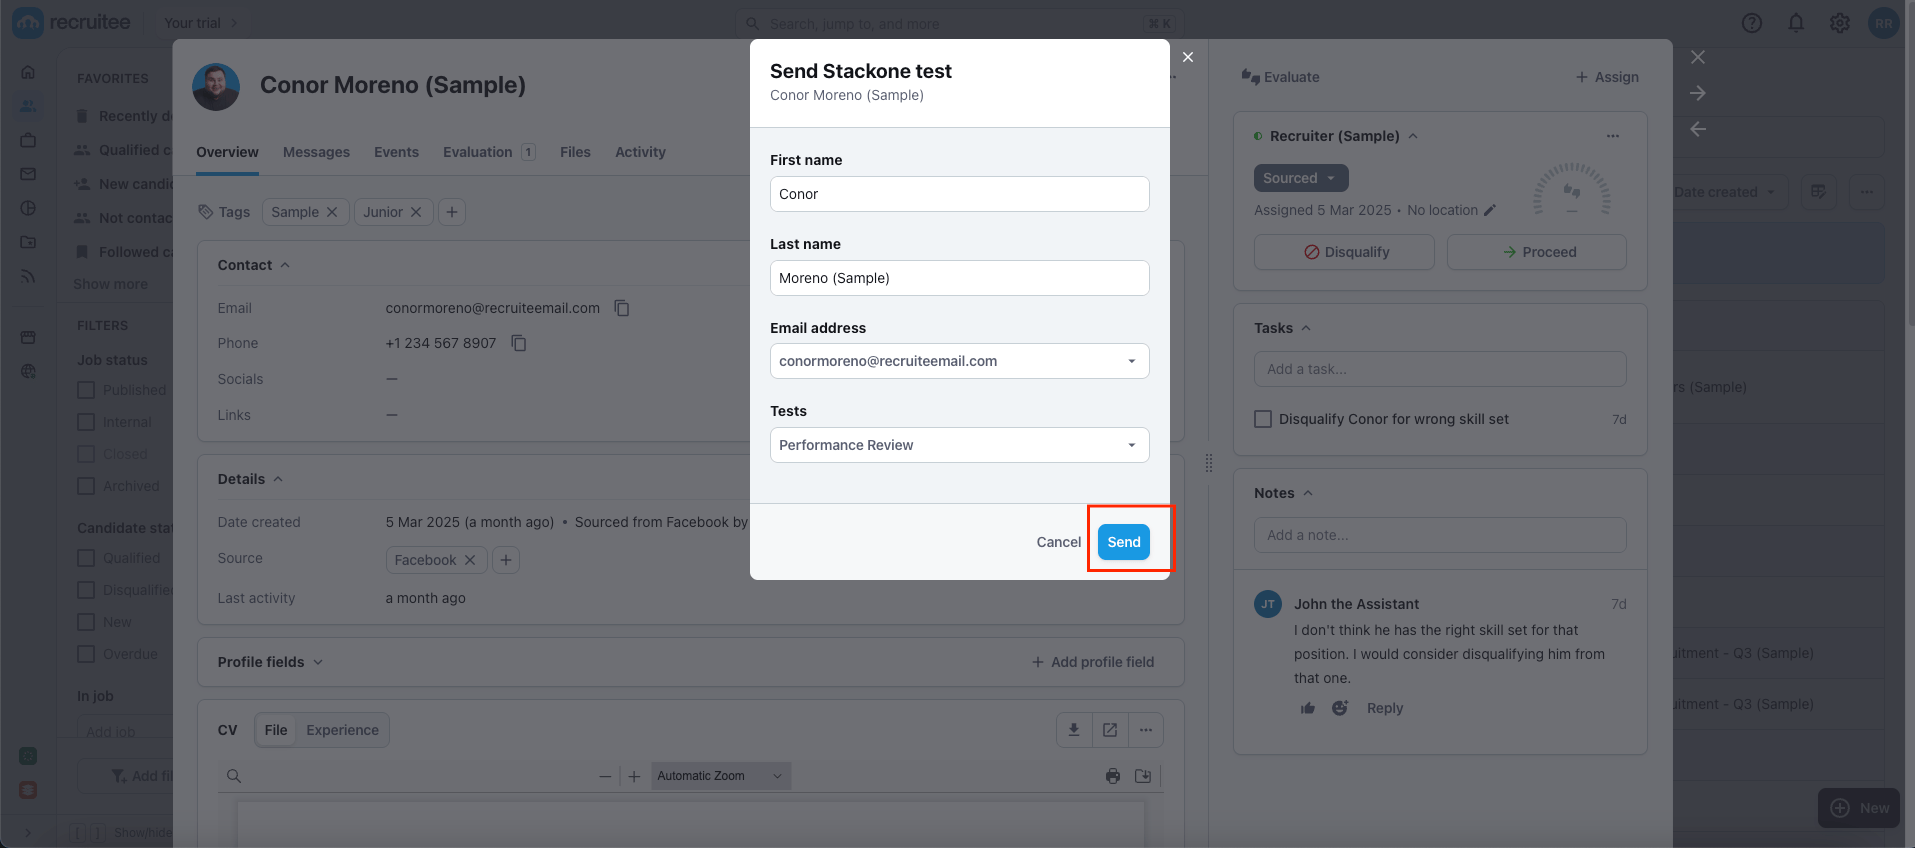
menu icon, then select integration app to proceed.Send button to become enabled, and then click Send to dispatch the notification.ATS User Experience Customization
1
To Update the result via unified api
Utilize the following endpoints to update the results:Utilize the following endpoint to get metadata to update the result of the assessment or background check:
- Connector Meta Information with the provider key
recruiteefor modelassessments/results.updateorbackground_checks/results.update
2
How will the results of the assessment/background check be displayed to the user in Recruitee?
Navigate to the candidate profile, where you will see the updated results along with the score from the previously sent test. This information will be available once the candidate has completed the assessment and background check.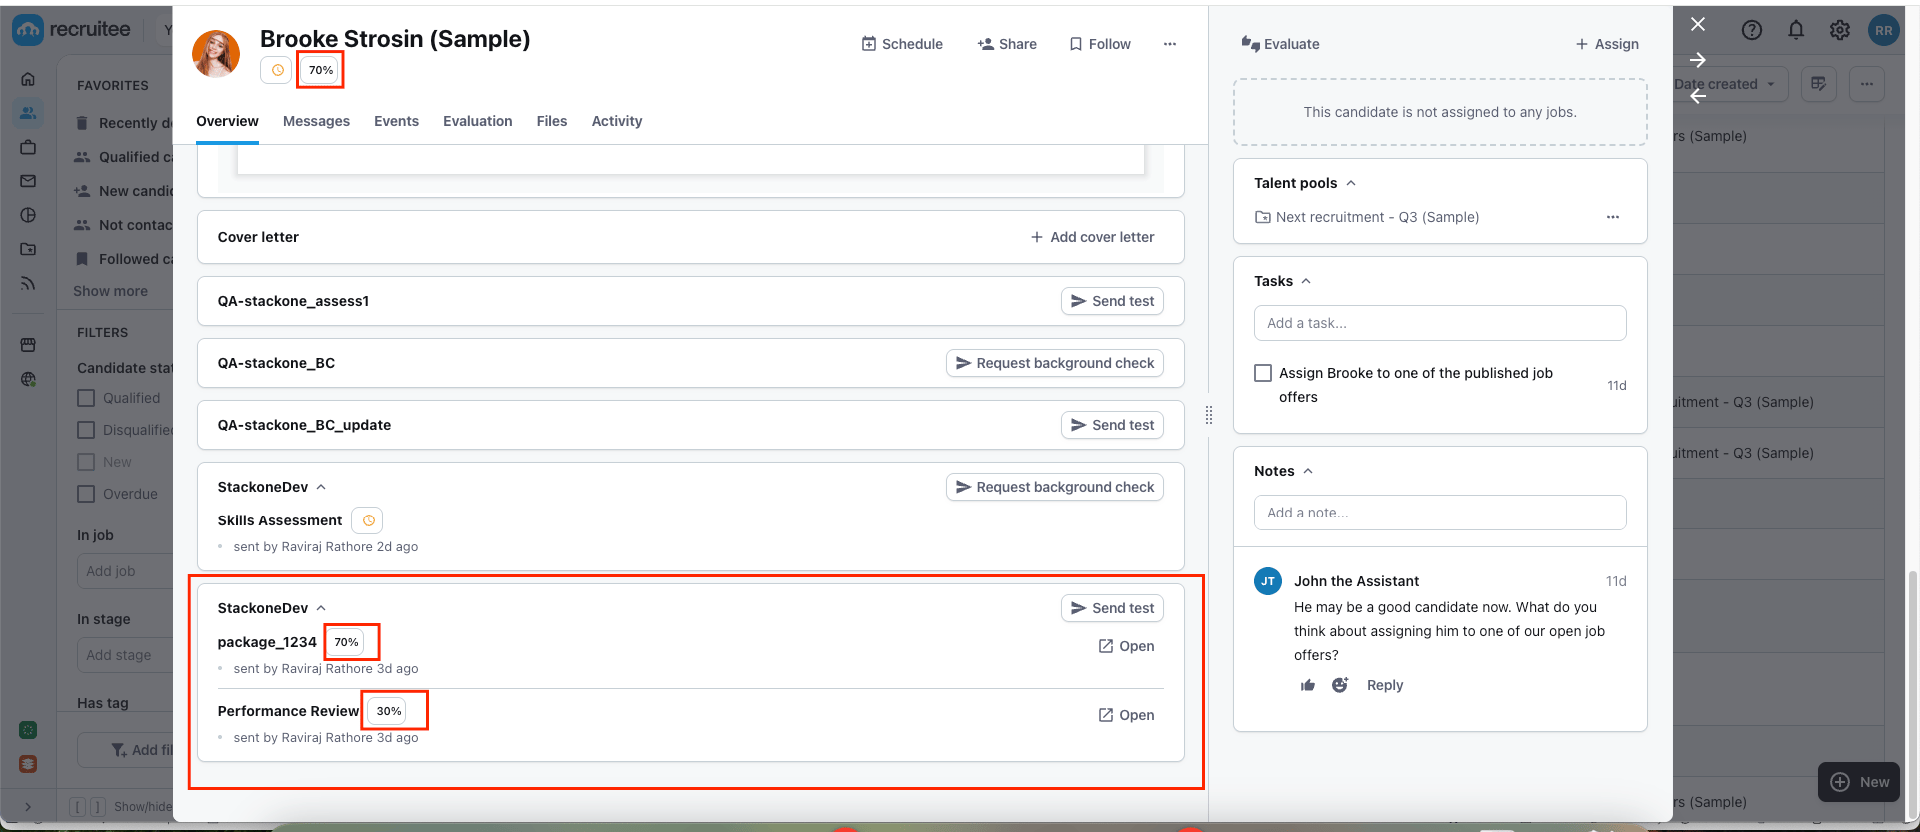
Testing Checklist
✅ Provider Setup:- Once the integration is approved/published by Recruitee, it is visible in the Recruitee Marketplace under Assessments or Background Checks categories.
- Selected
Public + Partner APIas the Authentication Type. - Package’s List Endpoint URL is correct.
- Package’s List Endpoint response is as expected according to the following endpoint’s response:
- Valid partner codename and other details, as mentioned here.
- Valid
External Trigger Tokento activate the partner integration. - Once activated, the integration will be available for selection under the candidate’s profile.
- Added a webhook for Recruitee and enabled it with the events such as:
Assessment OrderorBackground Check Order. - Valid webhook URL to receive assessment/background check notifications.
- Once activated, the integration will be available for selection under the candidate’s profile.
- If you have configured the Package’s List Endpoint URL, a list of packages is visible in the dropdown field when the user initiates sending the test to the candidate.
- If you have configured a Static Package ID, a single package is visible in the dropdown field when the user initiates sending the test to the candidate.
- Select a package, click
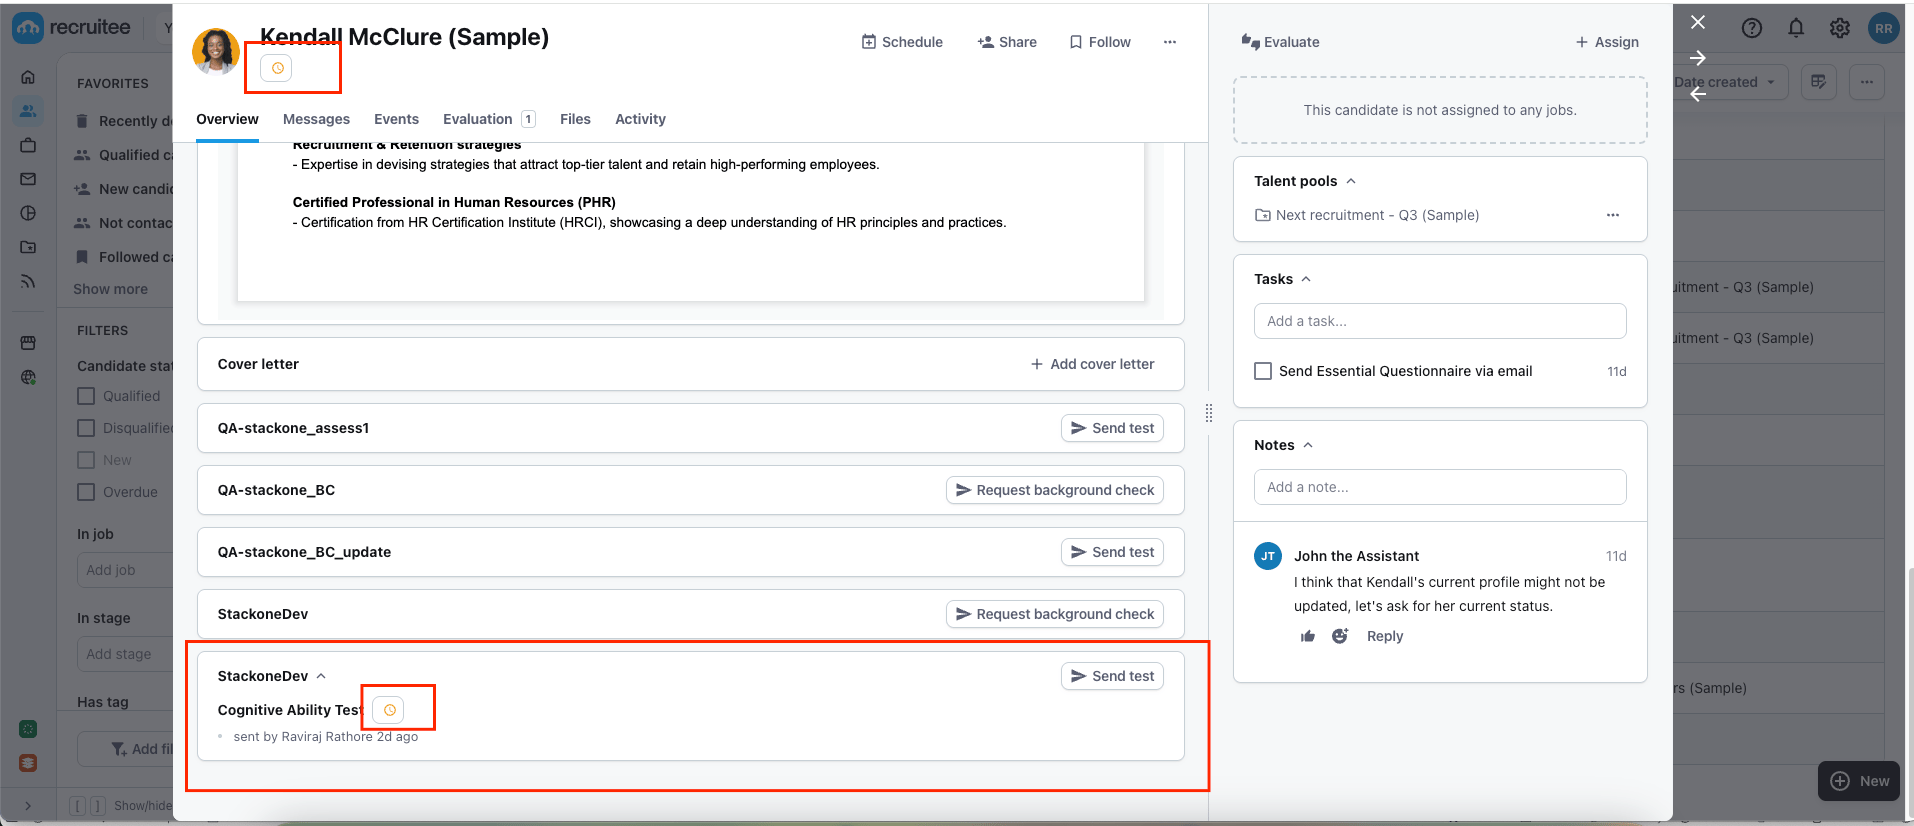
Send Test, and send the webhook. APendingicon as a status along with the assessment package name will appear if the notification has been sent.
- Success response from the update result endpoint.
- Updated result details to Recruitee’s UI.