

Overview
This guide explains how to configure custom options and fields, add background check packages in Eploy, and integrate with StackOne to receive background check notifications.Partner Requirements
Eploy integration partnership is required to proceed with this documentation. Visit Eploy Technology Partner Support to fill out the form and initiate the partnership process. One of the Eploy team members will reach out to you to discuss the partnership and integration process.Eploy Approach: Workflow-based Integrations
Eploy enables workflow-based integrations for recruitment, handling tasks like background checks. The process begins by regularly polling Eploy to identify applicants needing processing. Their data is then extracted to initiate the integration, which includes creating actions and marking exported applications. A typical Eploy workflow is structured as follows: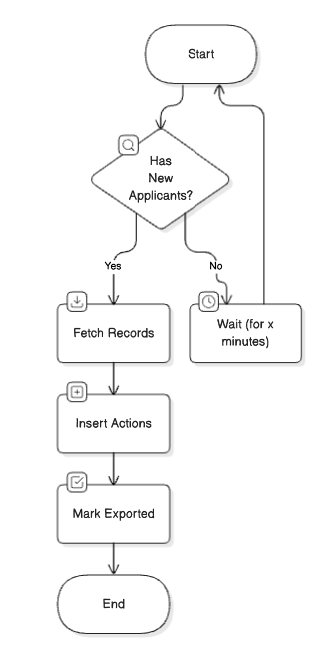
StackOne’s Unified Approach for Integration Partners
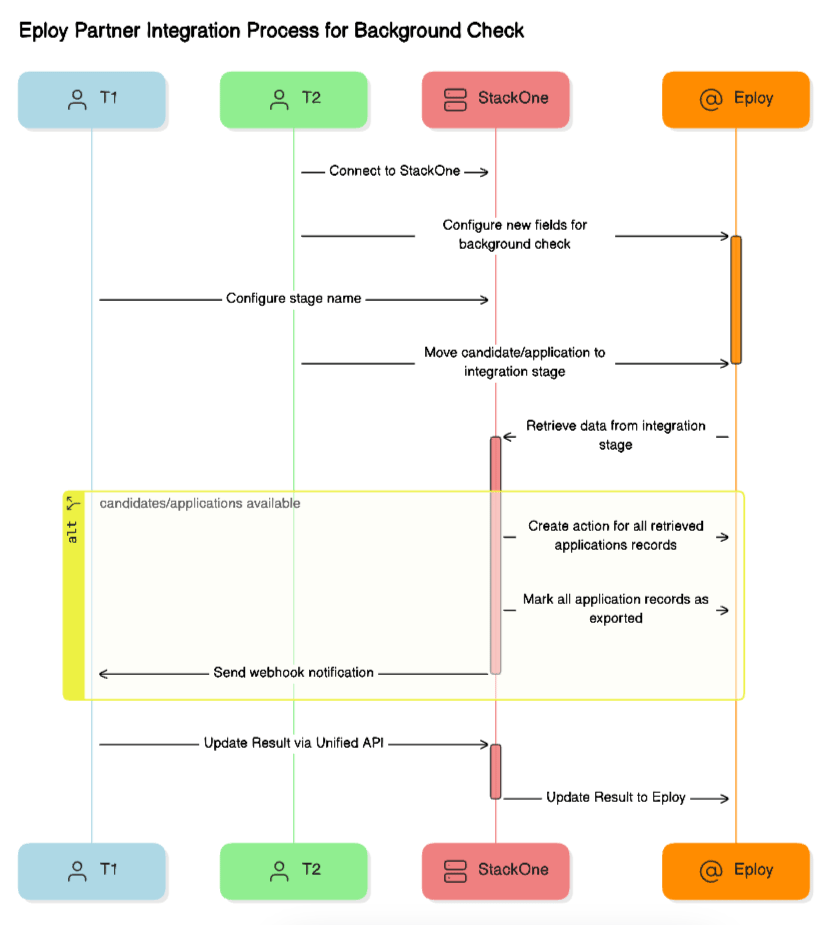
StackOne manages the Eploy-required polling internally. The interaction model for this integration follows our standard webhook-based Background Check pattern. Because Eploy requires polling, there can be a short delay between moving an application into the background check stage and the order being triggered.Note: Repeating the following step is required for each user that you want to connect with Eploy.To add your background check integration, please contact Eploy Technology Partner Support
Provider Side Setup
Once the Eploy partnership is established, your Eploy integration app will appear in the Eploy Marketplace. After it is enabled for testing, the integration app will be available as a stage option in the Stages dropdown when creating or editing Recruiting Workflows.Visit the ATS User Experience section to be ensure that the integration app is enabled and visible as a stage in a Recruiting Workflow.
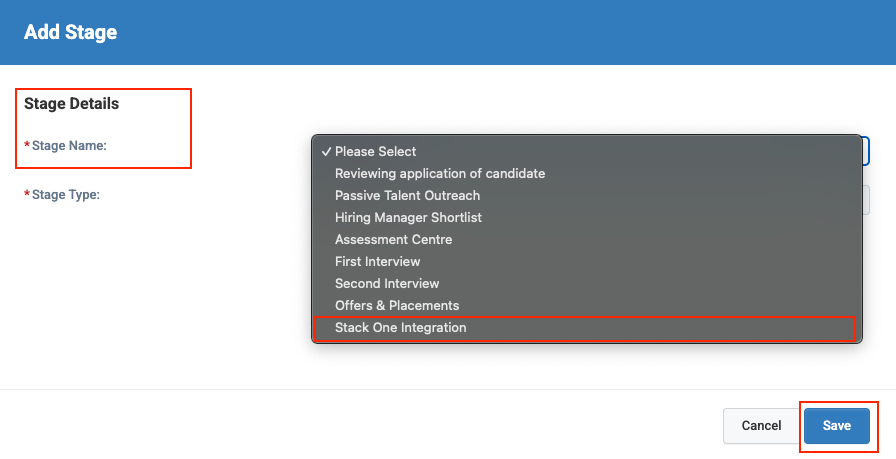
Users must contact you or Eploy to activate the integration partnership. Once activated, your app appears in the Stages dropdown when users create or edit Recruiting Workflows.
Add a custom option for background check packages
Navigate to the Custom Fields page by selecting Customise Fields from the Admin menu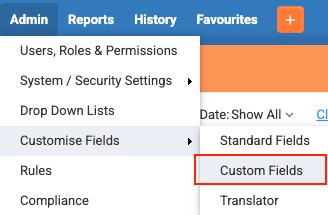
New button to create a new custom option in Eploy
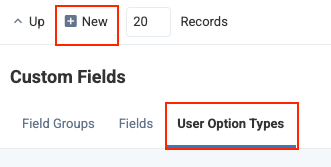
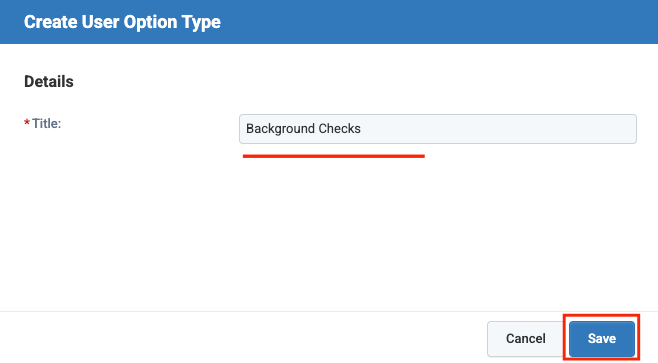
Background Checks and then click the Save button
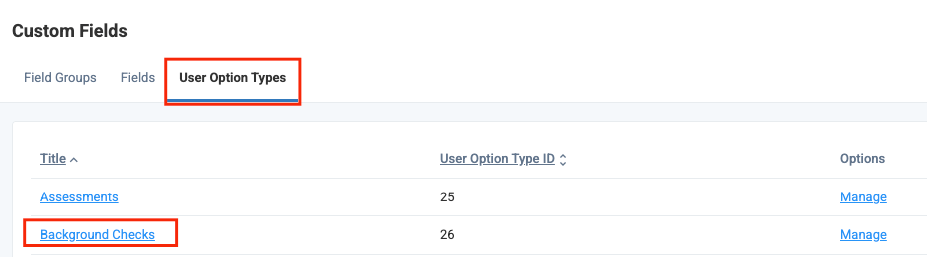
Background Checks option will be visible in the User Option Types grid
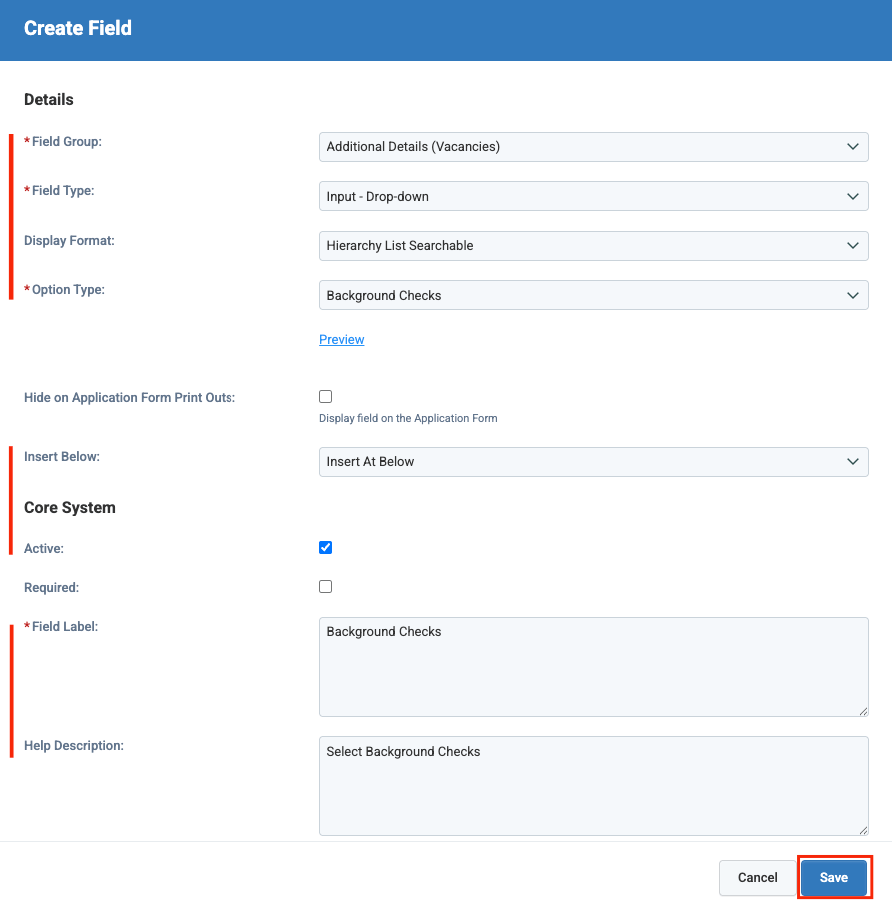
Add a custom field within the vacancy group
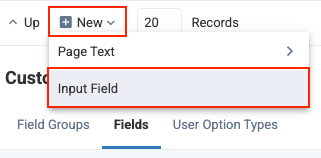
Navigate to the Custom Fields page by selecting Customise Fields from the Admin menuNew > Input Field button to create a new input field in Eploy
- Field Group: Select
Additional Details (Vacancies) - Field Type: Select
Input - Drop-down - Display Format: Select
Hierarchy List Searchable - Option Type: Select
Background Checks(as created in the previous step) - Insert Below: You can select any value here; it will determine where the field appears in the form
- Active: Ensure this field is marked as active
- Field Label: Select
Background Checks - Help Description: You may include any relevant description
Save button
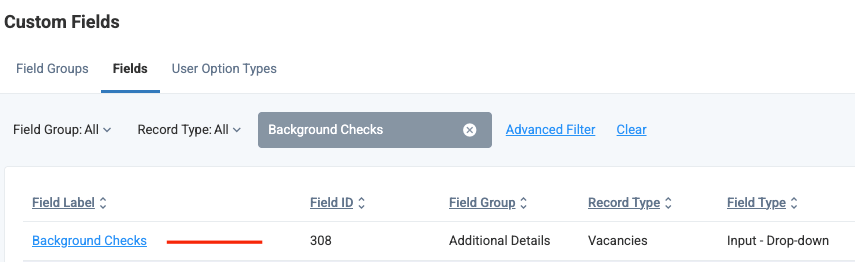
Background Checks field will be visible in the Fields grid
Add background check packages
You can use the Create Background Check Package unified endpoint to add background check packages, or follow the steps outlined below to add them manually.
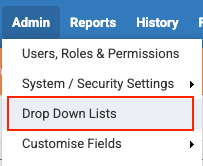
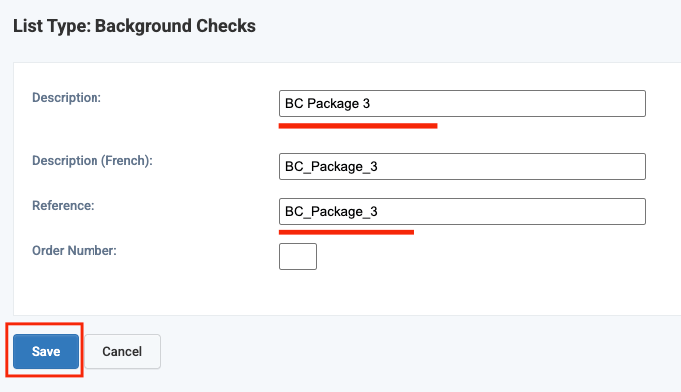
Background Checks and click the New button to create a new package in Eploy

- Description: This will be the label displayed in the dropdown list.
- Reference: This can be any string and will not appear in the dropdown list.
Save button.
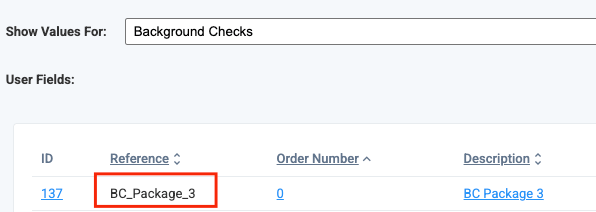
Configure the background check package for the vacancy
Users will need to select the background check package for each vacancy to associate the relevant background check.
Visit the ATS User Experience section to see how to create a vacancy in a workflow that includes the background check integration stage.
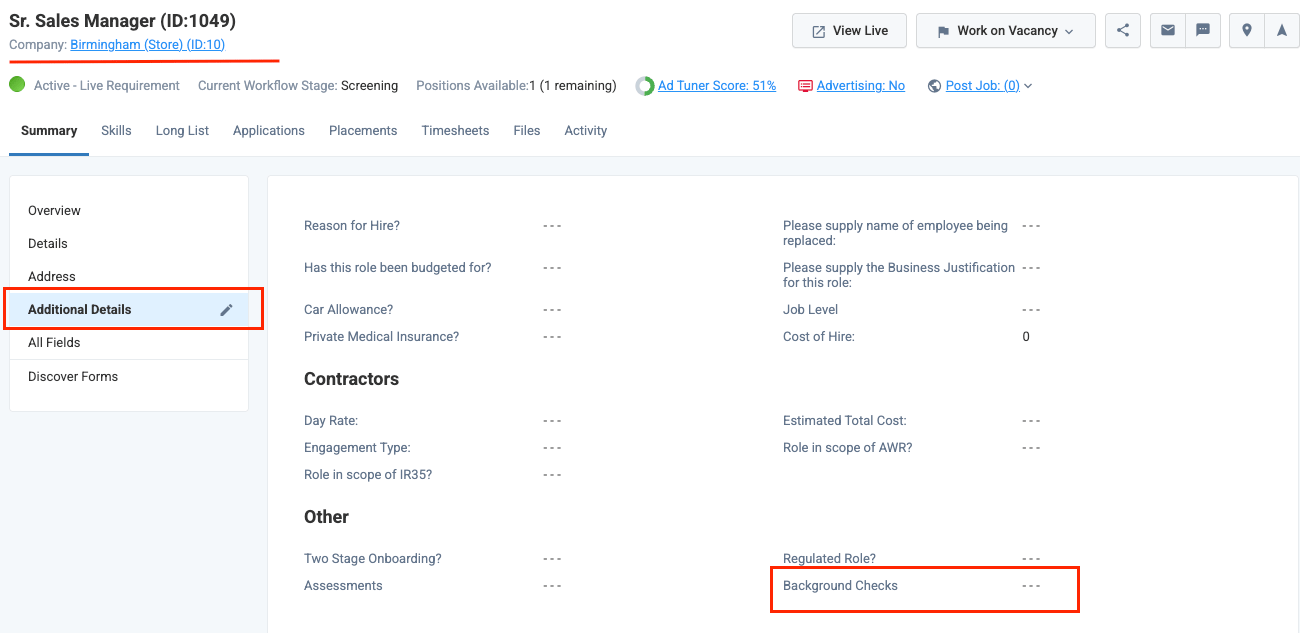
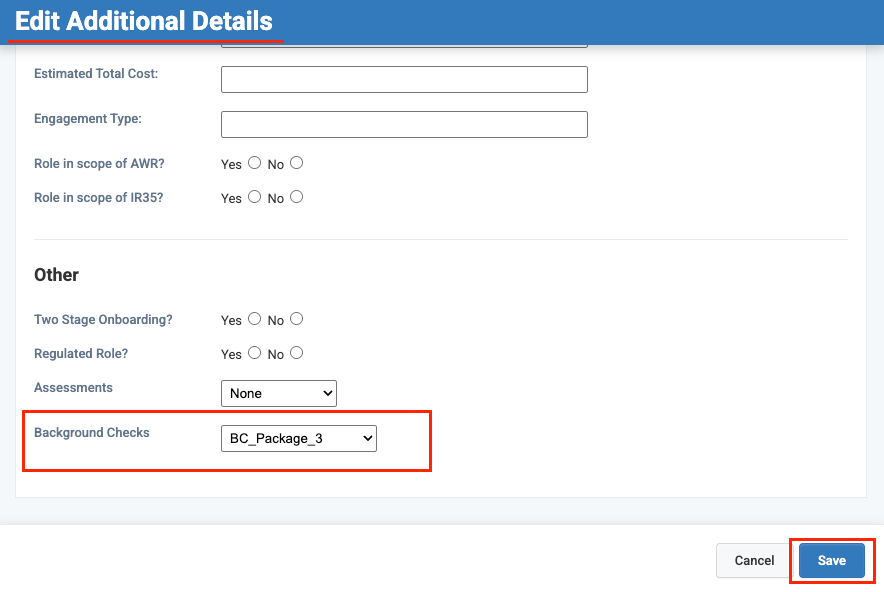
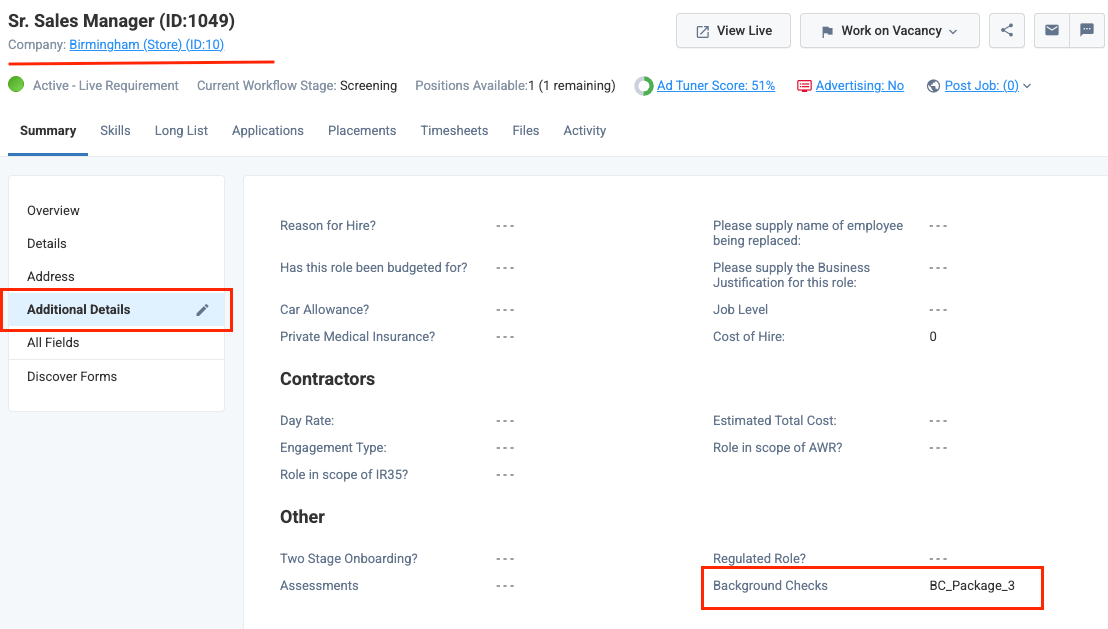
StackOne Configuration
1
Navigate to enable Eploy in StackOne
Go to the ATS category on the Integrations page and find Eploy.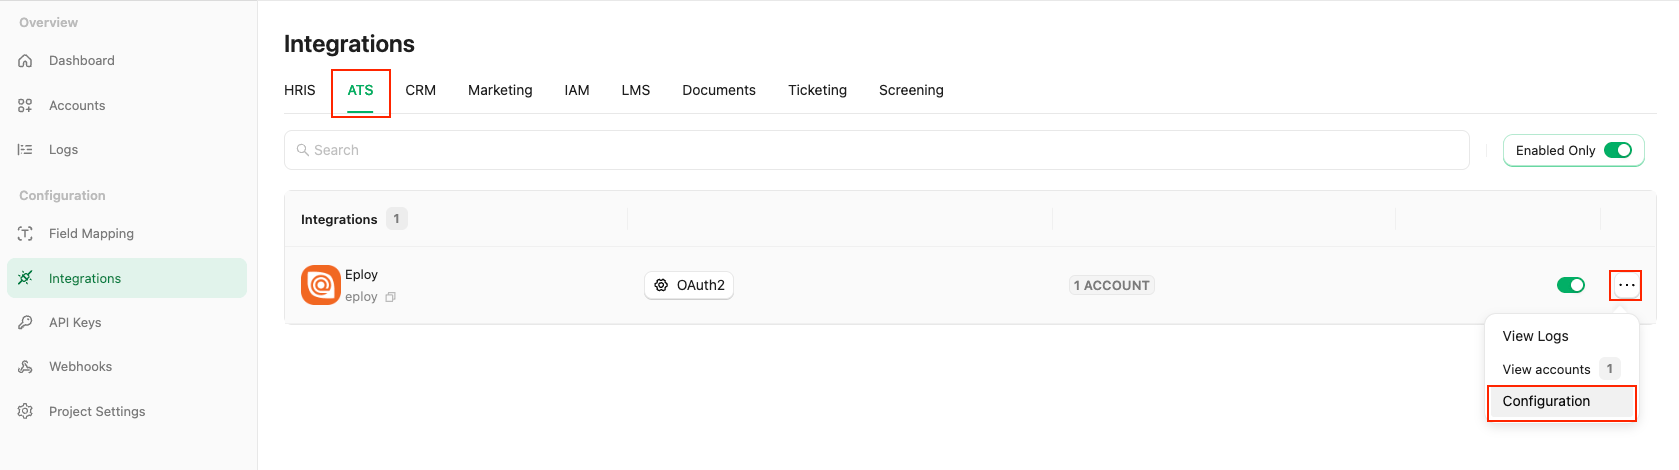
2
Configure Eploy in StackOne
Fill out the necessary fields in the Eploy - Configuration modal: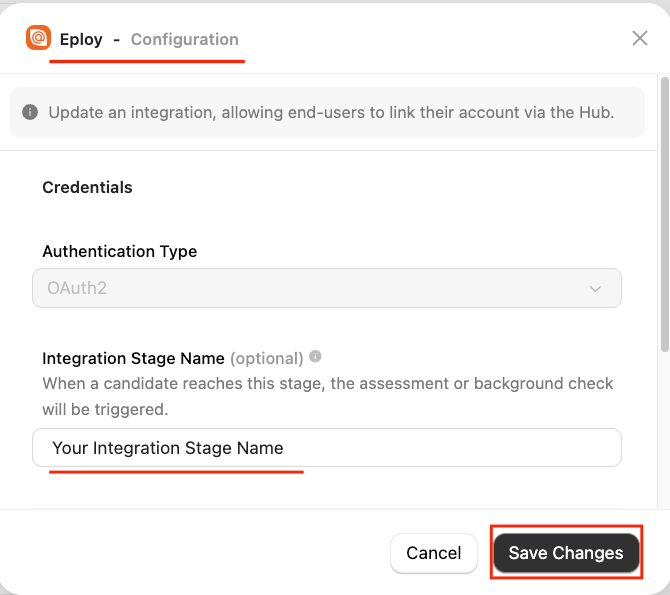
- Authentication Type: Select
OAuth2. - Integration Stage Name: Enter the stage name exactly as your integration app’s stage name in Eploy to trigger the Background Check.
Confirm or Save Changes to enable your OAuth APIs, which allows end-users to link their accounts via the Hub.3
Add a Webhook
Navigate to the Webhooks page, click 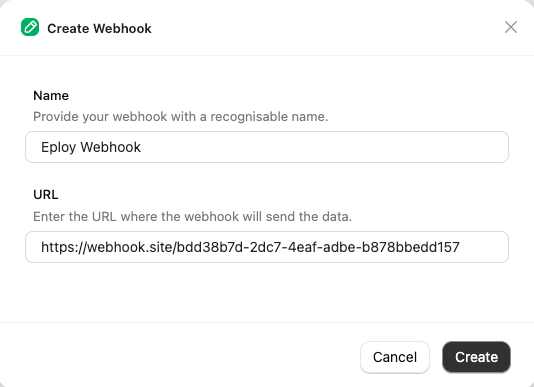
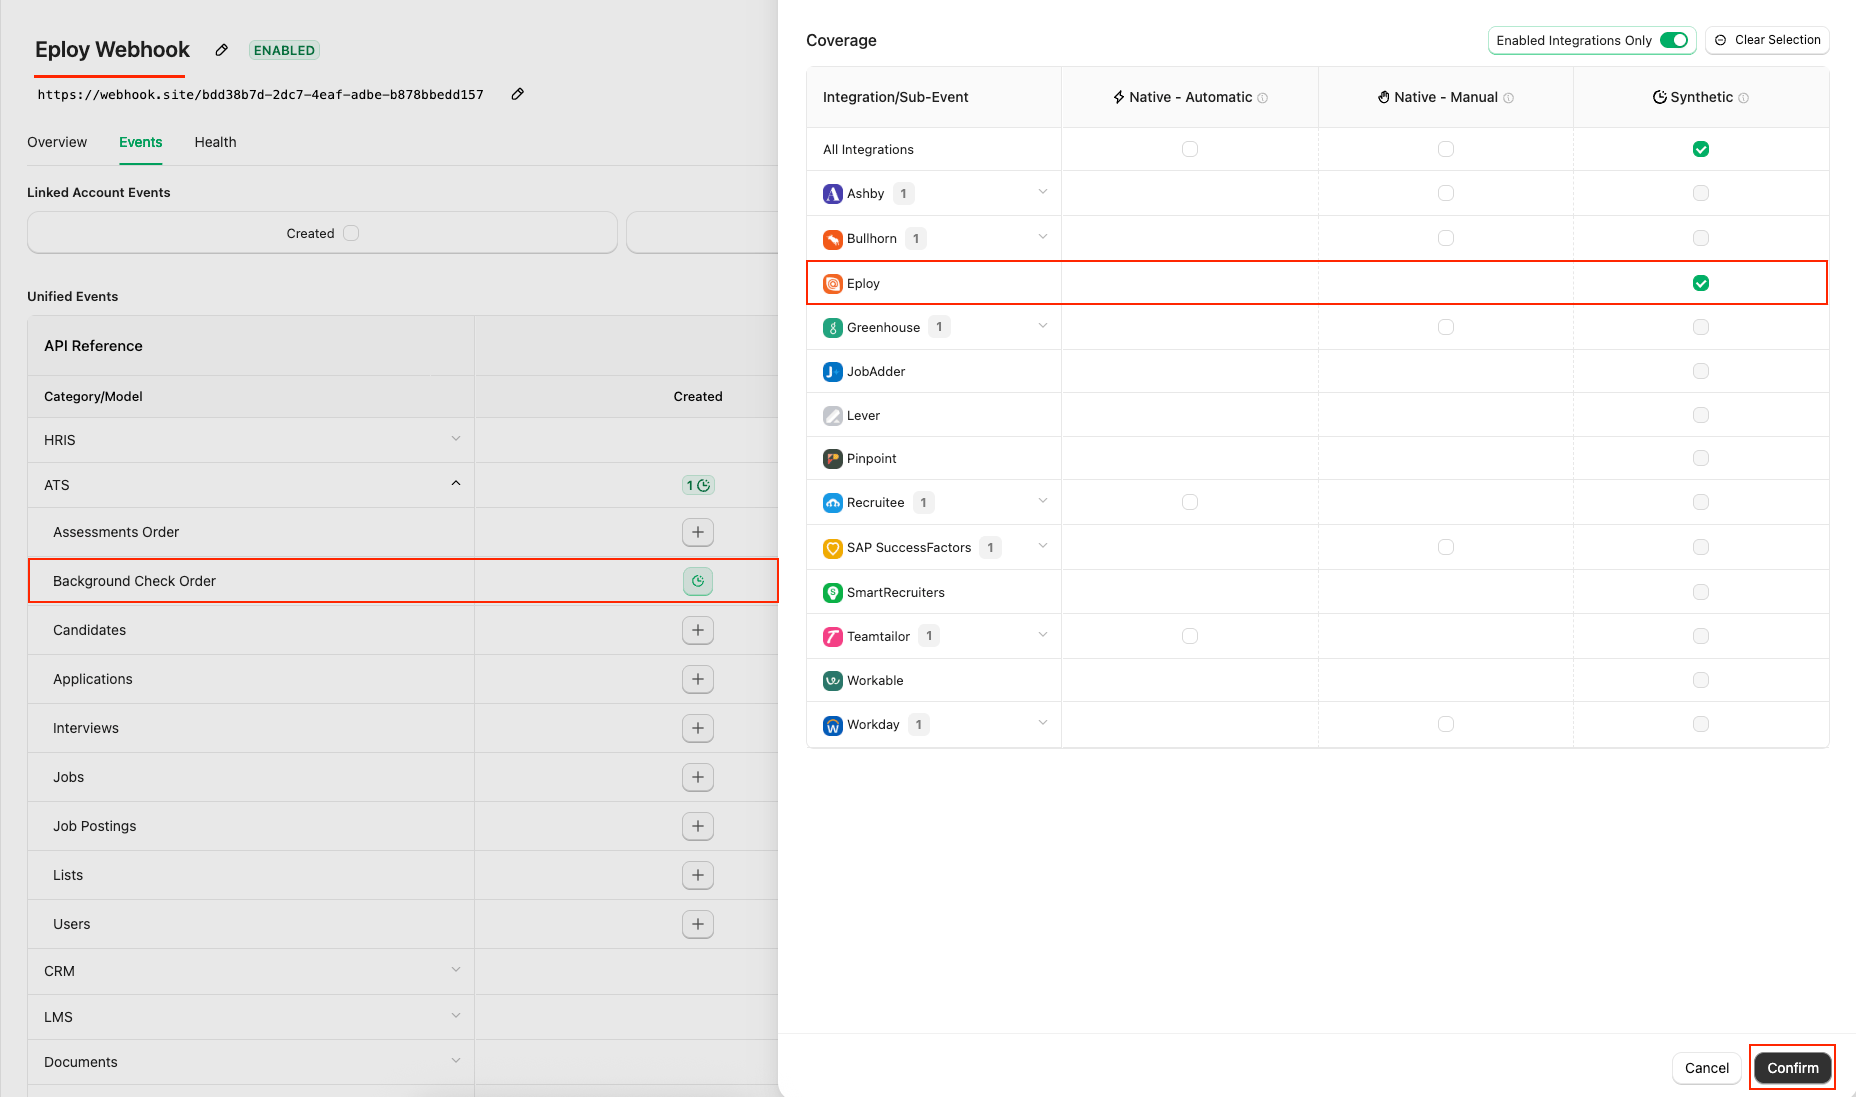
Add webhook, and fill out the form:- Name: A recognisable name for the webhook.
- URL: The endpoint that will receive notifications for enabled events.
Events tab for Background Check, such as Background Check Order.Confirm and then Save to add the webhook.ATS User Enablement
To enable the Eploy Technology Partner app and make it available as a stage within a Recruitment Workflow, go to the Eploy Marketplace.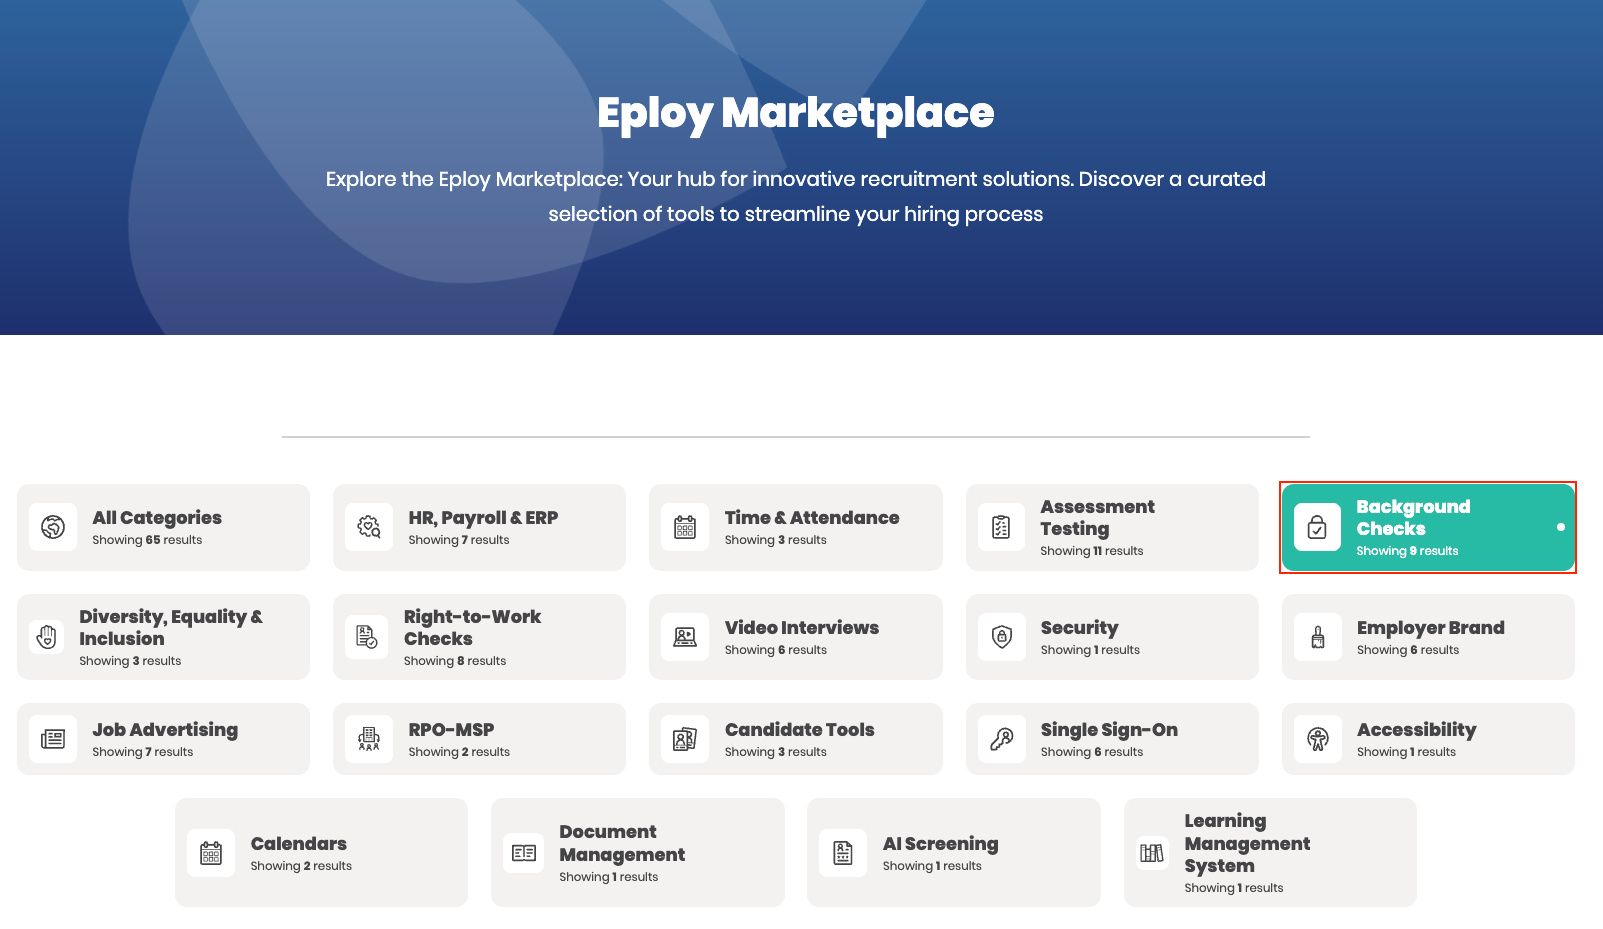
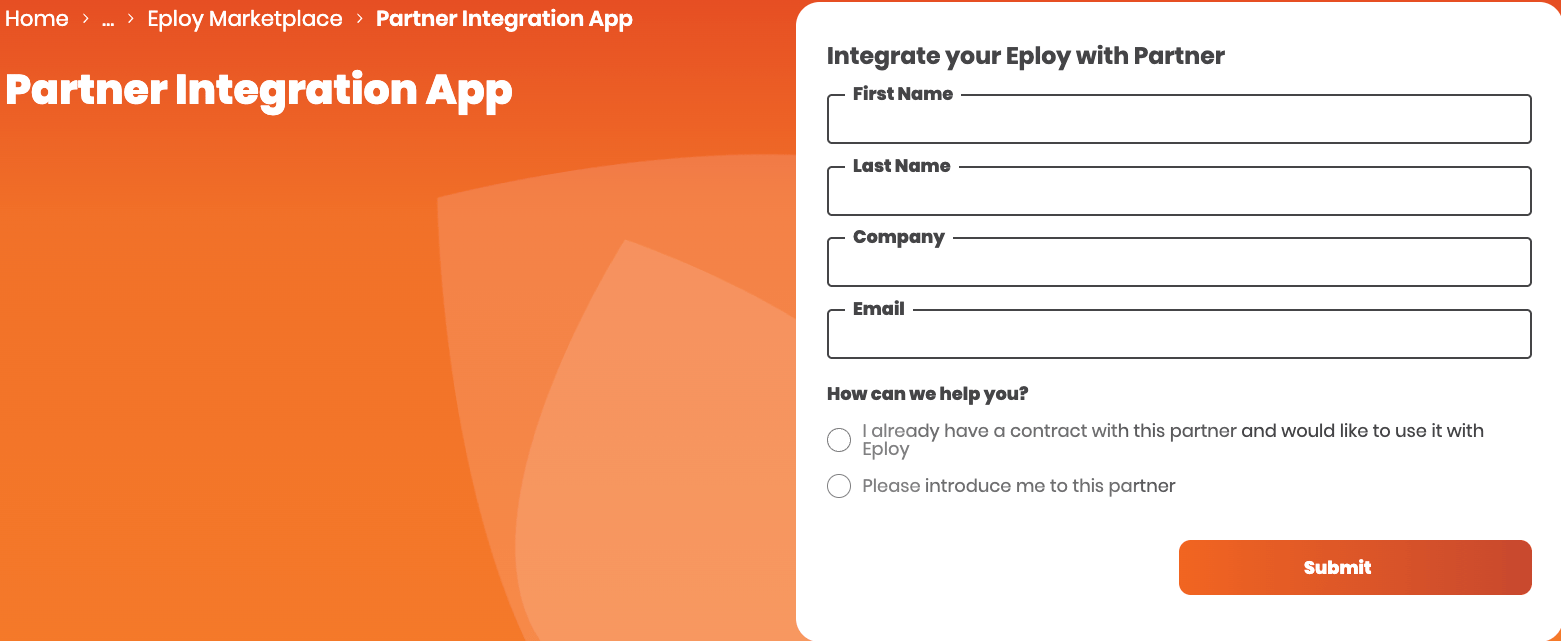
Visit the ATS User Experience section to verify if the partner’s integration app is enabled and visible in the Stages dropdown.
ATS User Experience
Add a Recruitment Workflow
Navigate to the Recruitment Workflow page from the Admin menu.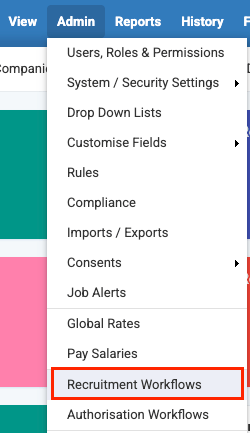
+ New button to create a new workflow.
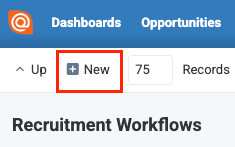
Save.
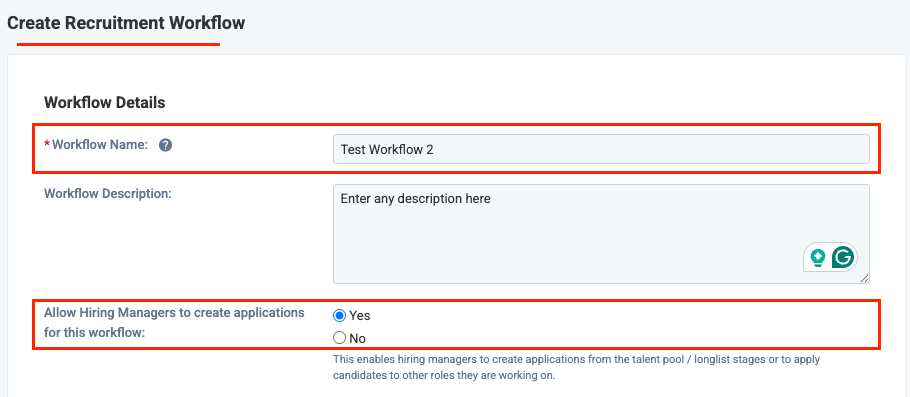
Add button to add stages in the workflow.
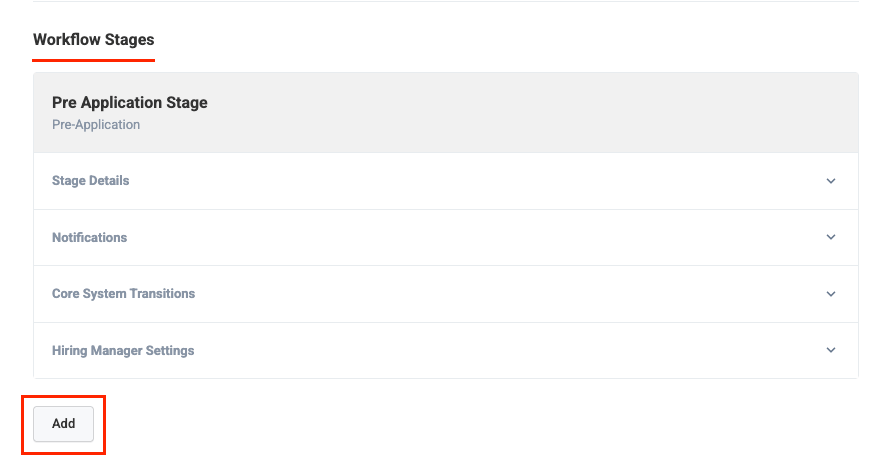
- Stage Name: Select the partner’s integration app name.
- Stage Type: Select
Actions. - Action Type: Select the partner’s integration app name.
Save to add this stage to the workflow.
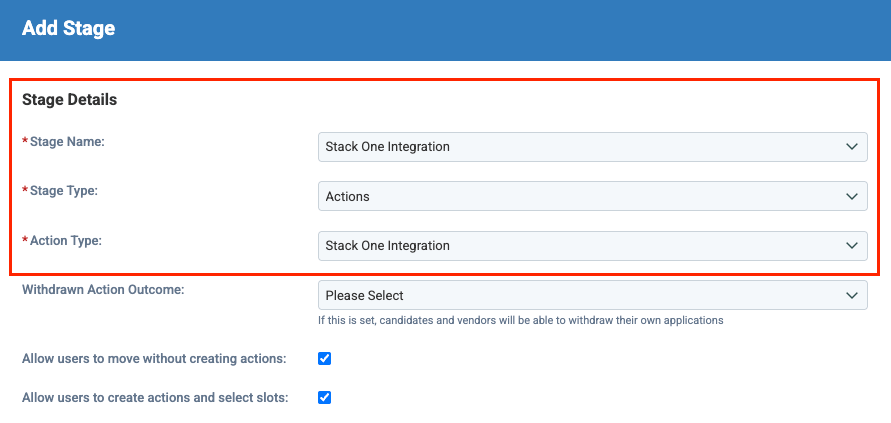
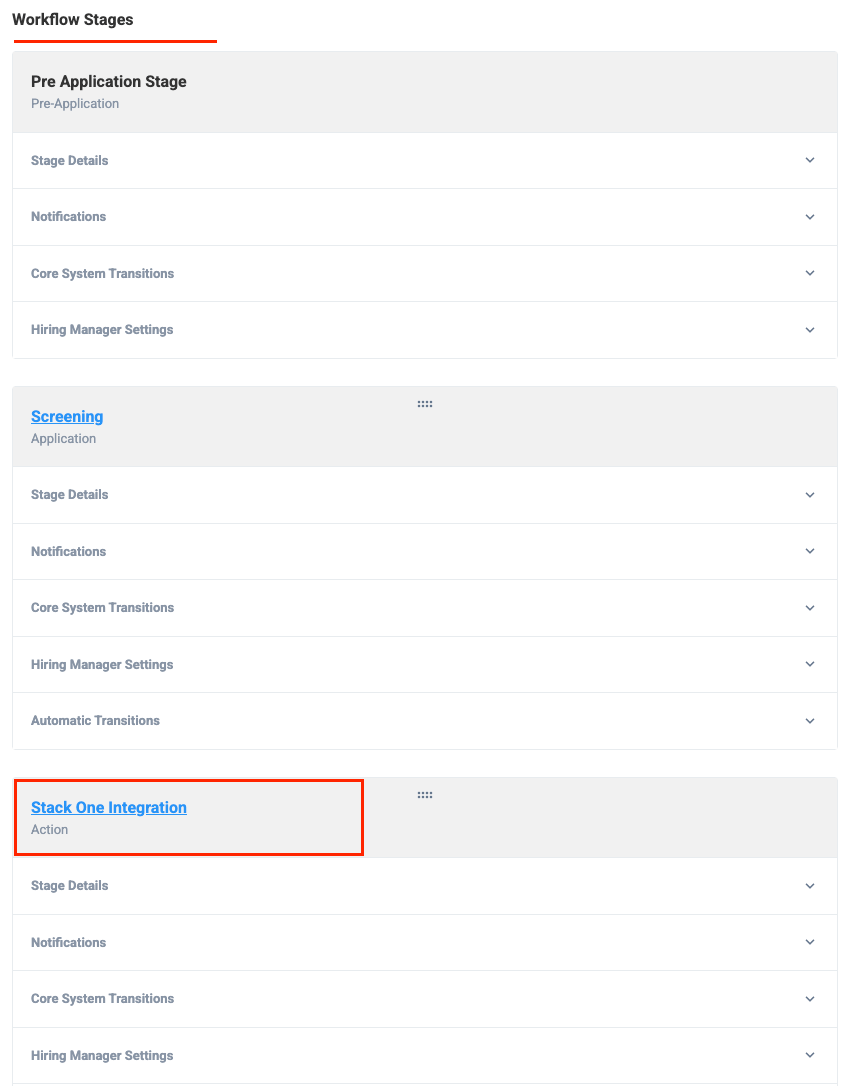
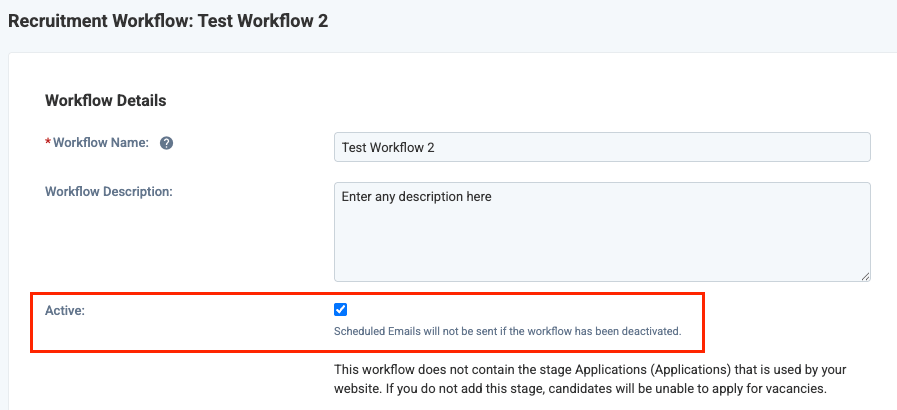
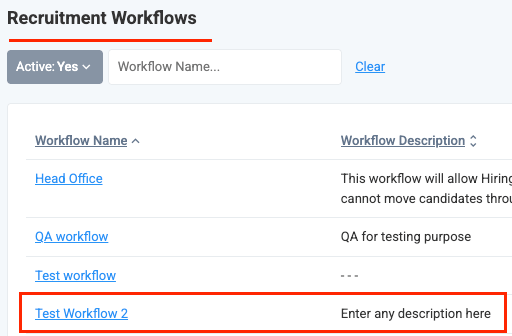
Active to be visible when creating a vacancy.
Create a Vacancy in the Workflow
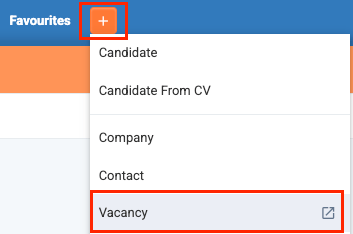
Navigate to the Vacancy page via+ button in the top menu.
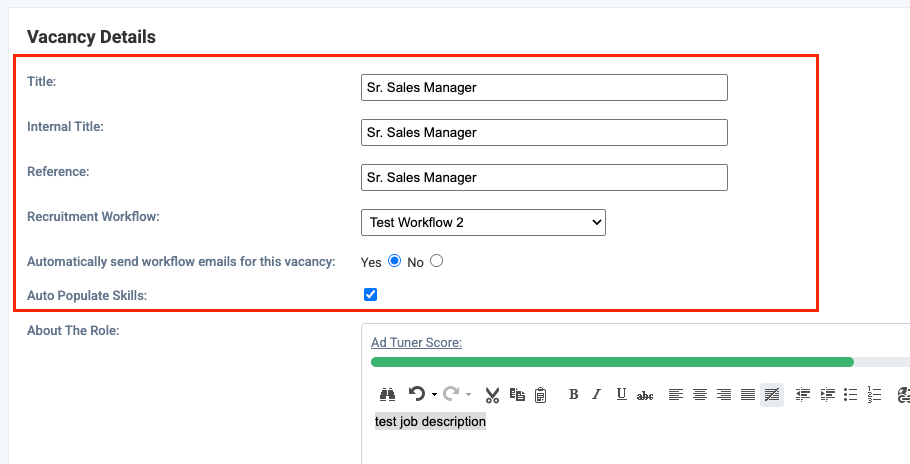
Save.
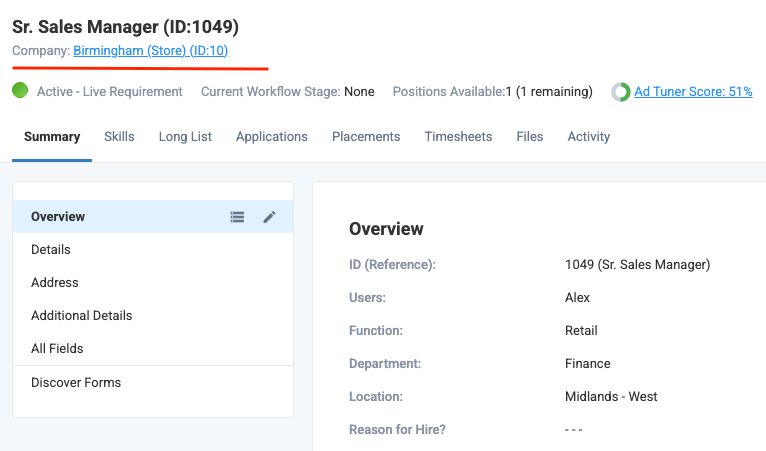
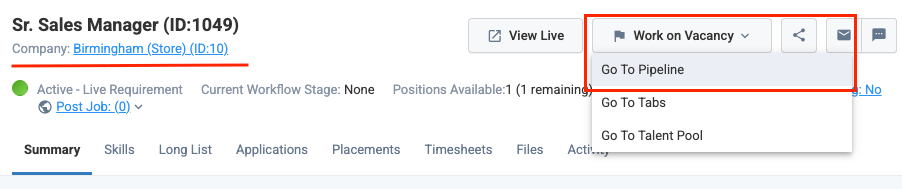
Work on Vacancy > Go to Pipeline.

Select a Background Check package to associate with the vacancy
Navigate to the Additional Details page of the vacancy to select and associate the background check package.Background Checks dropdown, and Save the changes.
Create a Candidate and add as an applicant to the vacancy
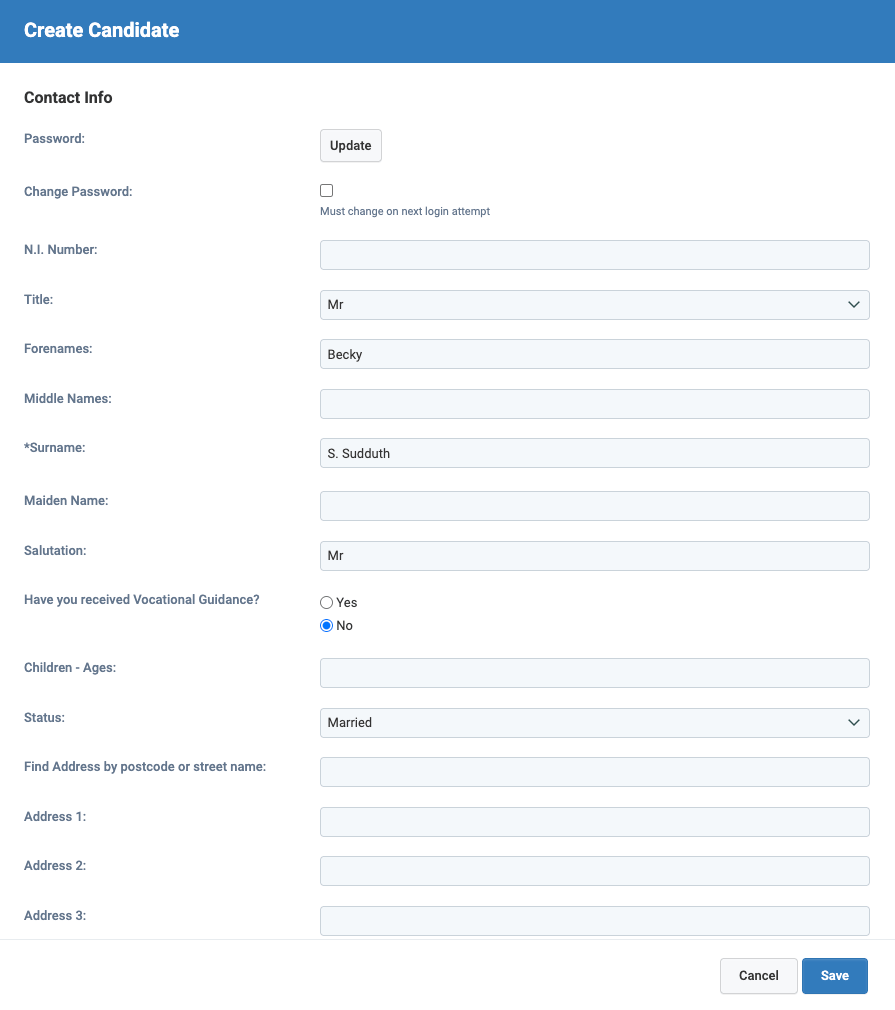
Navigate to the Candidate page via+ button in the top menu.
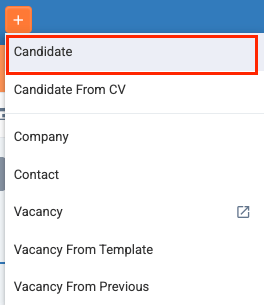
Save.
Application under the + button menu.
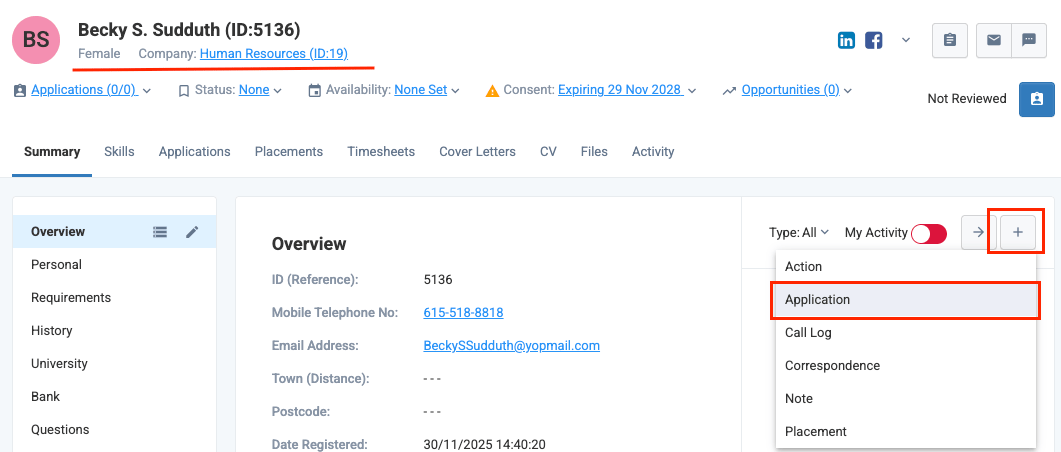
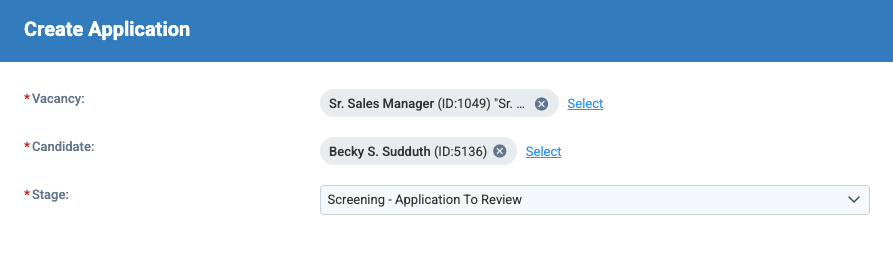
Save to add the candidate as an applicant to the vacancy.
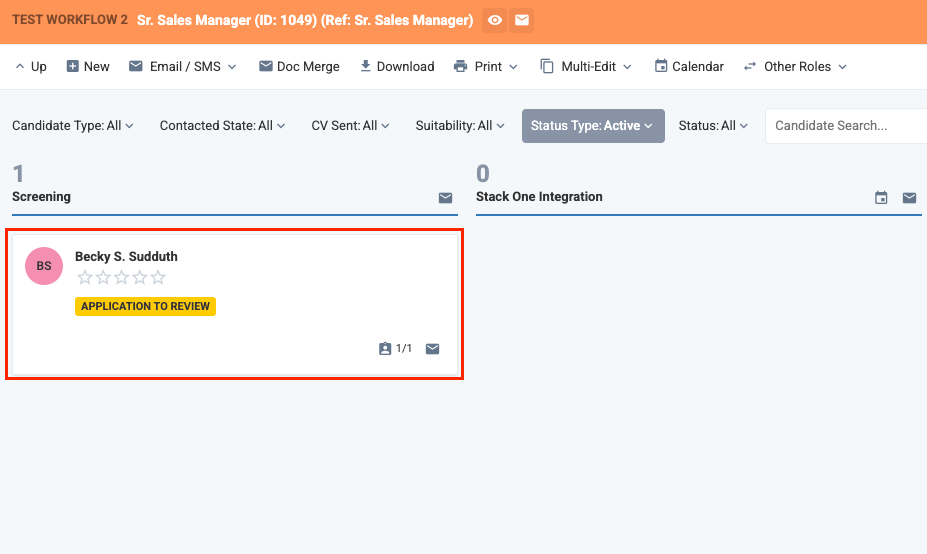
Because Eploy requires polling, there can be a short delay between moving an application into the background check stage and the order being triggered.
Send test to the candidate
Test your integration with StackOne using your Eploy Sandbox
User will see after test has been sent
When a user sends the background check test to a candidate, a success message is shown on the candidate’s application.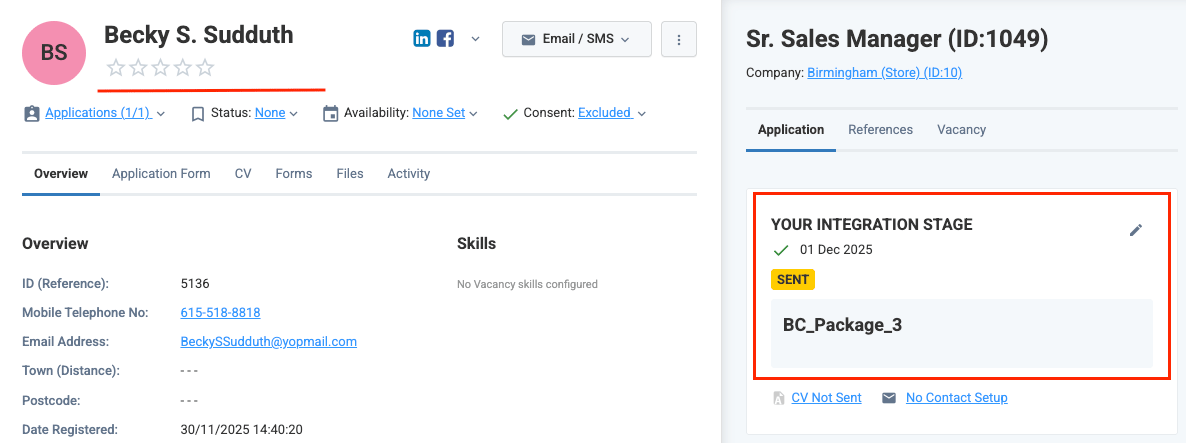
ATS User Experience Customization
1
Update the result via Unified API
Use the following endpoint to update the results:Use the following endpoint to get metadata needed to update the background check result:
- Connector Meta Information with the provider key
eployfor modelbackground_checks/results.update
2
How will the results of the background check be displayed to the user in Eploy?
When a user opens a candidate application, the updated results are visible.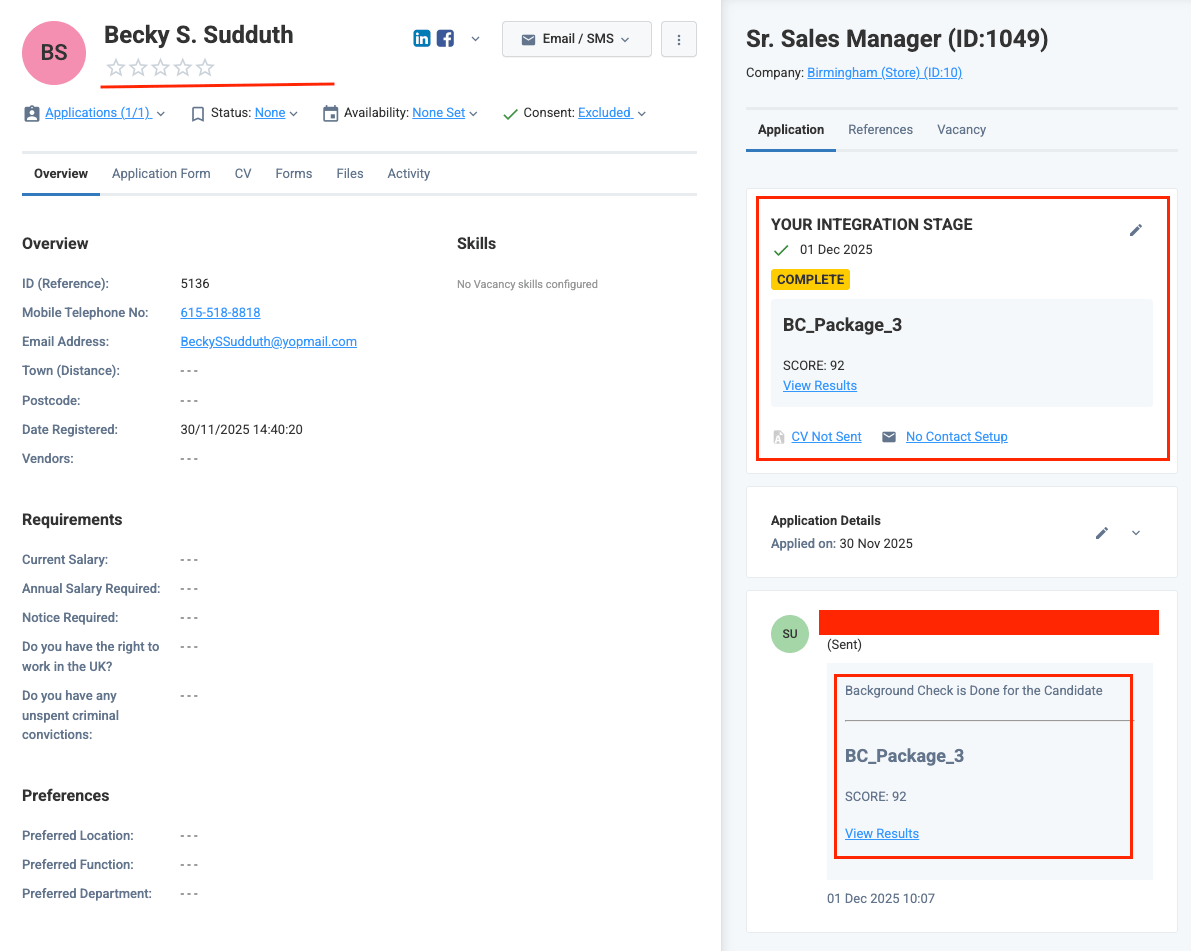
Testing Checklist
✅ Provider Setup:- Ensure the Eploy Partner Integration app is enabled for your Eploy Sandbox account.
- Add the
Background Checkscustom option in User Option Types. See this step. - Add a custom input field for the vacancy group; it appears under Additional Details. See this step.
- Add background check packages; they appear in the custom field dropdown. See this step.
- Associate a background check package with the vacancy. See this step.
- Enter a valid
Integration Stage Namethat exactly matches your integration app’s stage name in Eploy.
- The partner app is enabled by Eploy and visible in the Stages dropdown to add within a workflow.
- The user associates the background check package for the vacancy.
- Add a webhook for Eploy with a valid URL and enable expected Background Check events, such as
Background Check Order.
- Go to Vacancy > Additional Details and select a background check package to associate with the vacancy.
- The integration stage is visible when the vacancy is created in a workflow that includes the background check stage.
- The user can move the application to the integration stage.
- The user can see the sent test details in the candidate’s application.
- Receive a success response from the update result endpoint.
- Updated result details appear in Eploy’s UI.