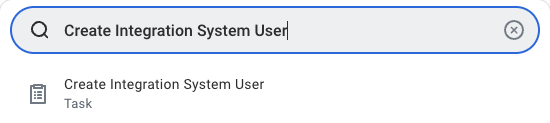
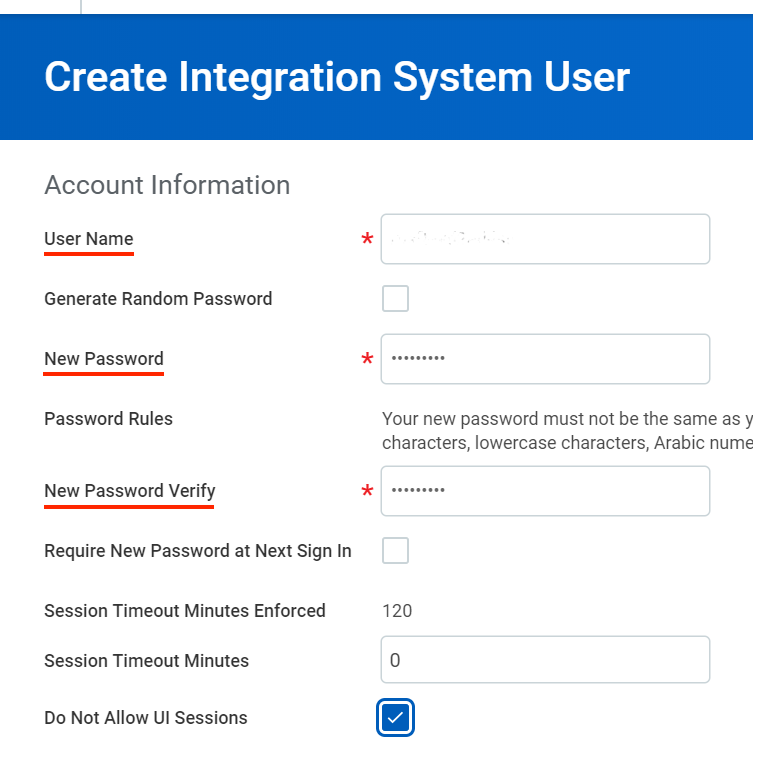
Set Up an Integration System User (Optional)
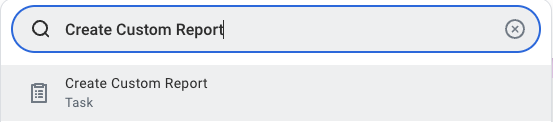
Create and View a Custom Report (Optional)
Configure custom report
Follow the steps below to configure the custom report: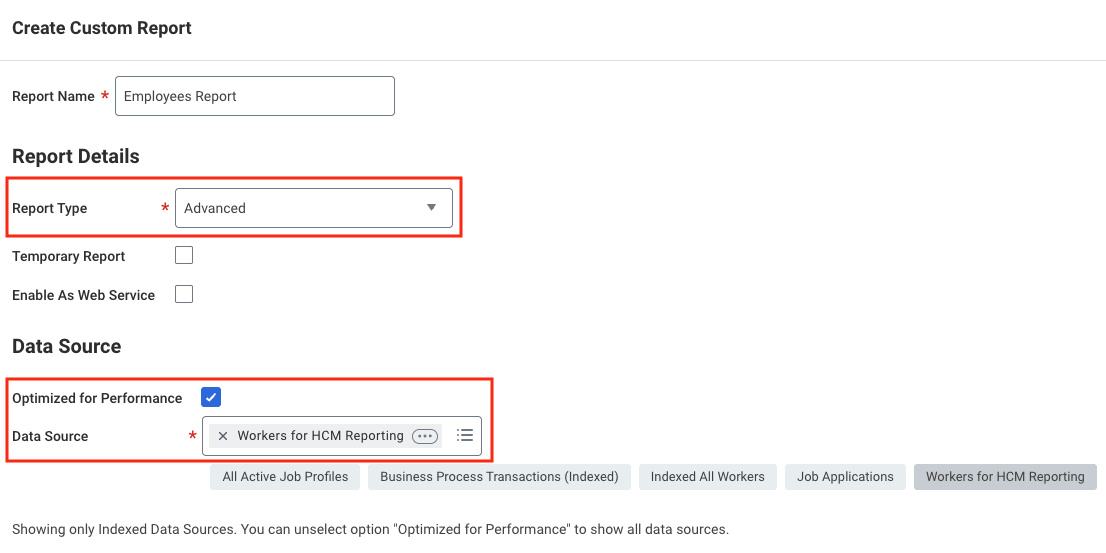
- Report Name: Must be unique within the tenant
- Report Type: Select Advanced
- Optimised for Performance: Tick this box to enhance performance
- Data Source: Choose the appropriate data source based on the data you need (e.g. Workers for HCM reporting).
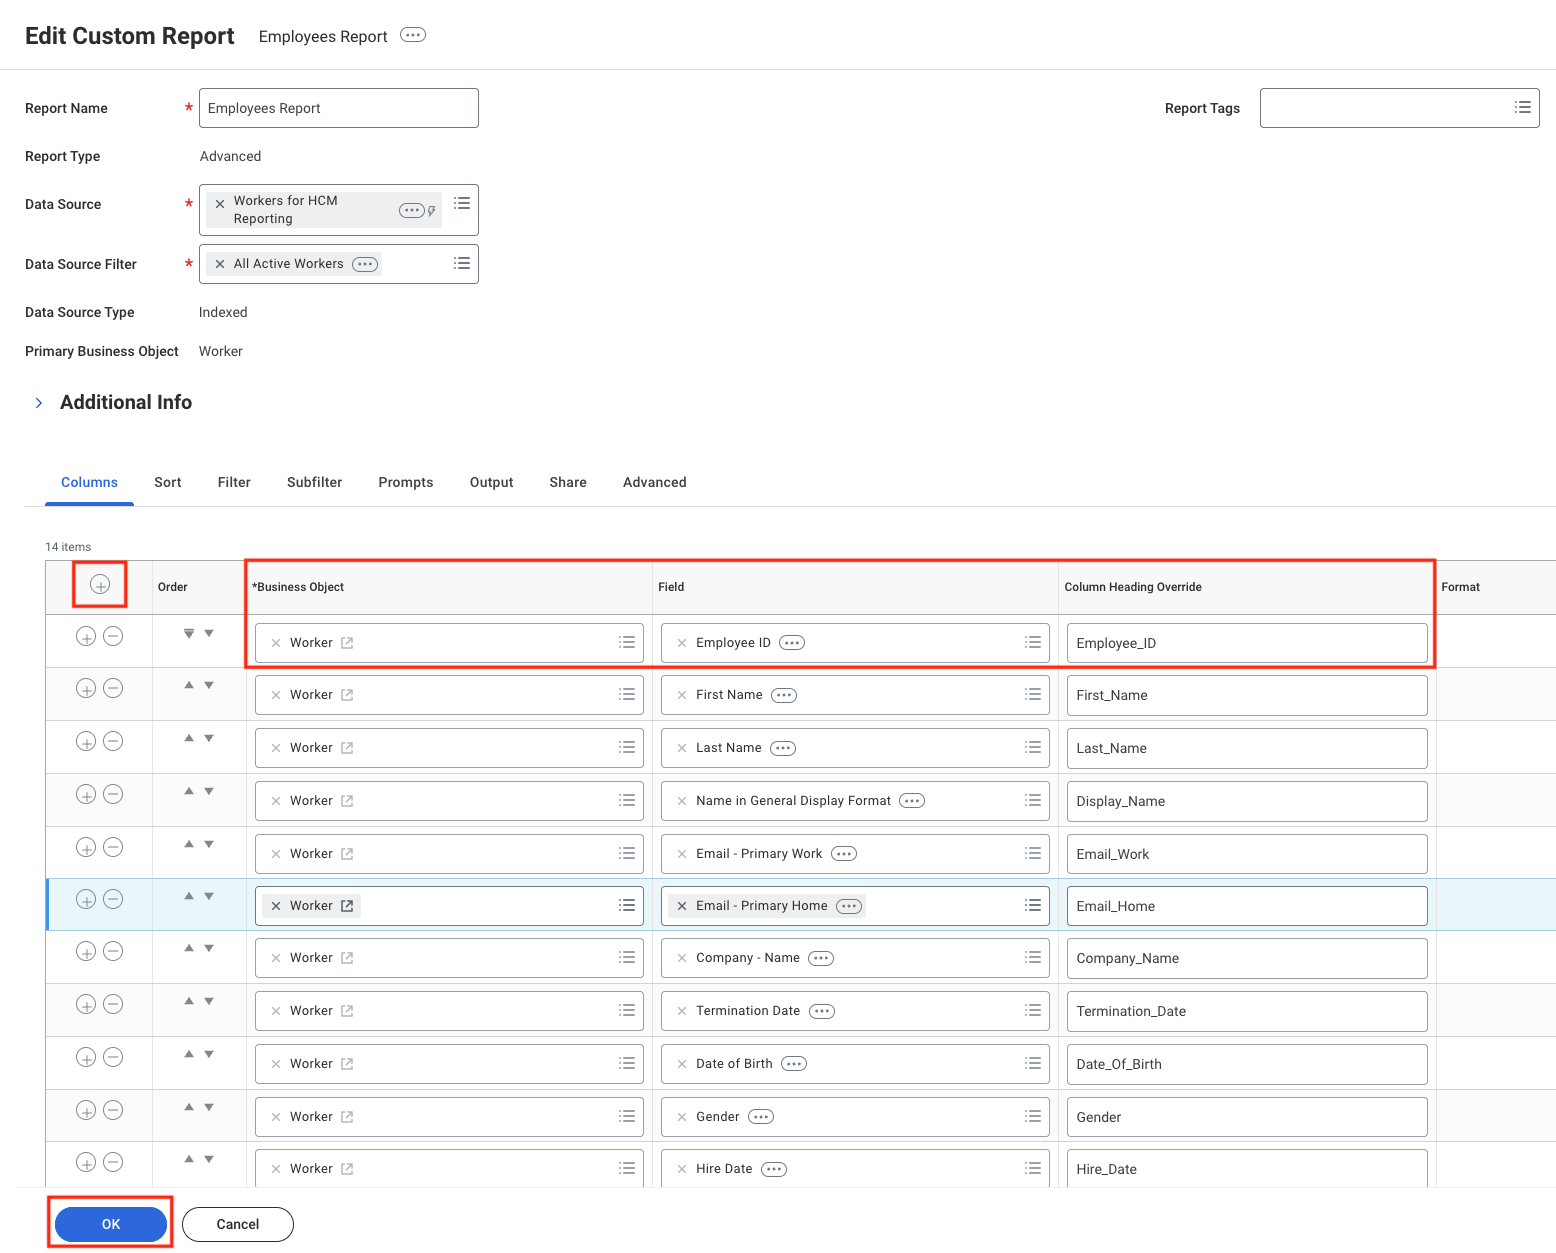
OK to continue.Add and configure report fields:- Click the
+icon to add a field. - Select a Business Object (e.g. Worker) in the Business Object column.
- Choose the specific field (e.g. Employee ID) in the Field column.
- Set aliases in Column Heading Override and Column Heading Override XML Alias to ensure stable field names in API responses.
For employee data, you can include the following fields:
- Employee_ID
- First_Name
- Last_Name
- Display_Name
- Email_Work
- Email_Home
- Phone_Work
- Phone_Home
- Job_Title
- Hire_Date
- Gender
- Date_Of_Birth
- Termination_Date
- Company_Name
Configure report filters (Optional)
Add filters to narrow the result data set (e.g. Supervisory Organisation – Primary Position).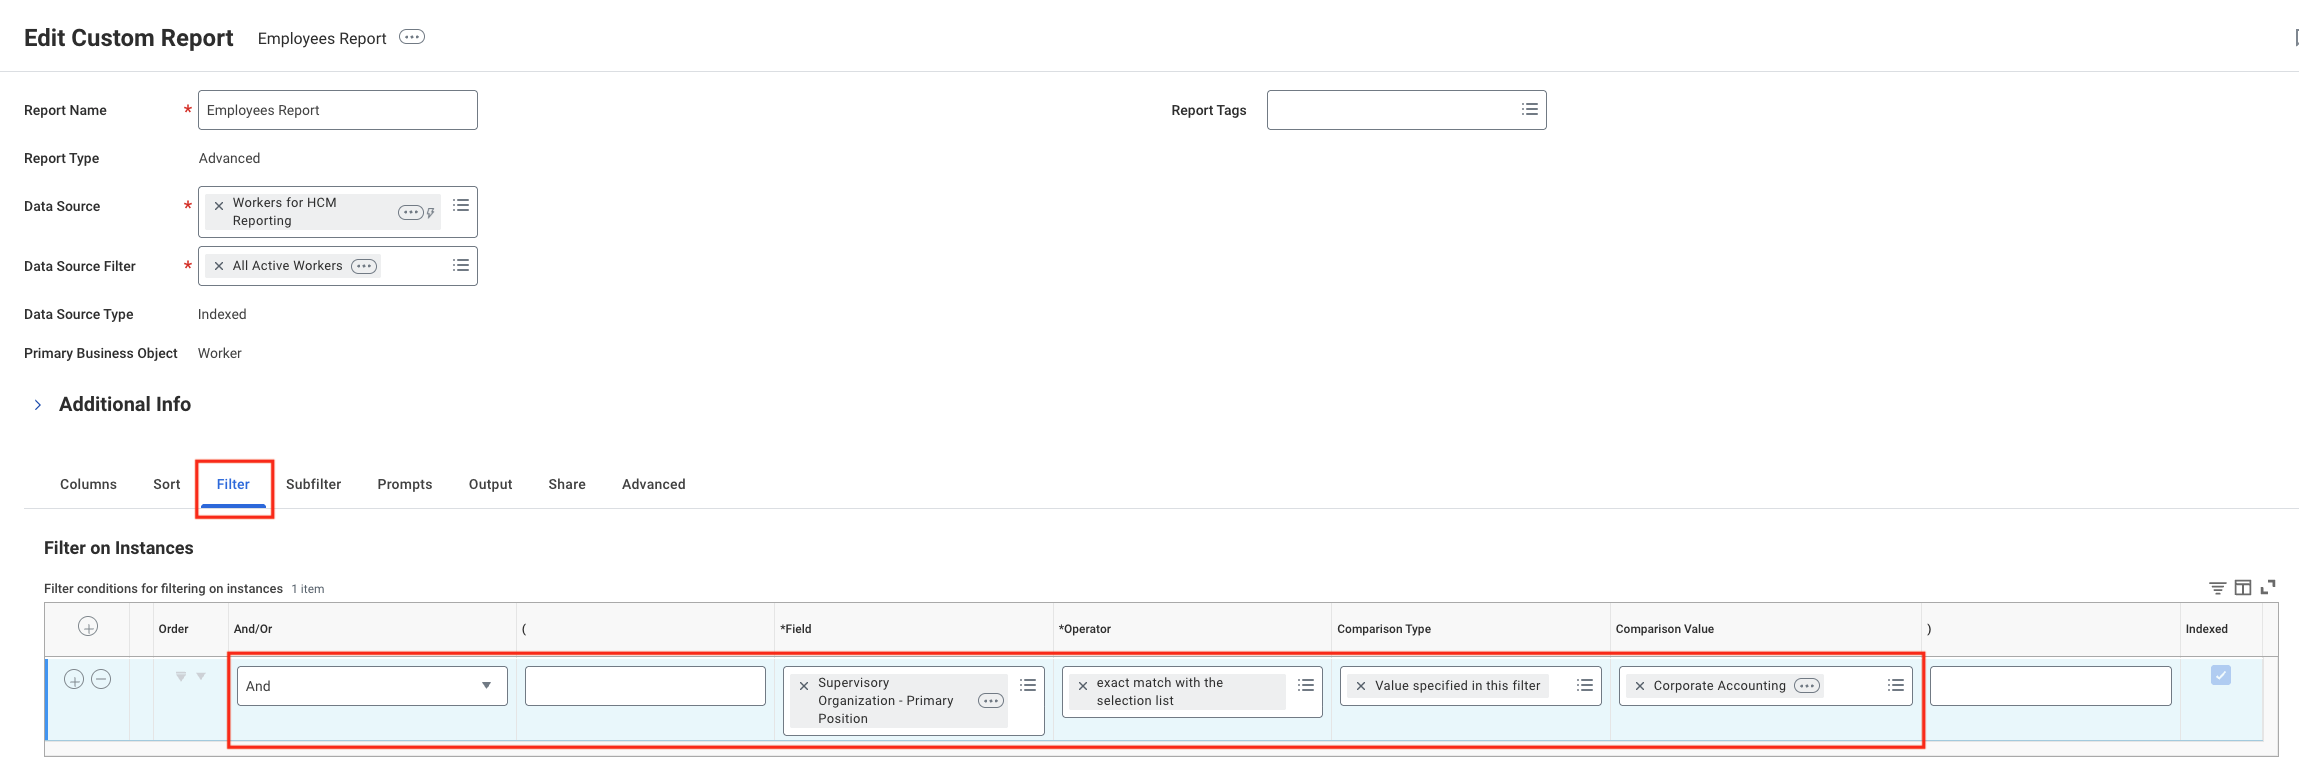
Configure report prompts
Enable prompt display by ticking Display Prompt Values in Subtitle. Leave other settings at their defaults.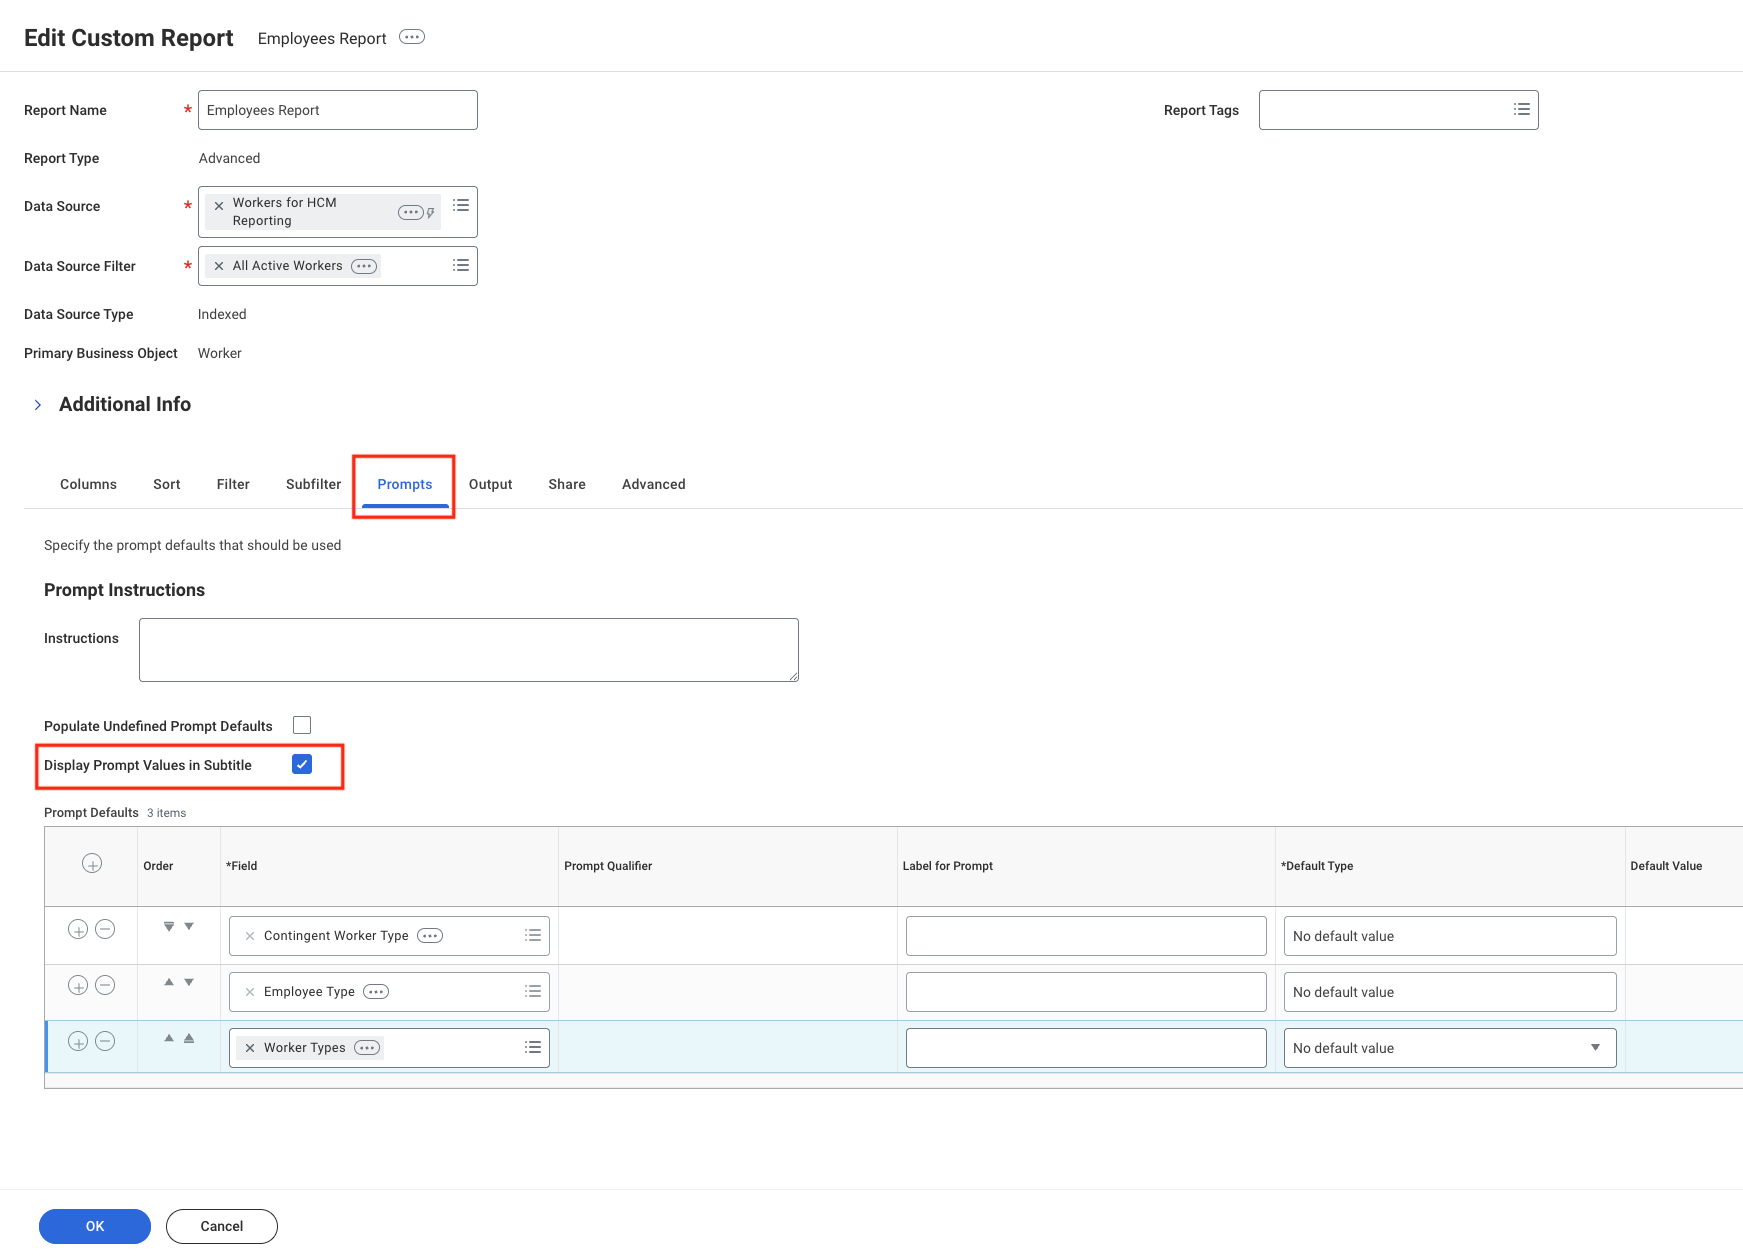
Configure advanced options
Tick Optimised for Performance and Enable As Web Service. Leave other advanced options unchanged.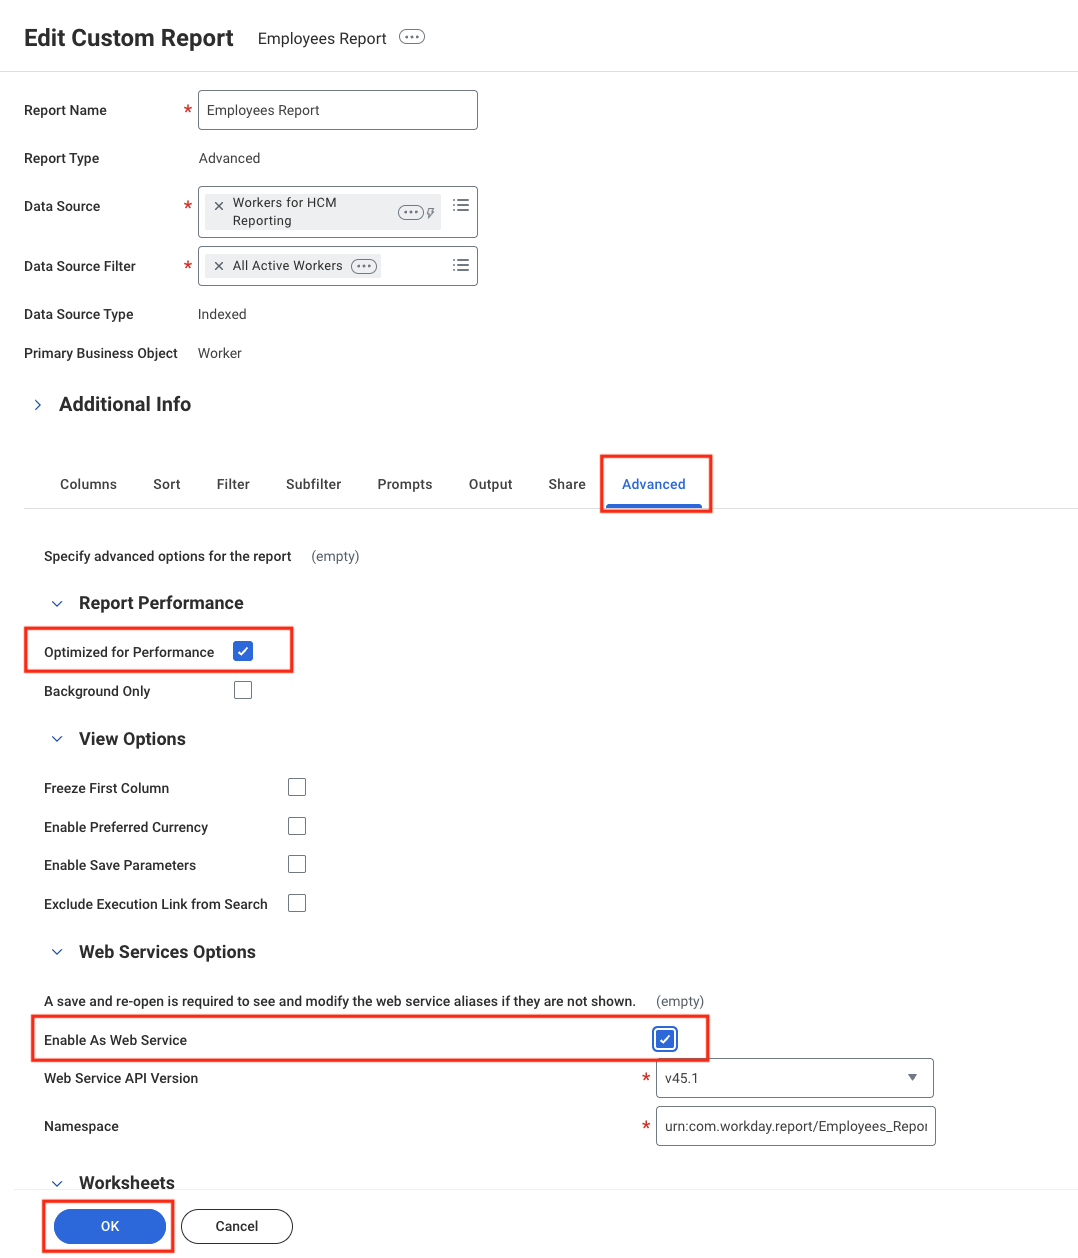
OK to save the report.Go to View Custom Report
Search for 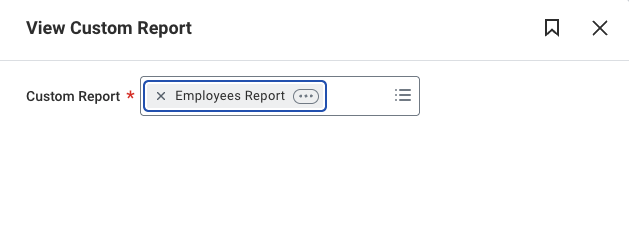
View Custom Report, select the report you just created, then click OK to open it.
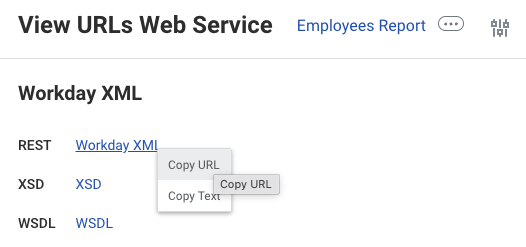
Connecting to StackOne
Use the ISU Username, ISU Password, and Report URL to create a connection.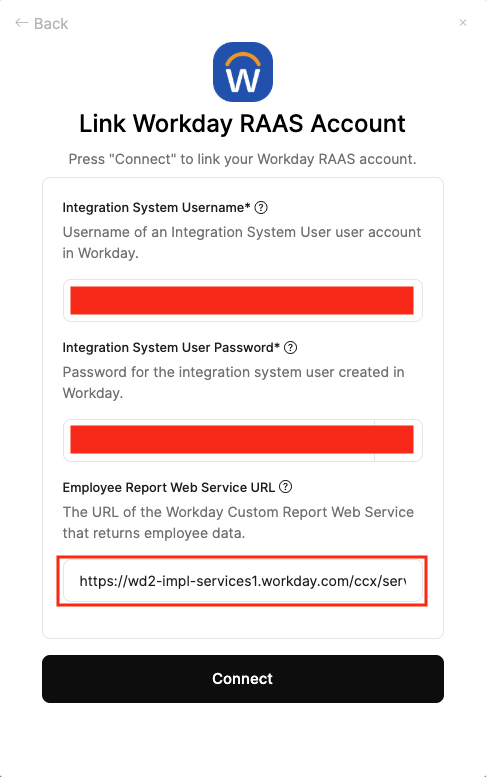
If you are encountering issues after connecting and calling the unified List Employees endpoint, you can visit Integration Configuration & Concepts guide of Workday RaaS