Create Workday Application Custom Field
1
Search for 'Create Custom Object'
Search for Create Custom Object in the search bar and select it.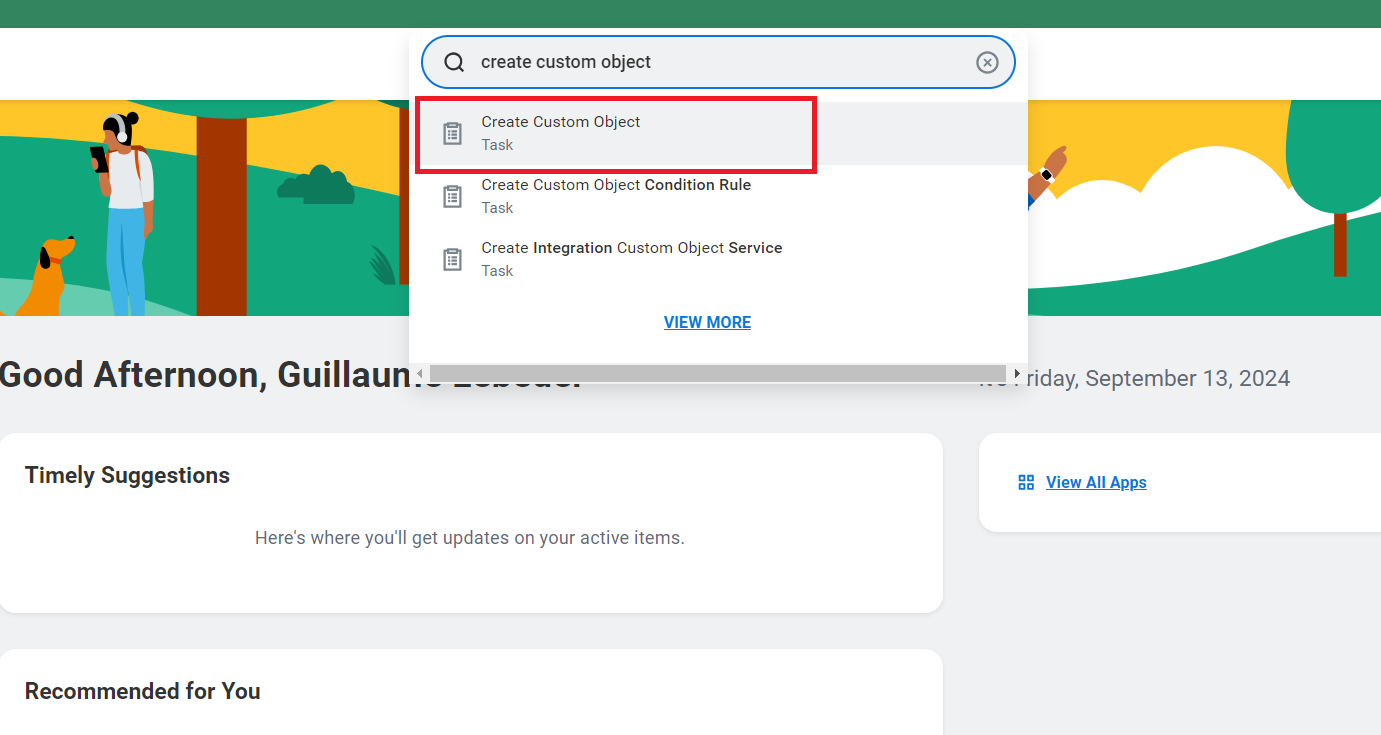
2
Create Custom Object
Select Job Application in Workday Object.
Enter a name for the custom object and click OK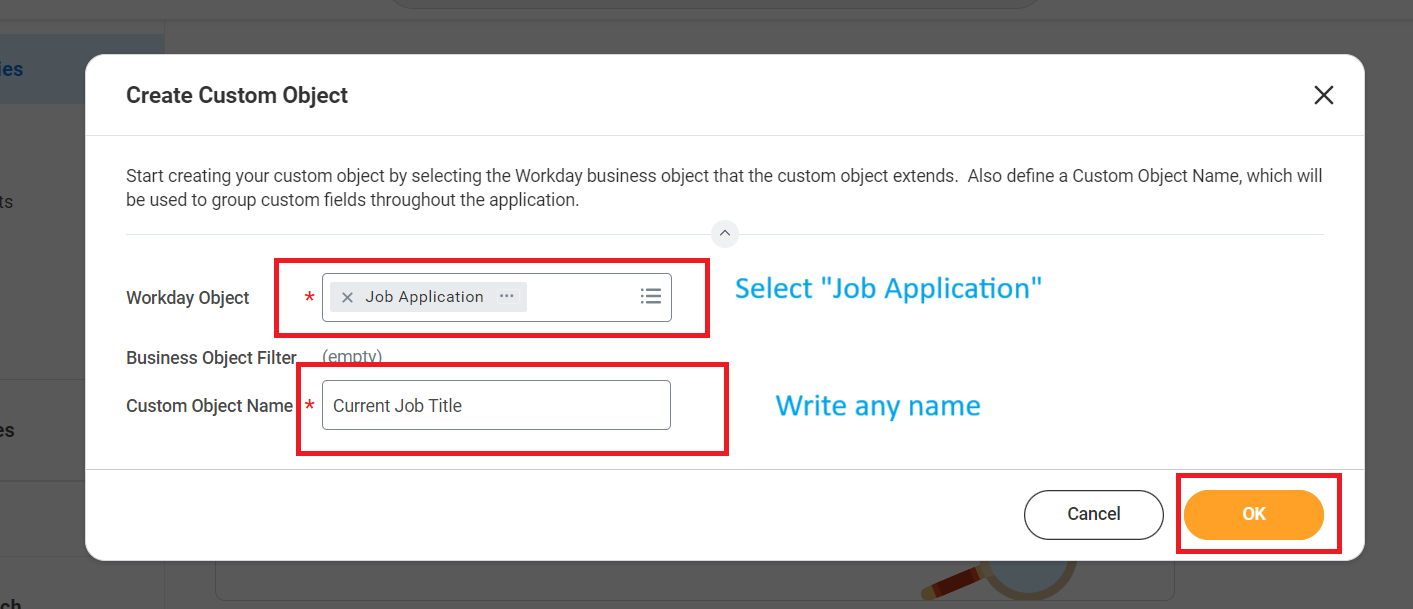
Enter a name for the custom object and click OK
3
Click 'Field Definitions'
Click the Field Definitions tab in the sidebar.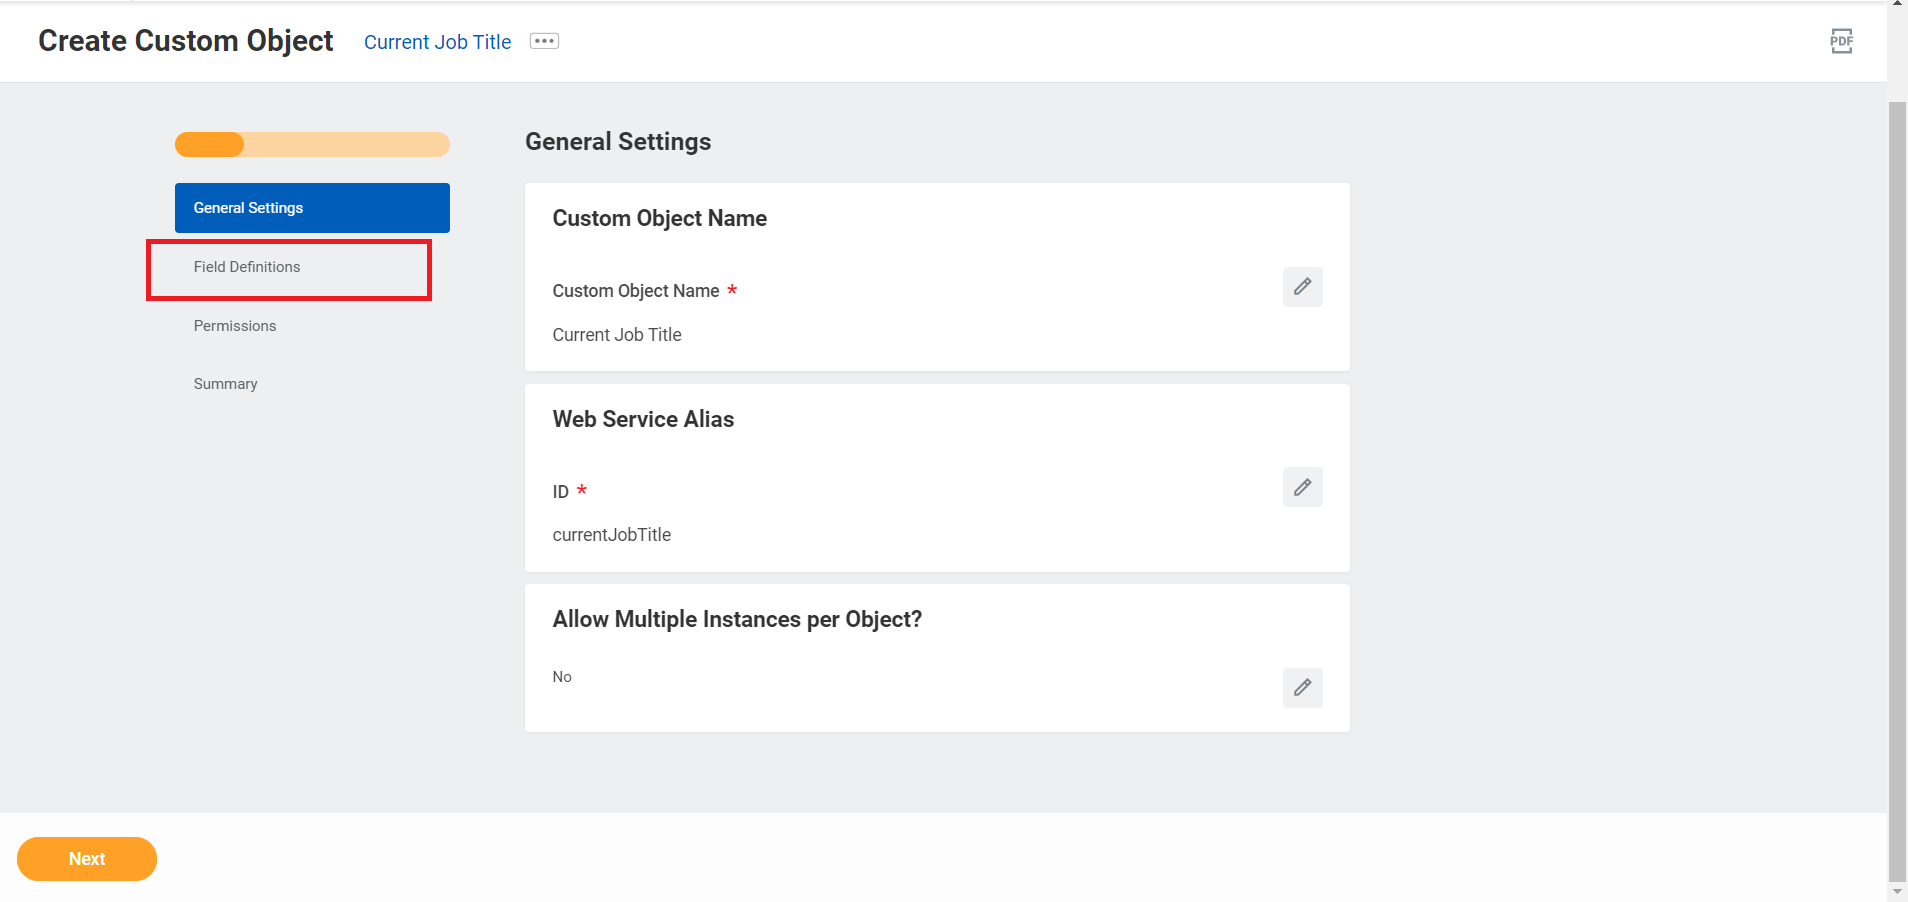
4
Click 'Add' button
Click the Add button in Proposed New Fields.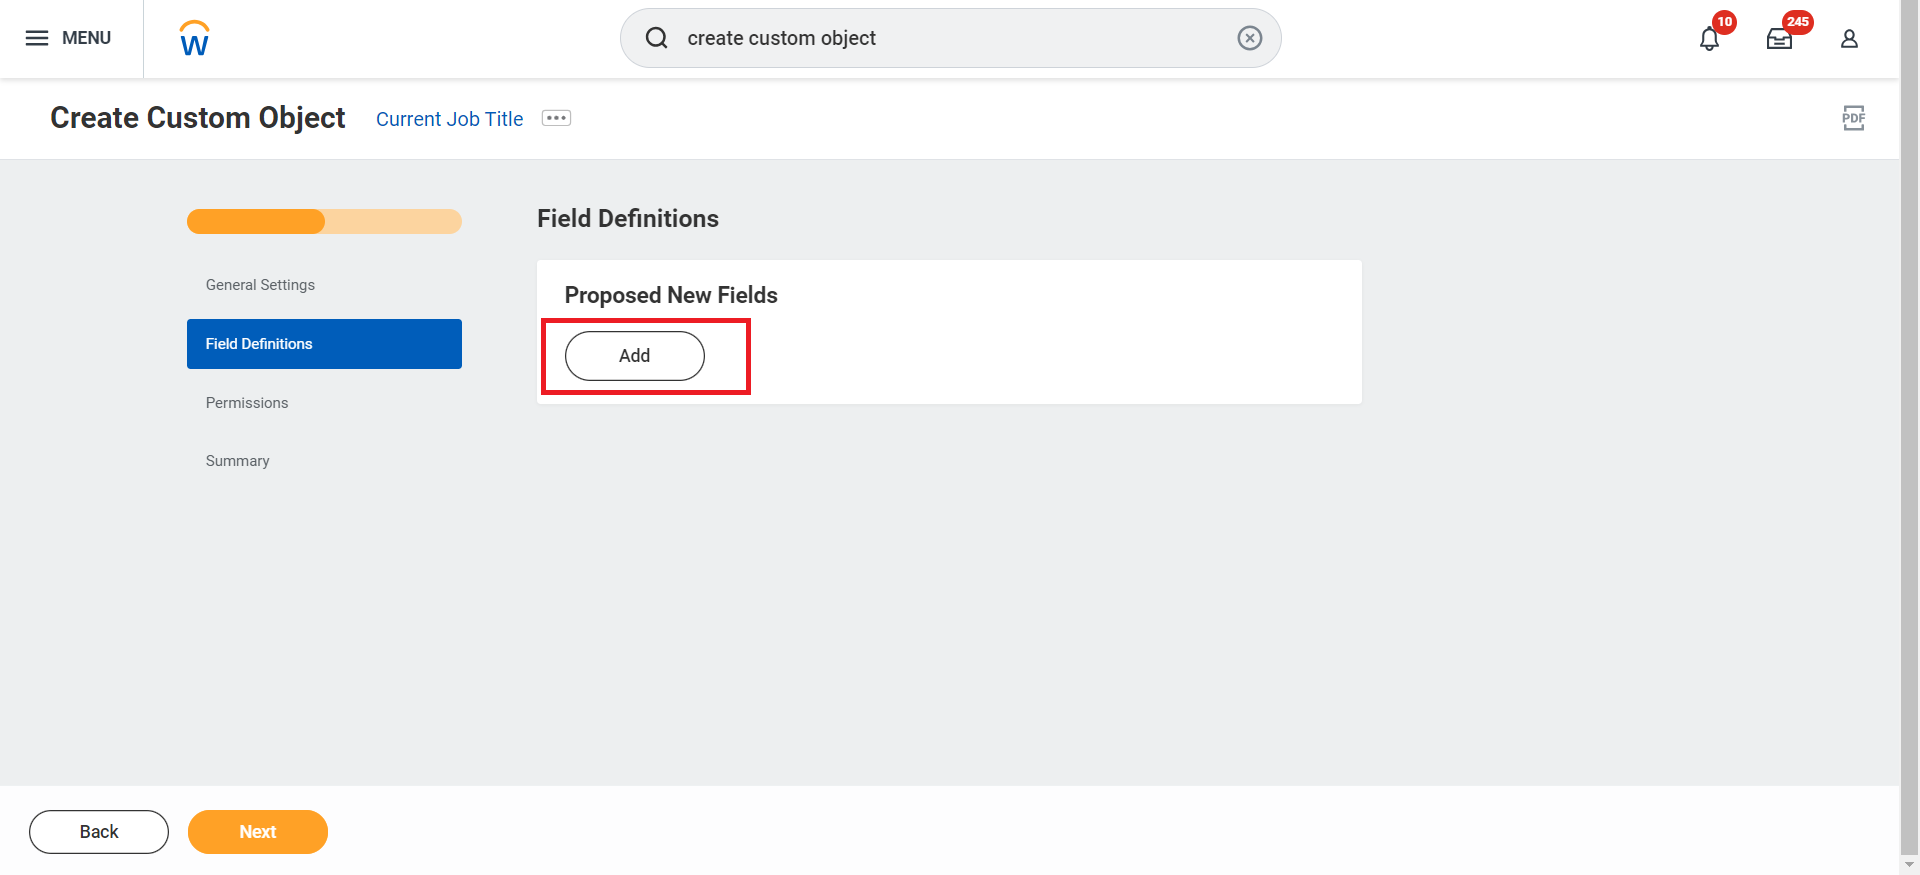
5
Enter Label & Field Type
Enter a label for the field, select a field type from the dropdown menu, and click Next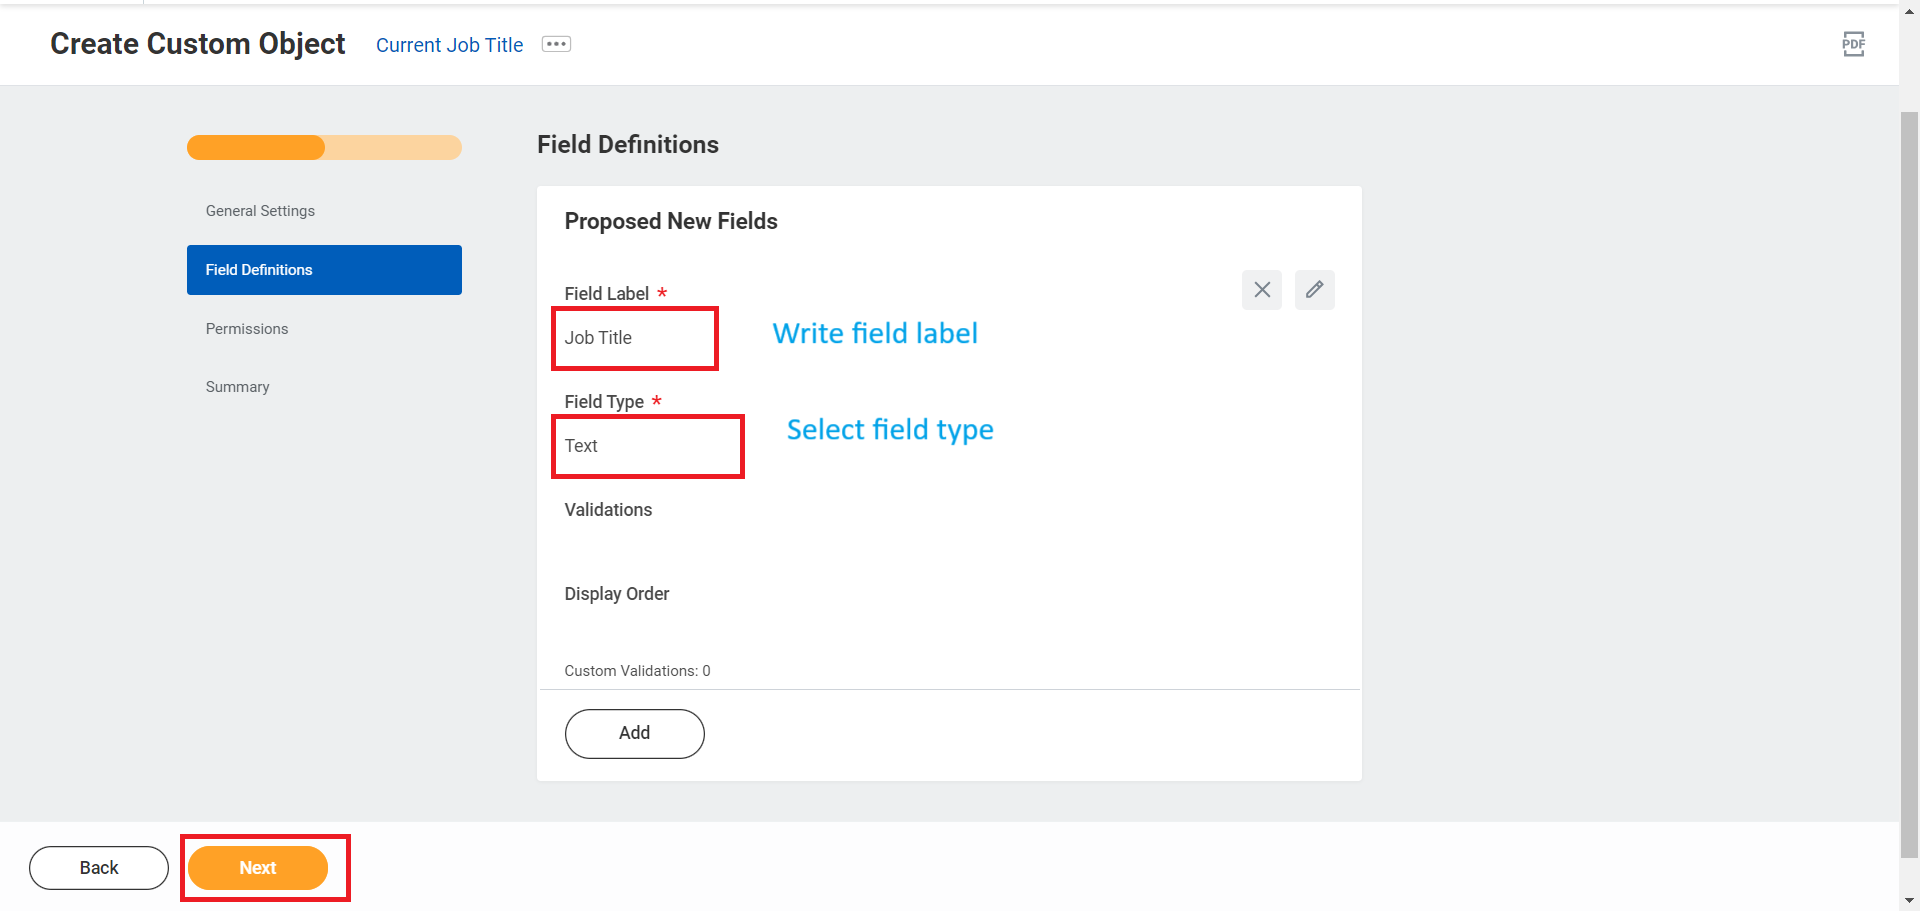
6
Select 'Candidate Date: Job Application'
Select Candidate Date: Job Application in Permissions tab and click Next.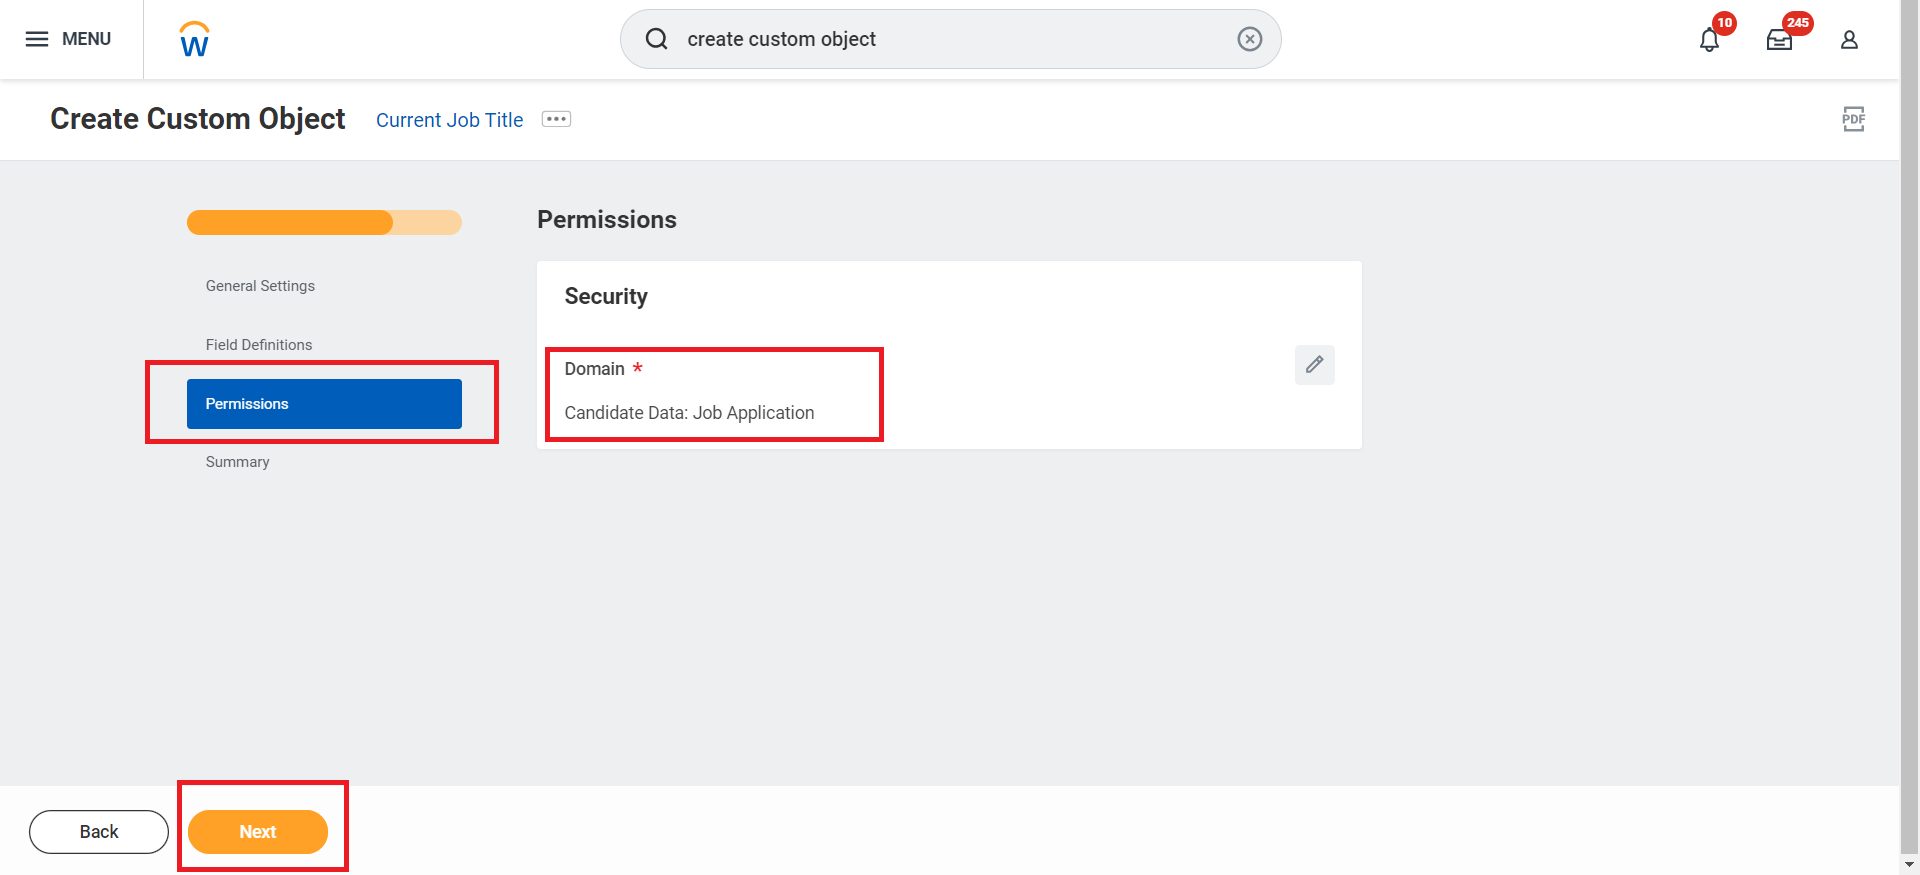
7
Review and Confirm
Verify the custom object summary and click OK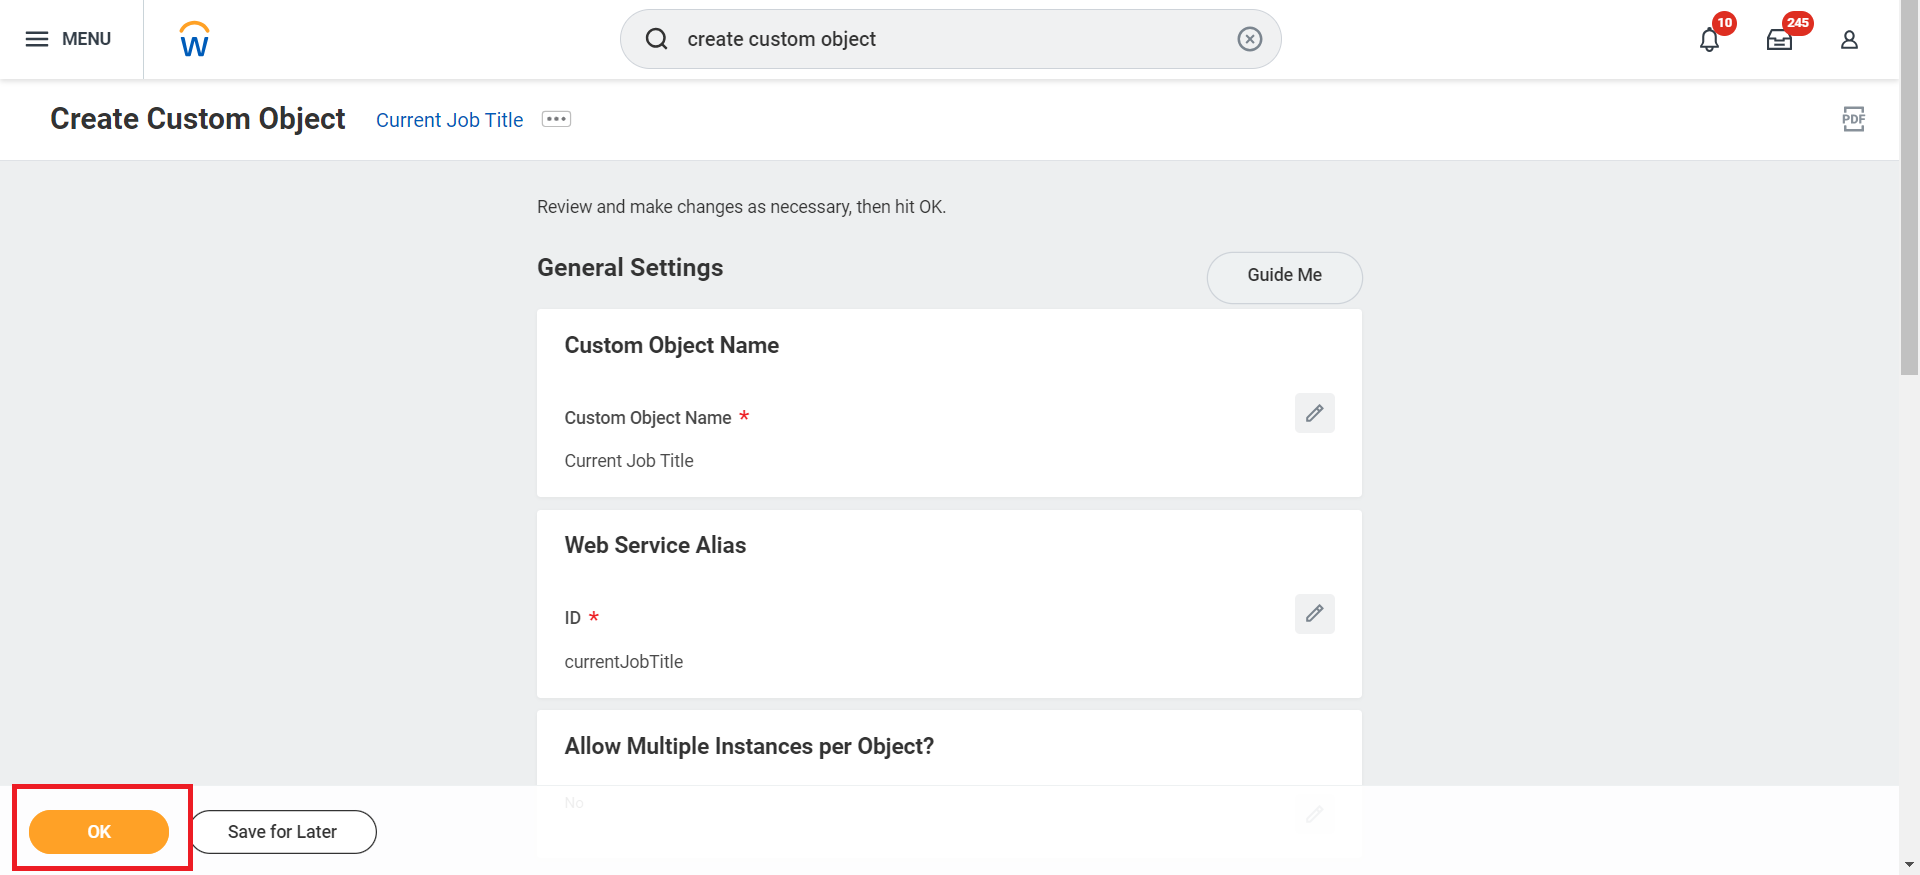
8
Configure Field Selection
Select the newly created custom field from the Display Value and Reference ID dropdowns if the Allow Multiple Instances per Object option is selected, and click OK.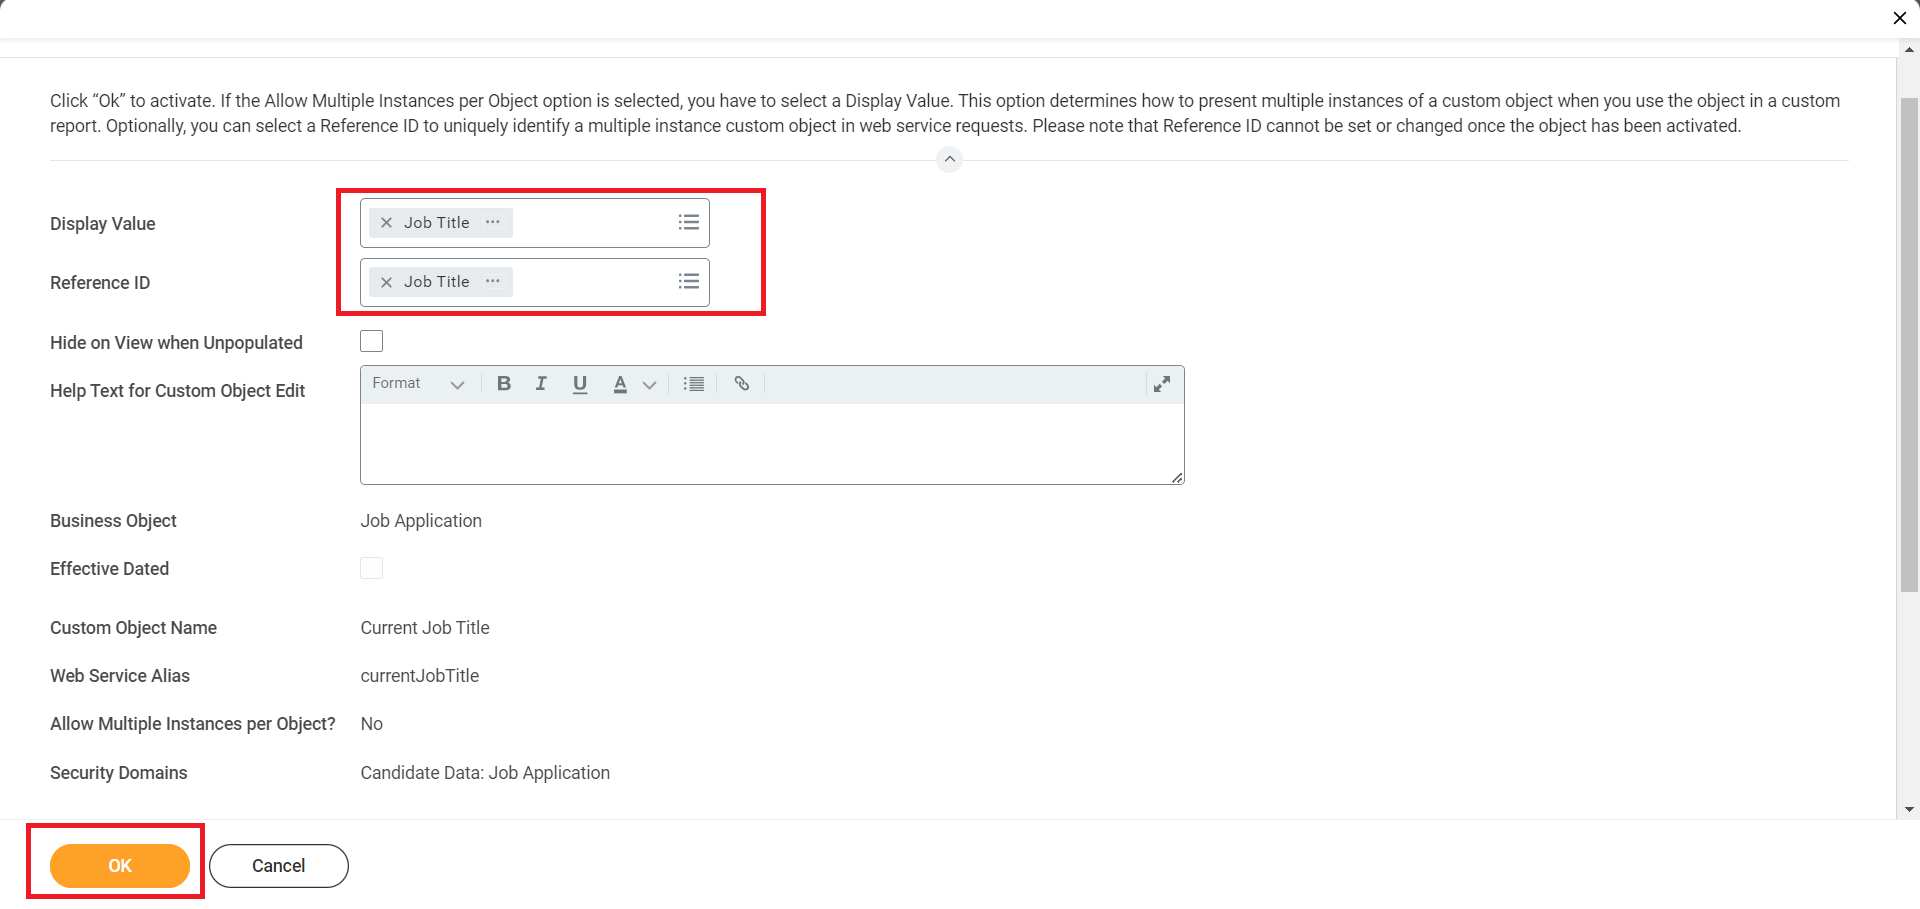
9
Activate Custom Object
Activate the custom object by clicking Done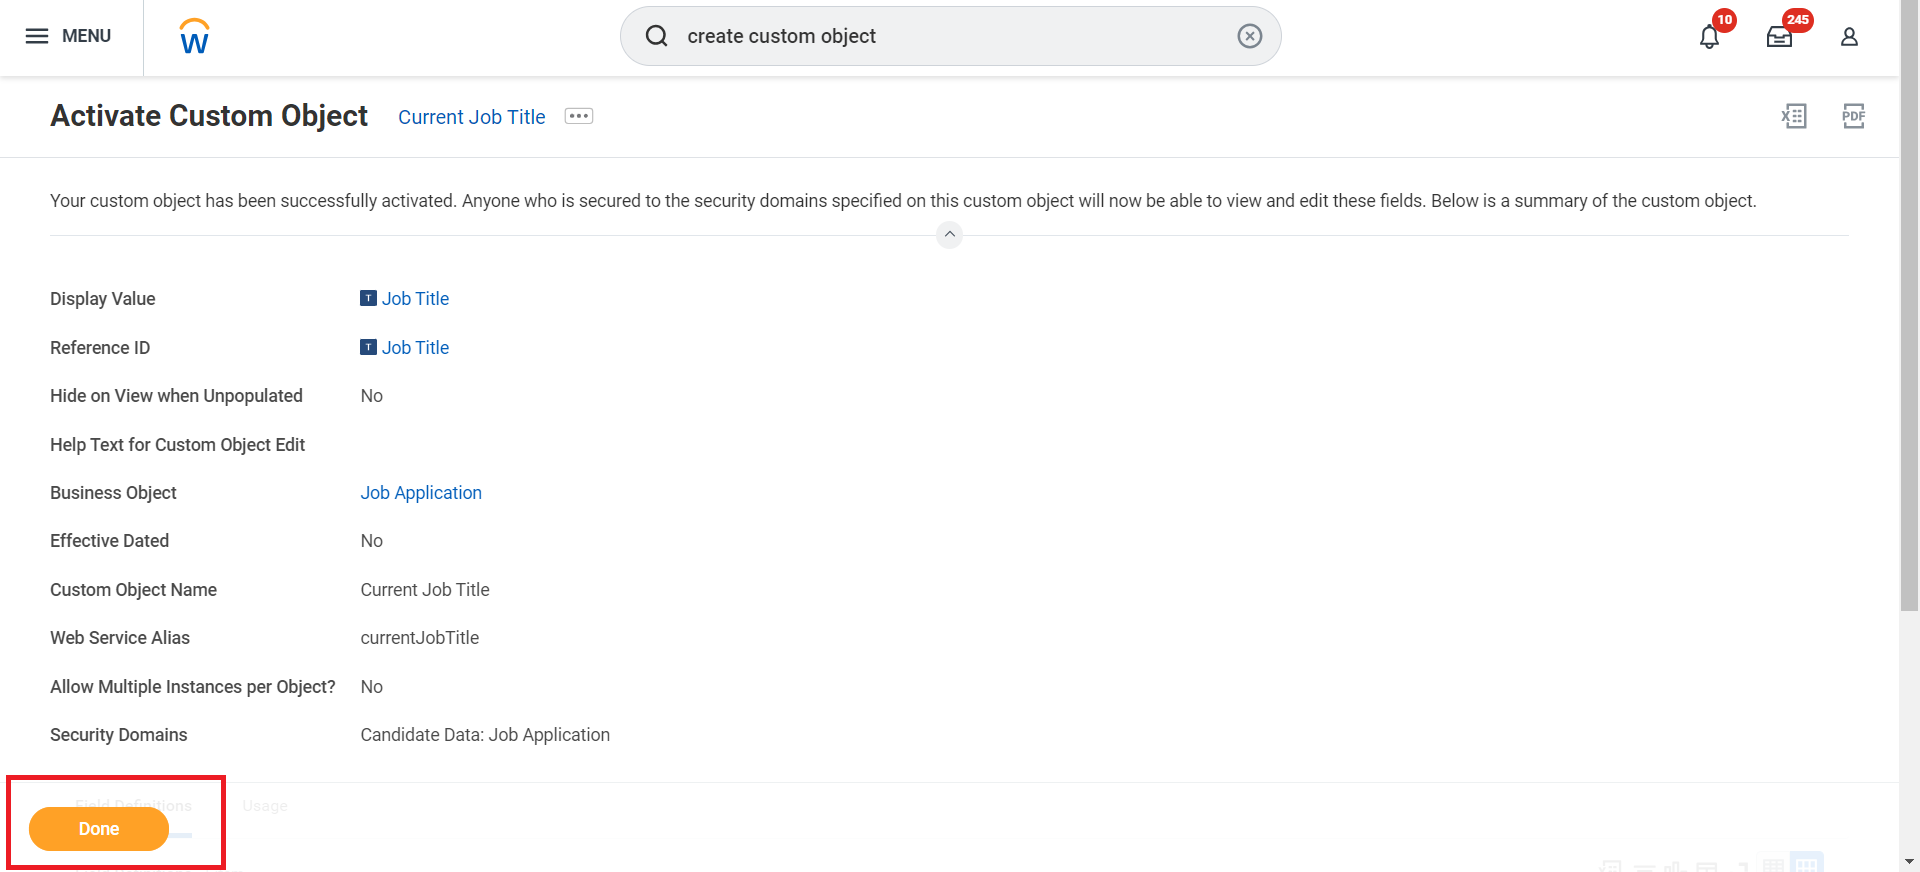
View Workday Application Custom Field
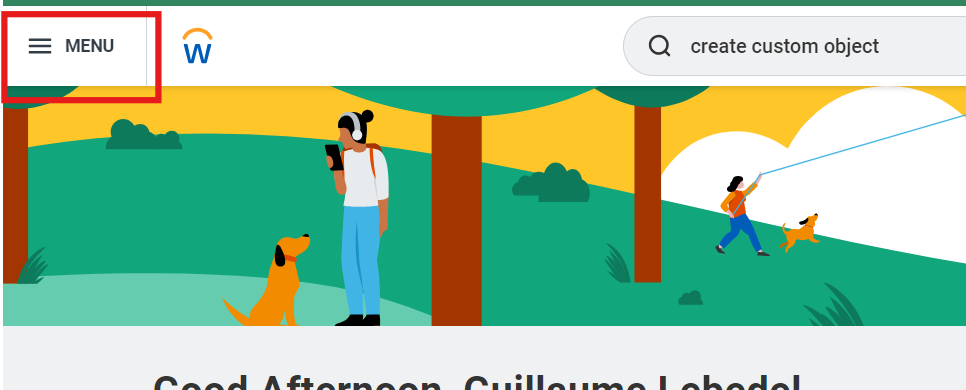
1
Click on 'Menu'
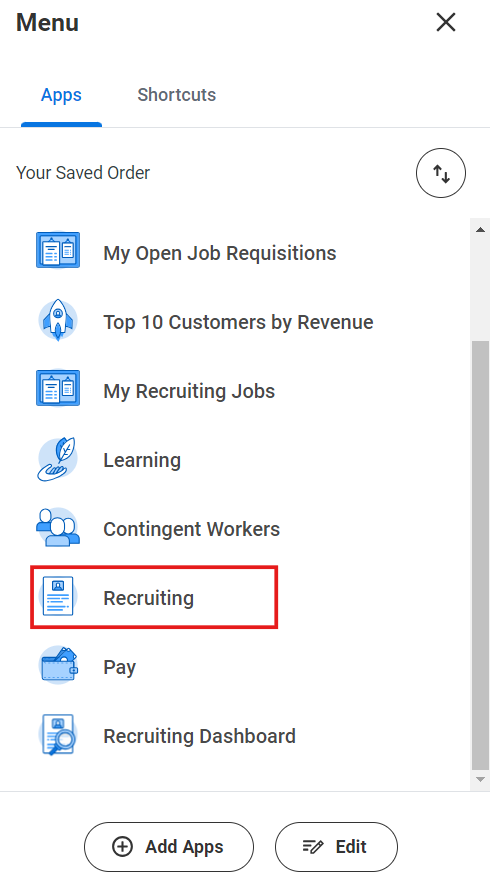
2
Click 'Recruiting'
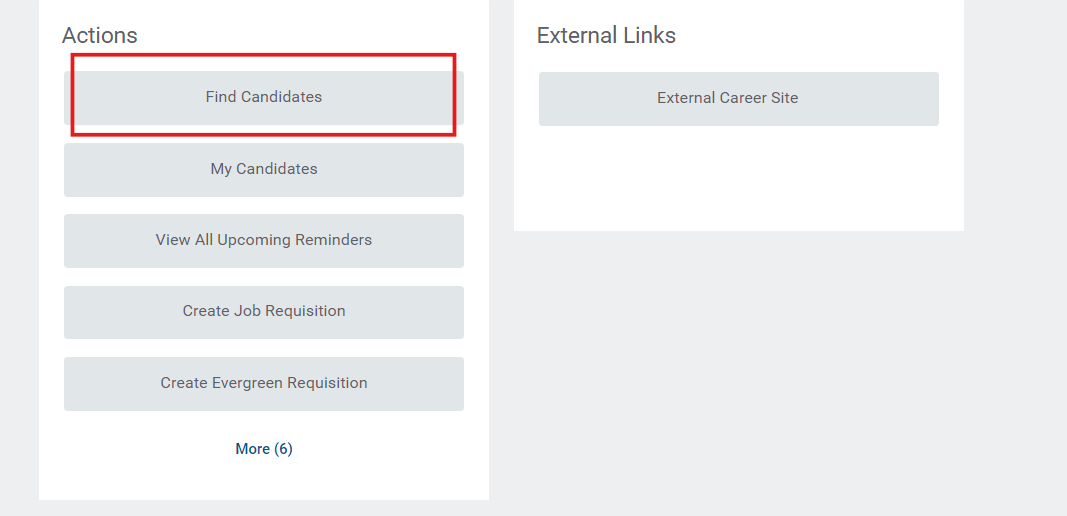
3
Click on 'Find Candidates'
4
Access Job Application Actions
Expand the Job Applied section for the candidate, hover over the job application, and click on the three dots (…).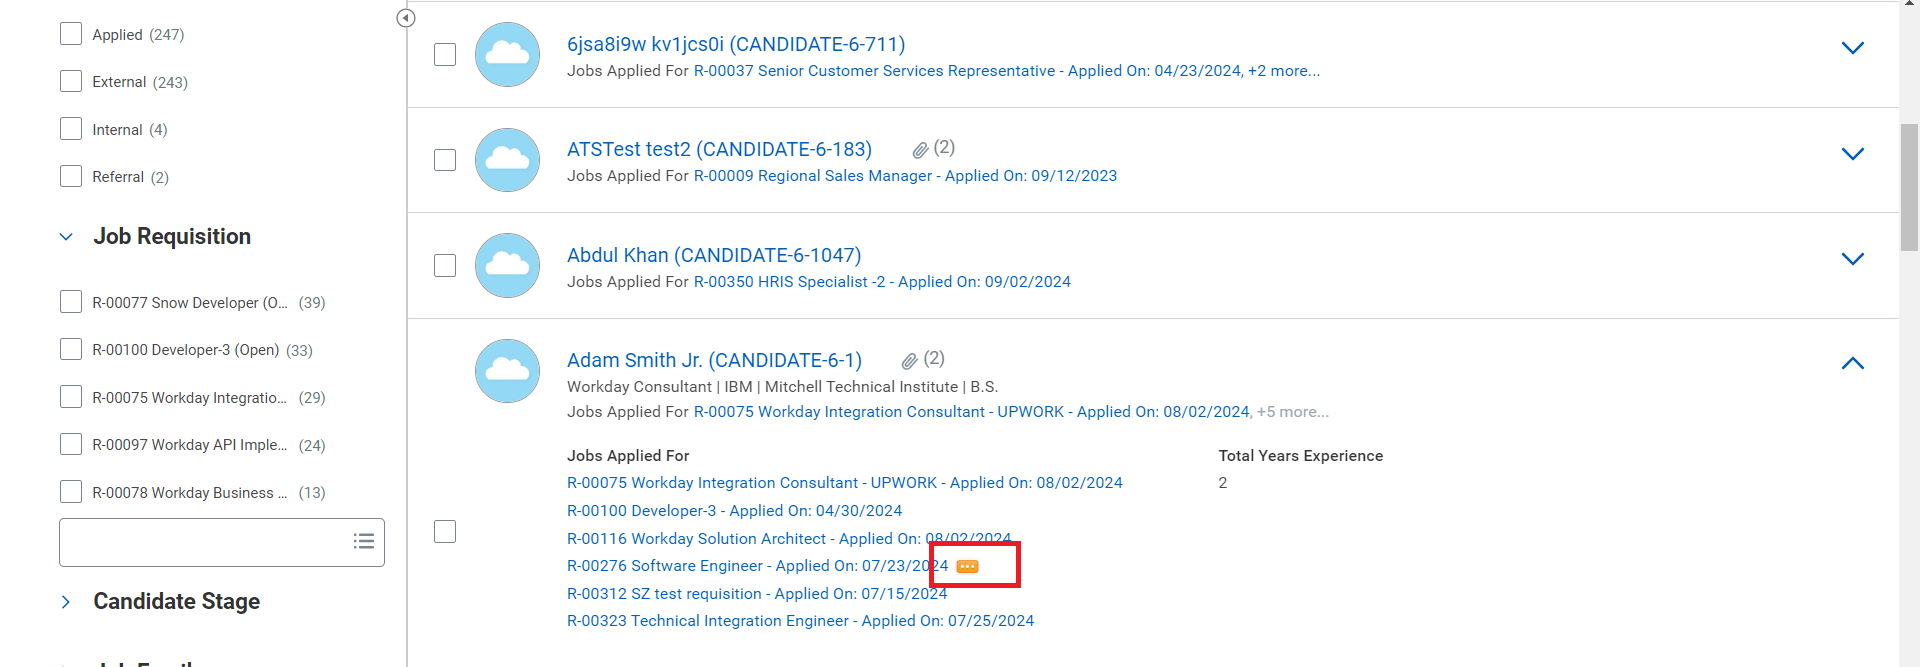
5
View All Additional Fields
In the Additional Fields section, click on View All.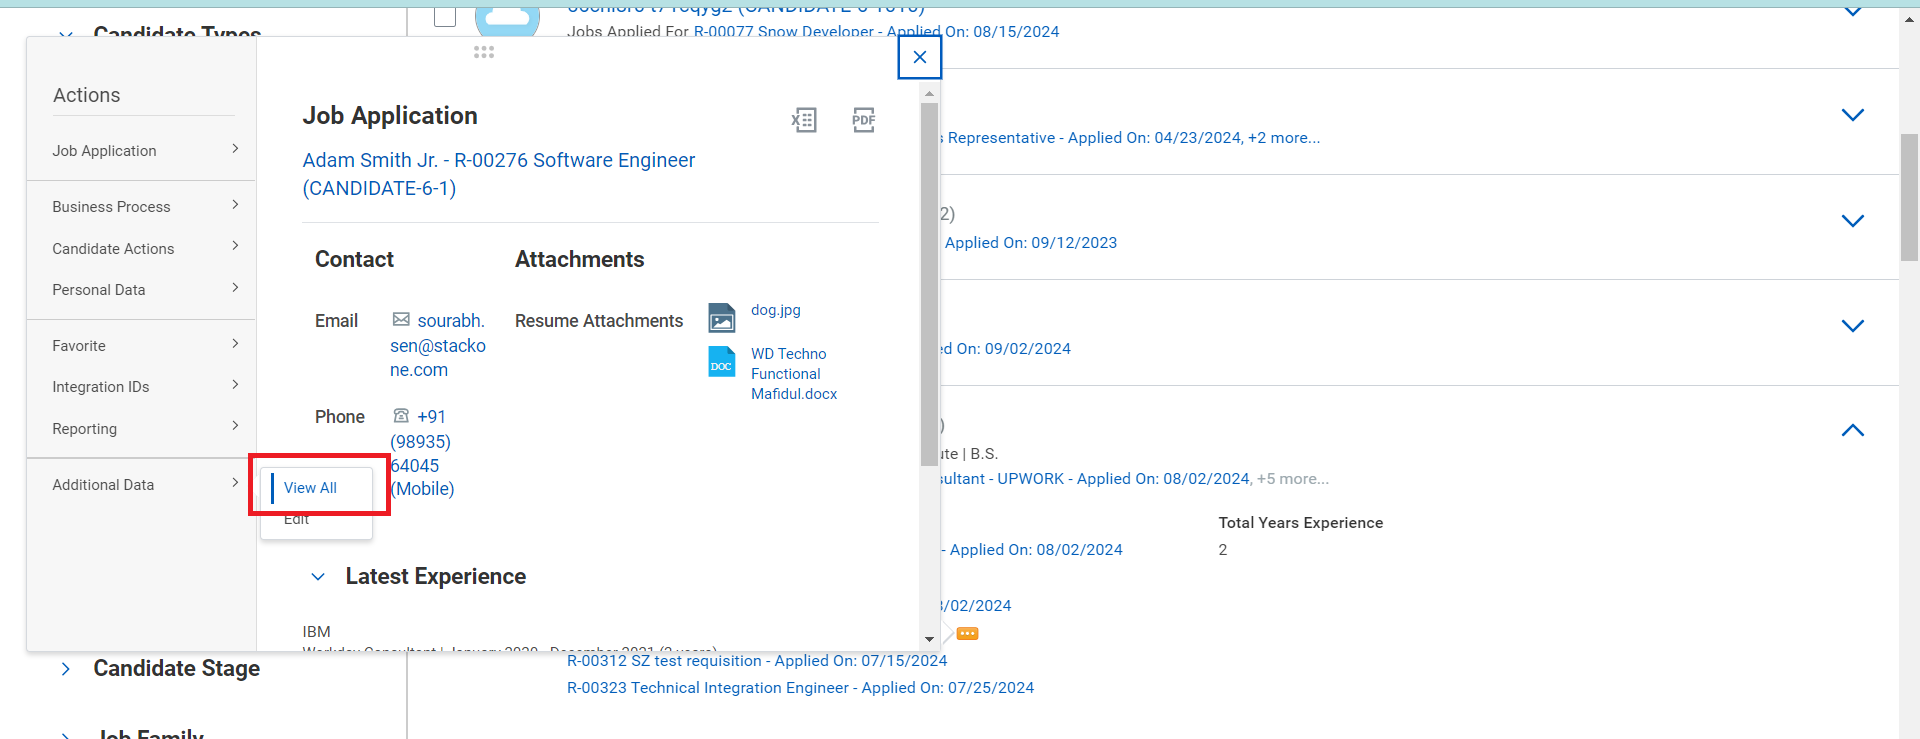
6
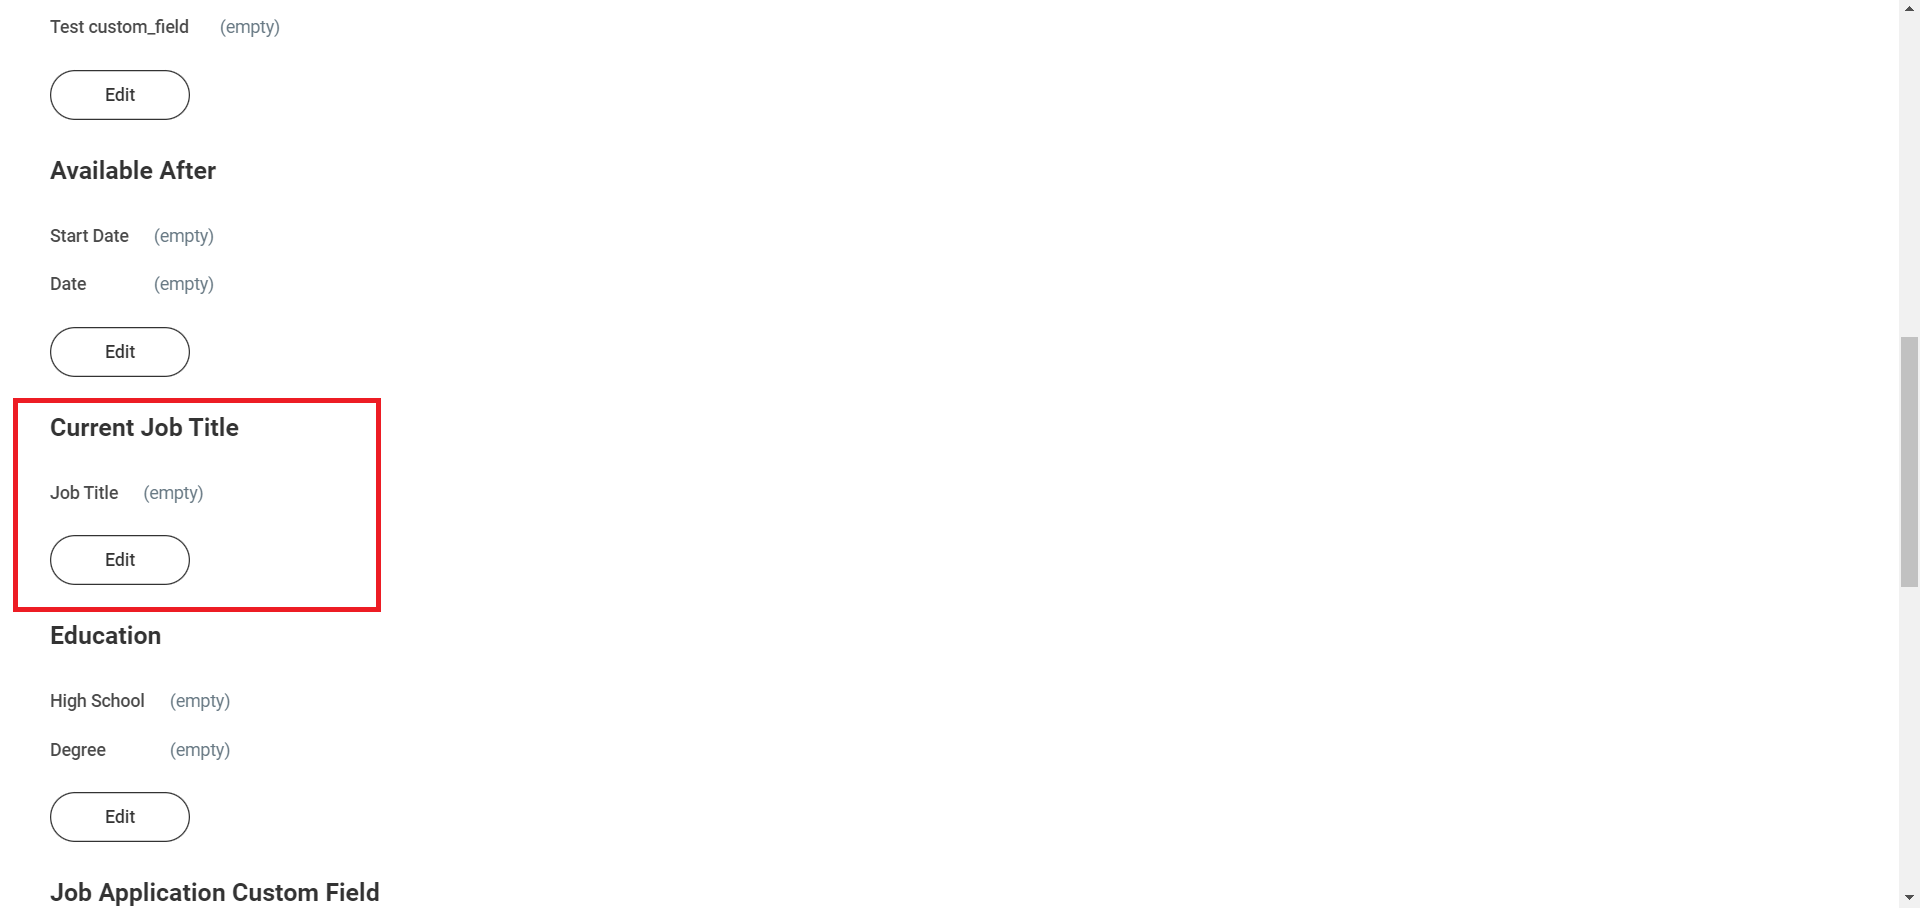
View Newly Created Custom Field
Now, you will see the newly created custom field.