To Get External Trigger Token
1
To get the External Trigger Token
From the StackOne hub, you will receive the 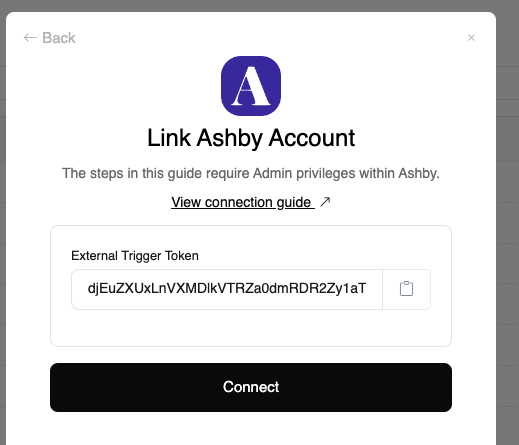
External Trigger Token needed to enable the Ashby Integration.To enable the integration on your Ashby account
1
Go to Integration
Please navigate to 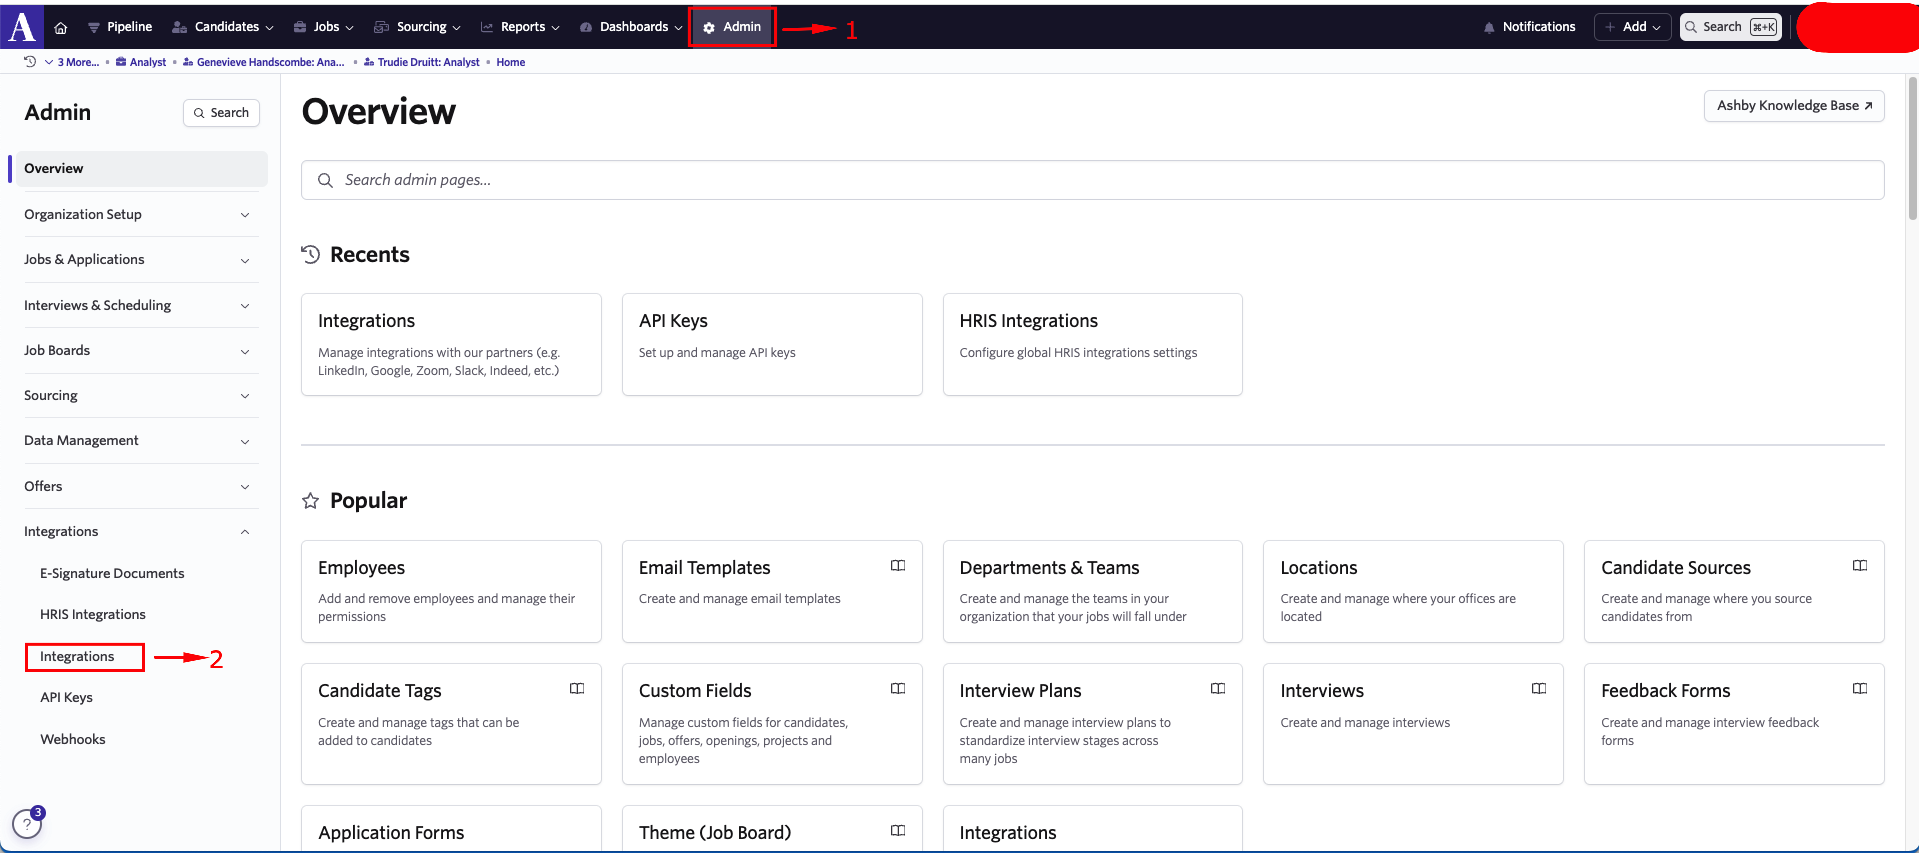
Admin in Ashby’s dashboard. Then navigate to Integrations and click on it2
To enable the Stackone integration
Check the Show unlaunched integrations flag, search for 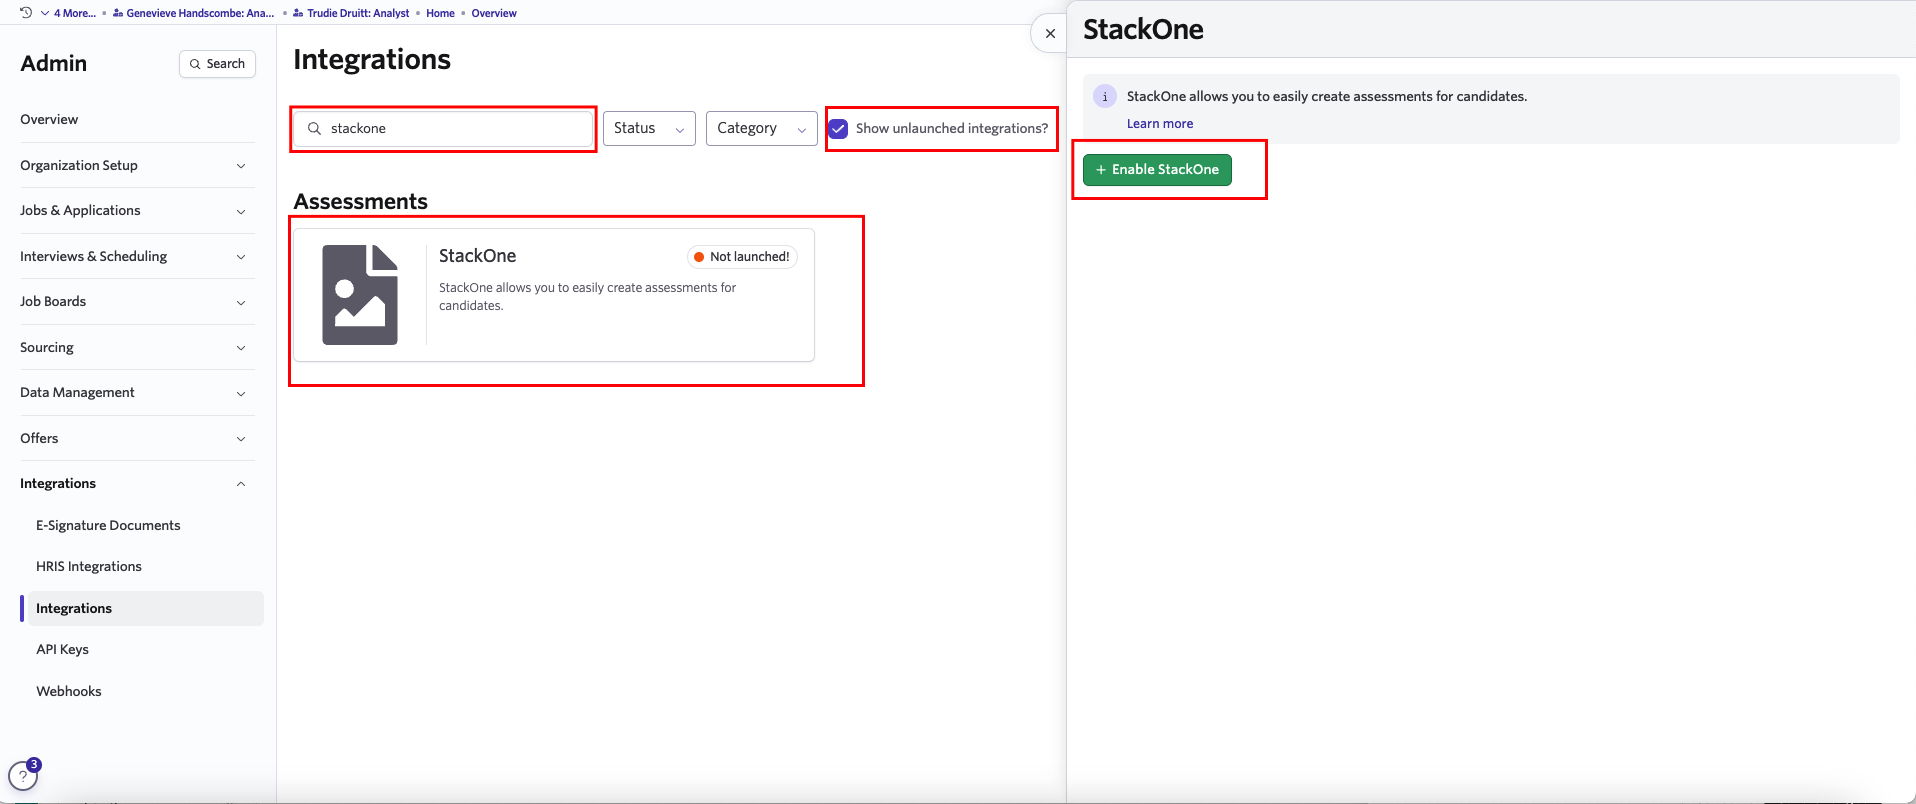
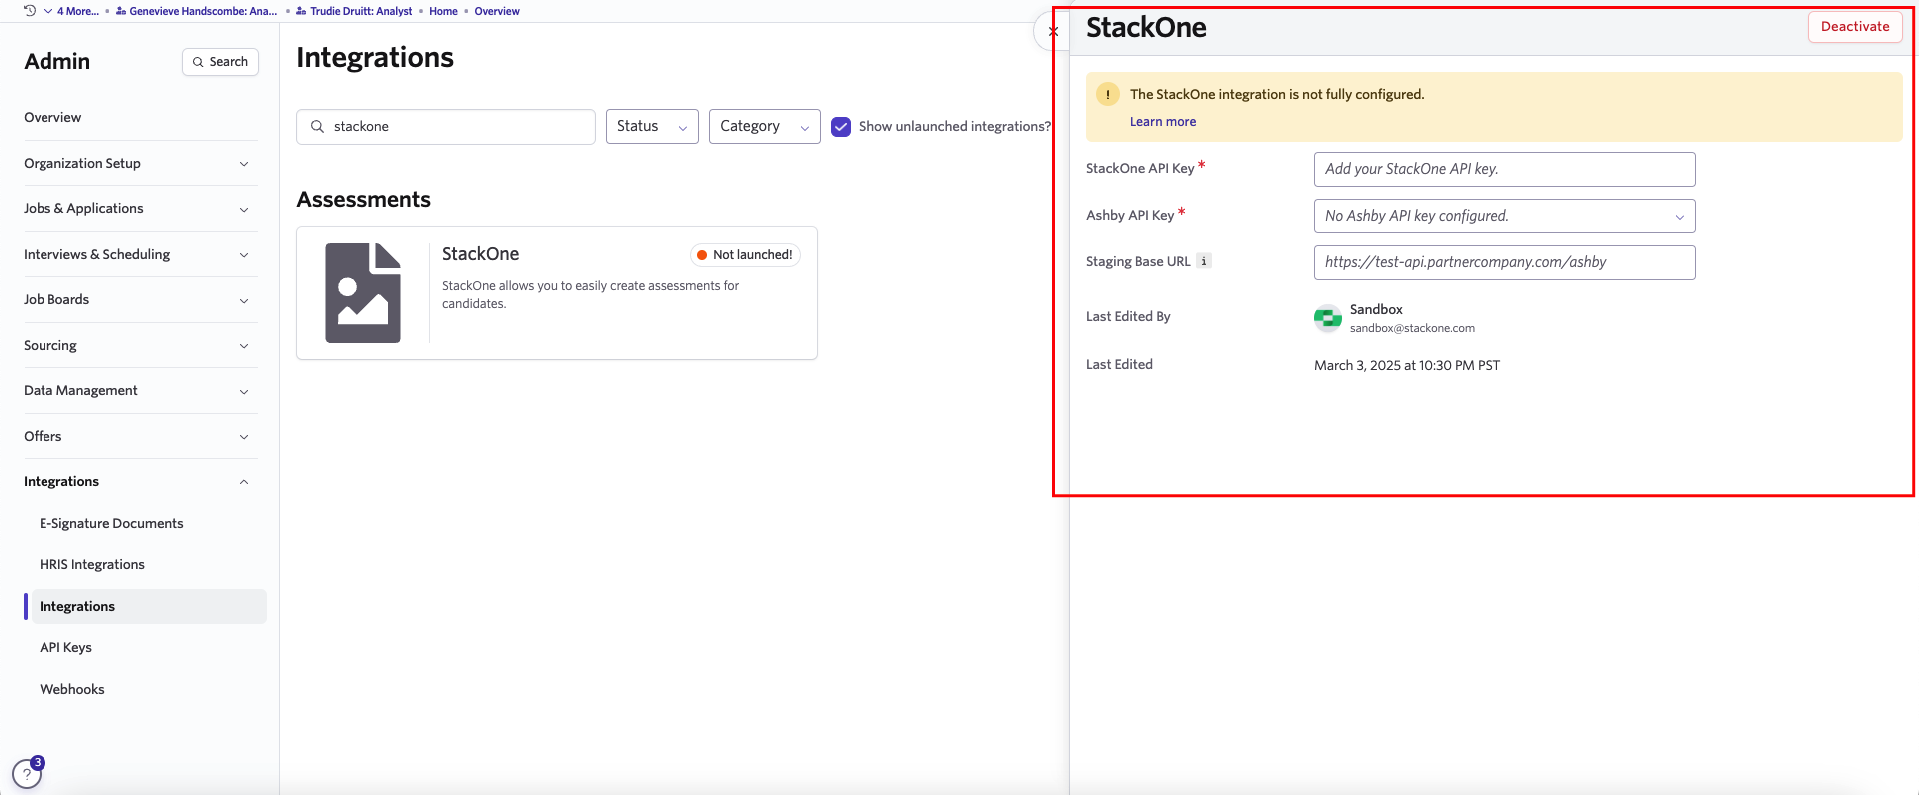
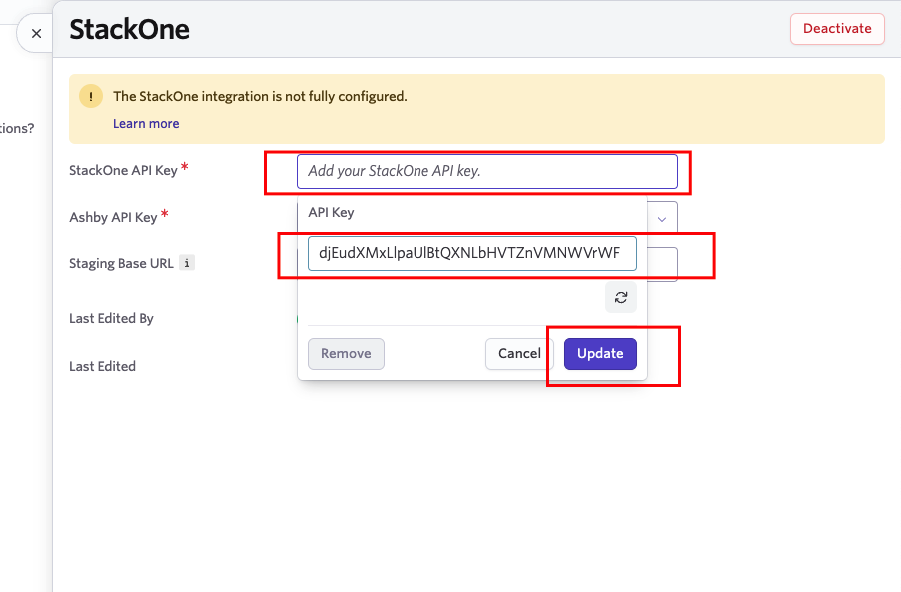
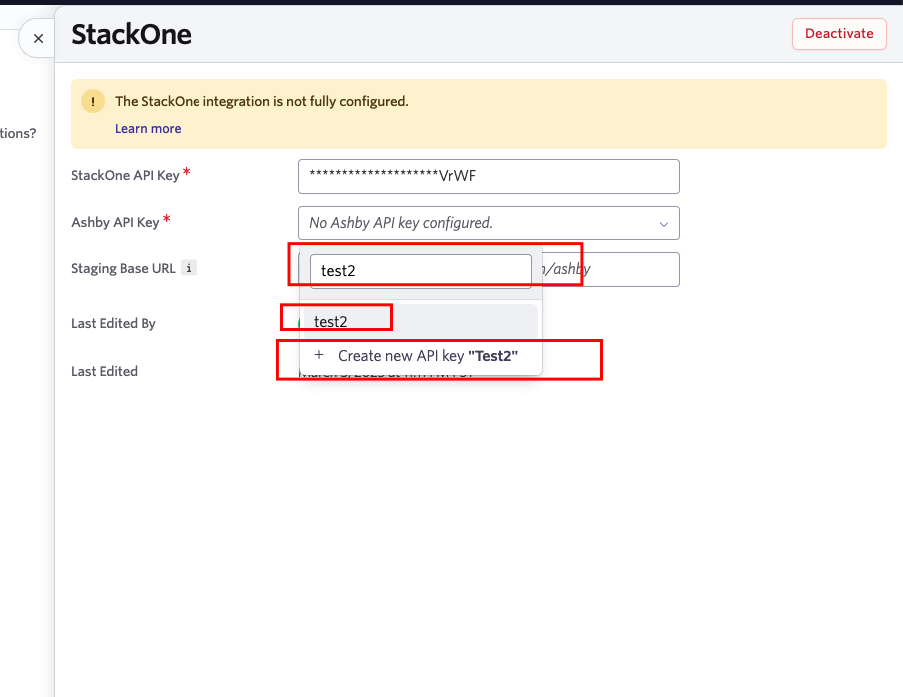
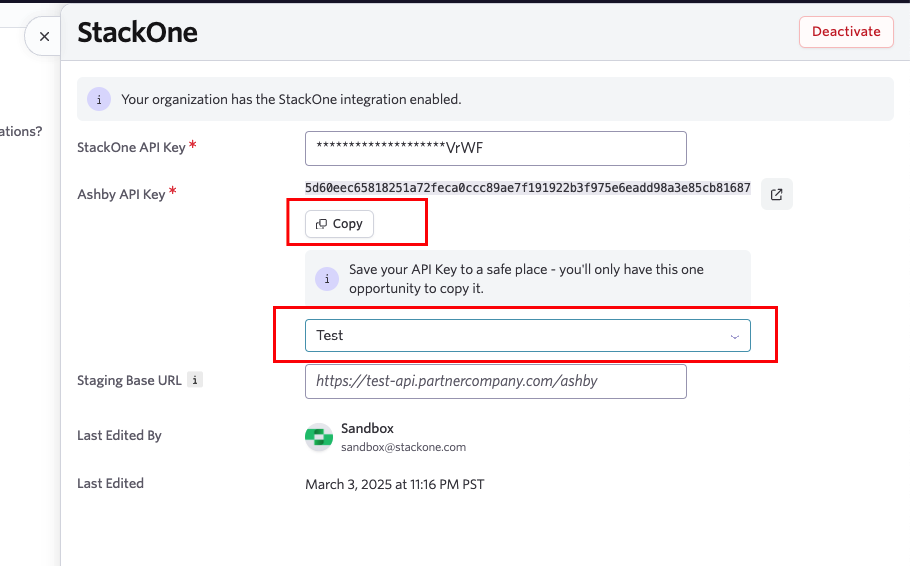
Stackone Integration and click on the integration as shown below. A pop up for enabling the Stackone integration will appear. Click on Enable Stackone integrations.StackOne API Key. An input field will appear, allowing you to enter the External Trigger Token provided by the StackOne Hub. After entering the External Trigger Token, click Update.Ashby API Key. A search bar will appear, allowing you to enter the name of an existing Ashby API Key. If you want to use an existing one, select it; otherwise, click Create New API Key.Adding Background check to Candidate Pipeline.
1
Navigate to your job dashboard and select a job from the job list
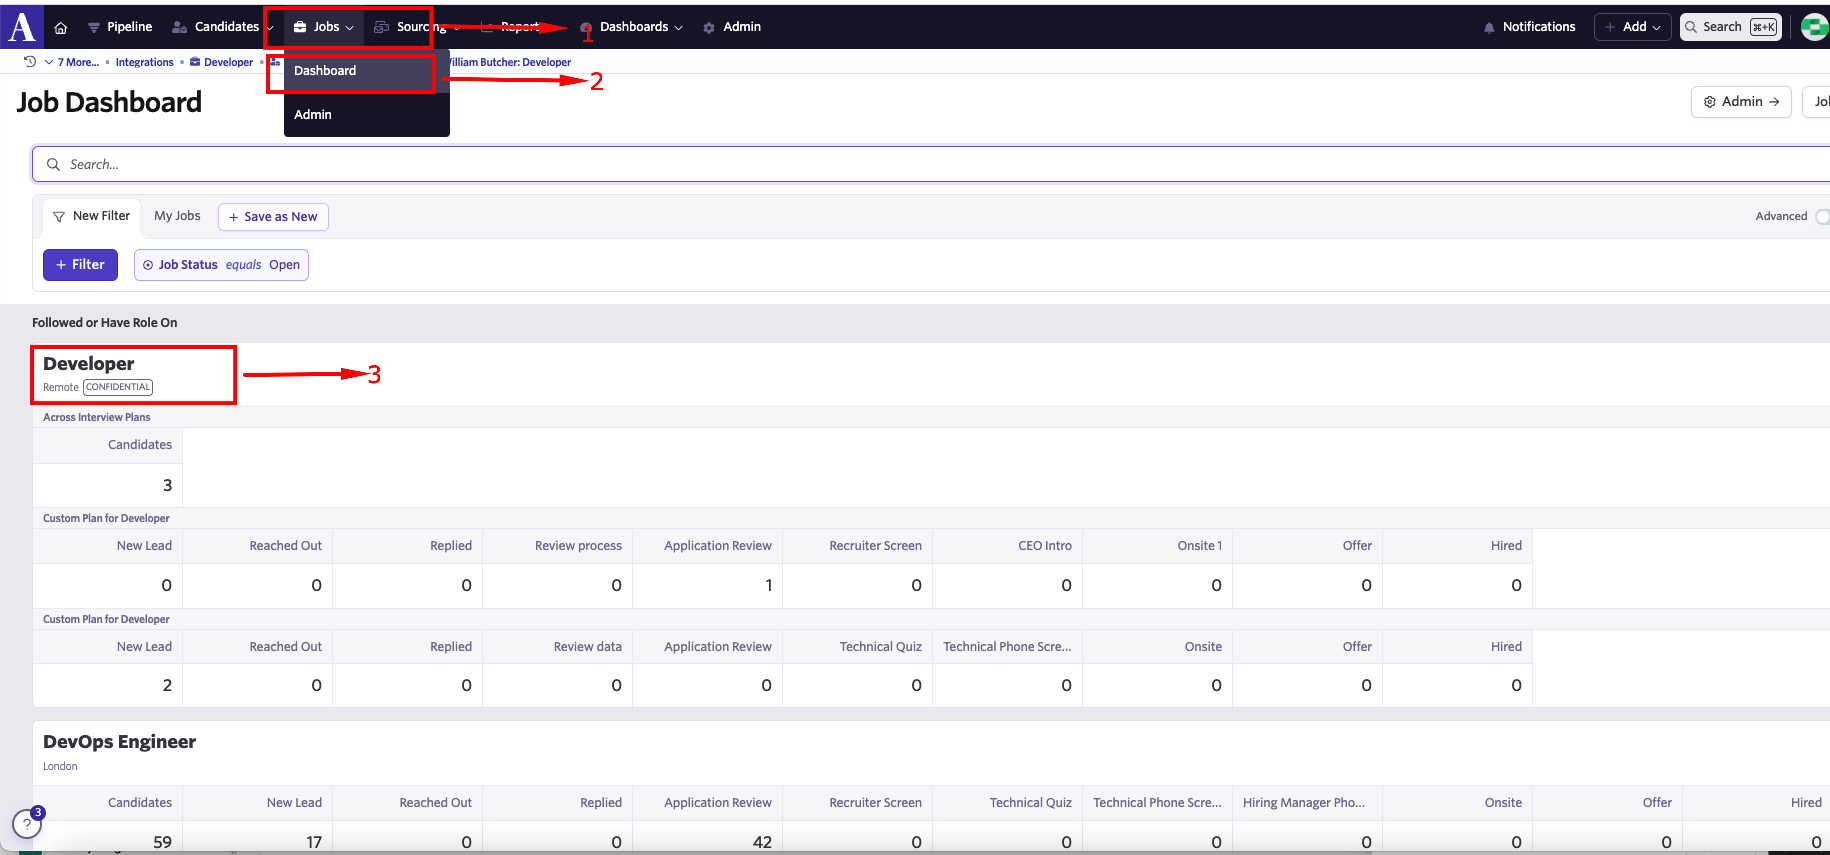
2
Select a candidate from candidate pipeline stage
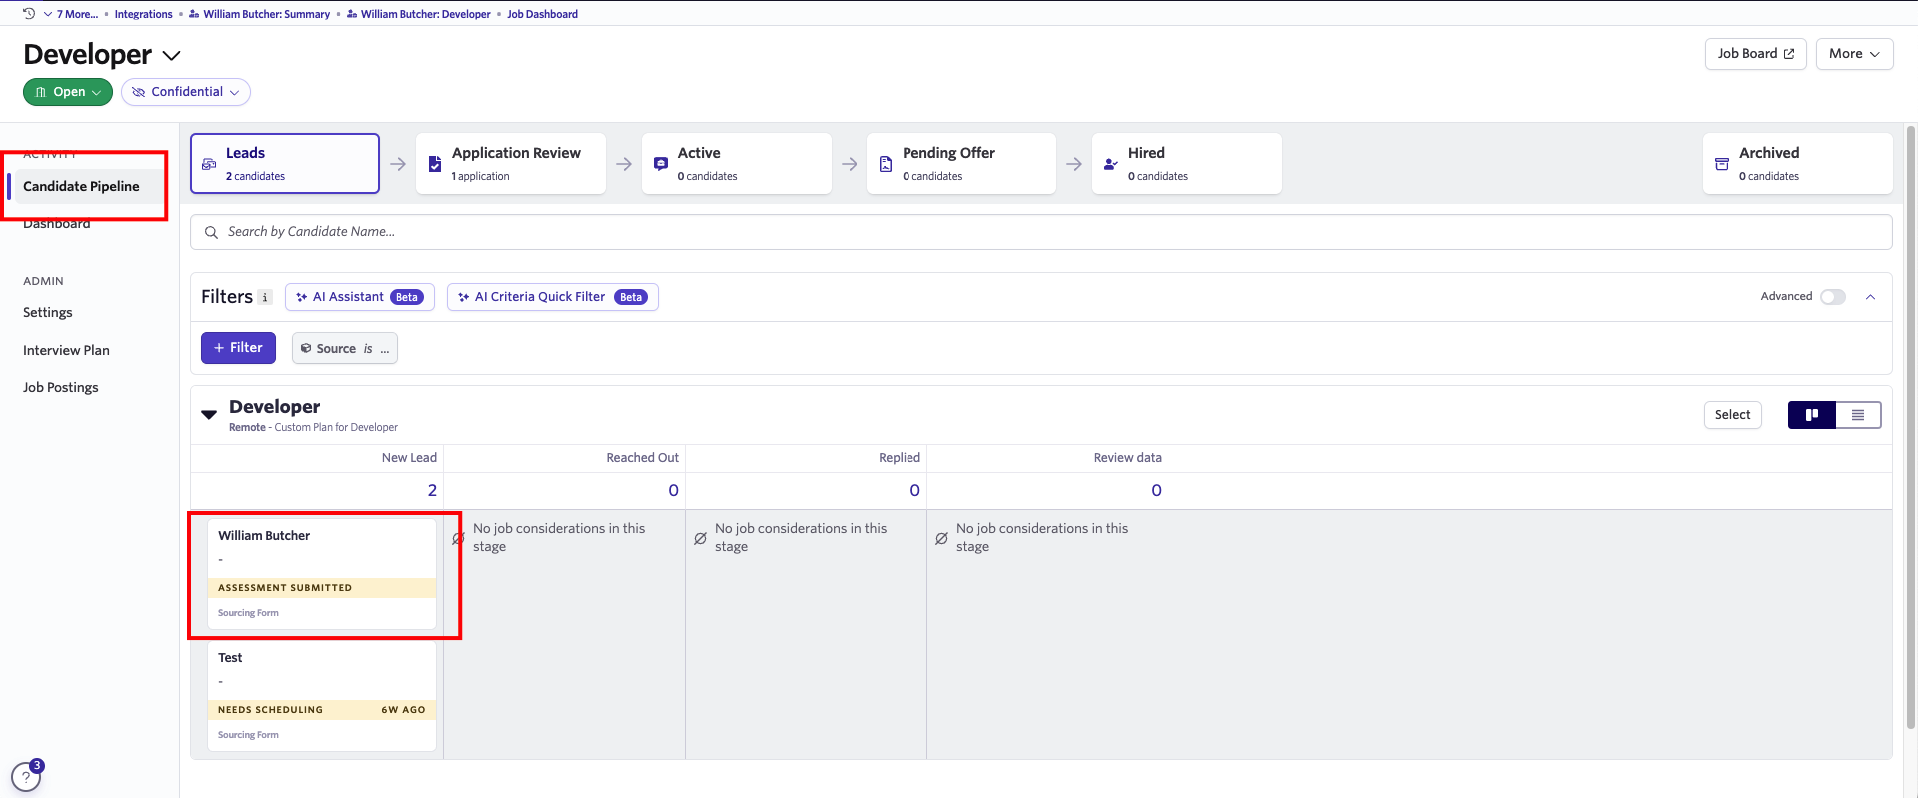
3
To select the background check tests
Click on 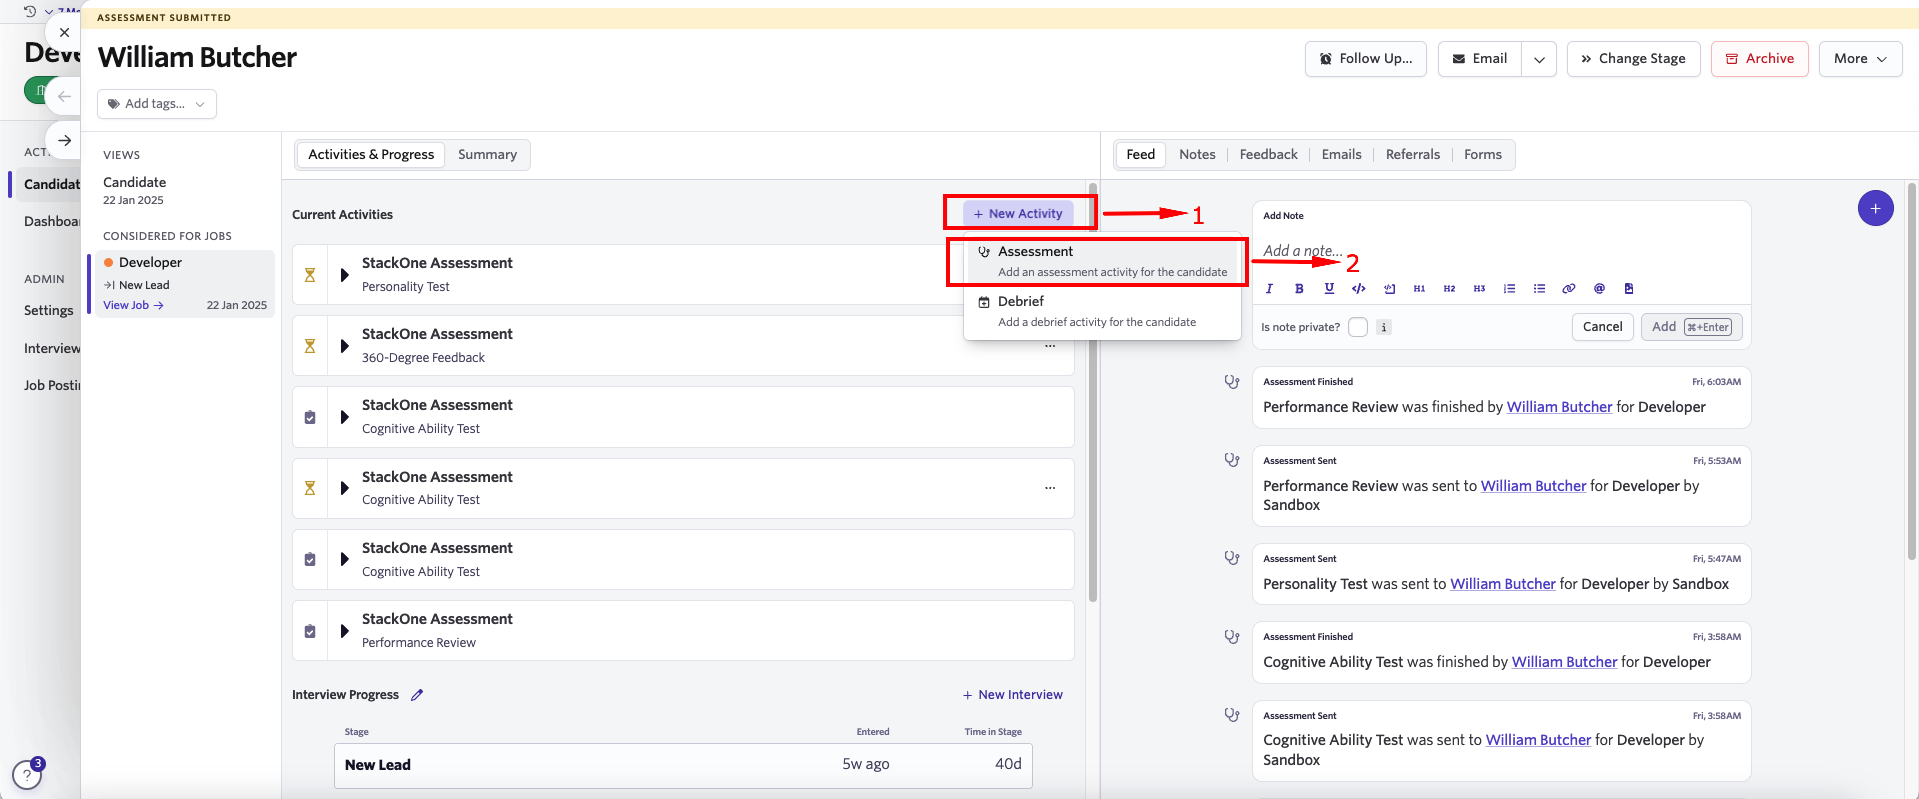
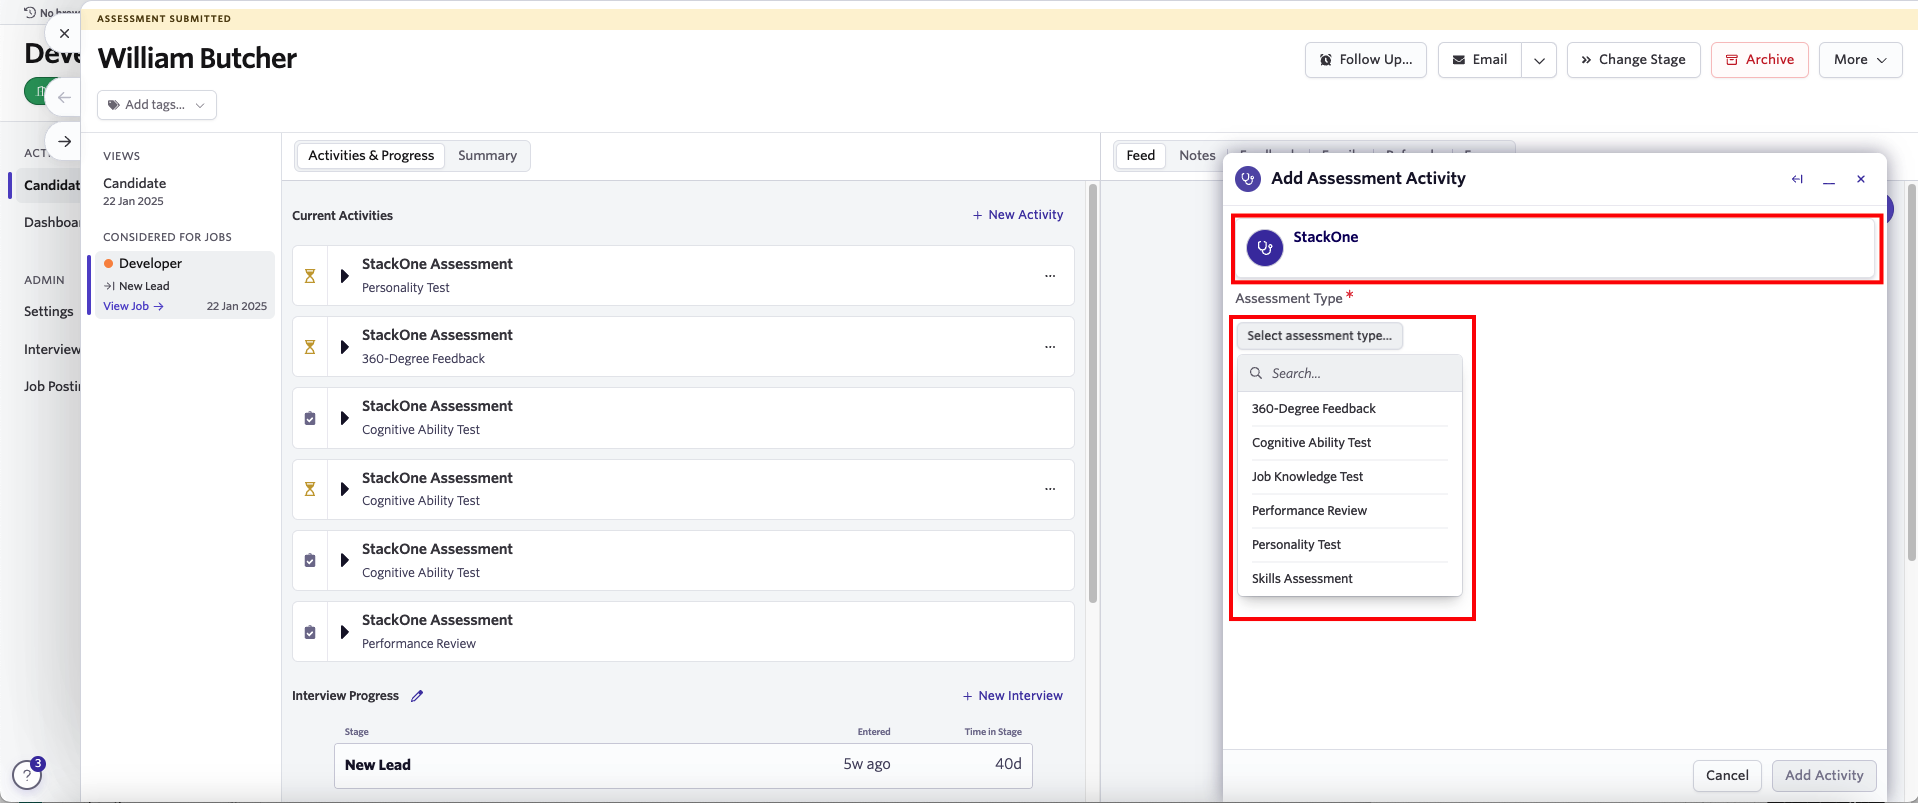
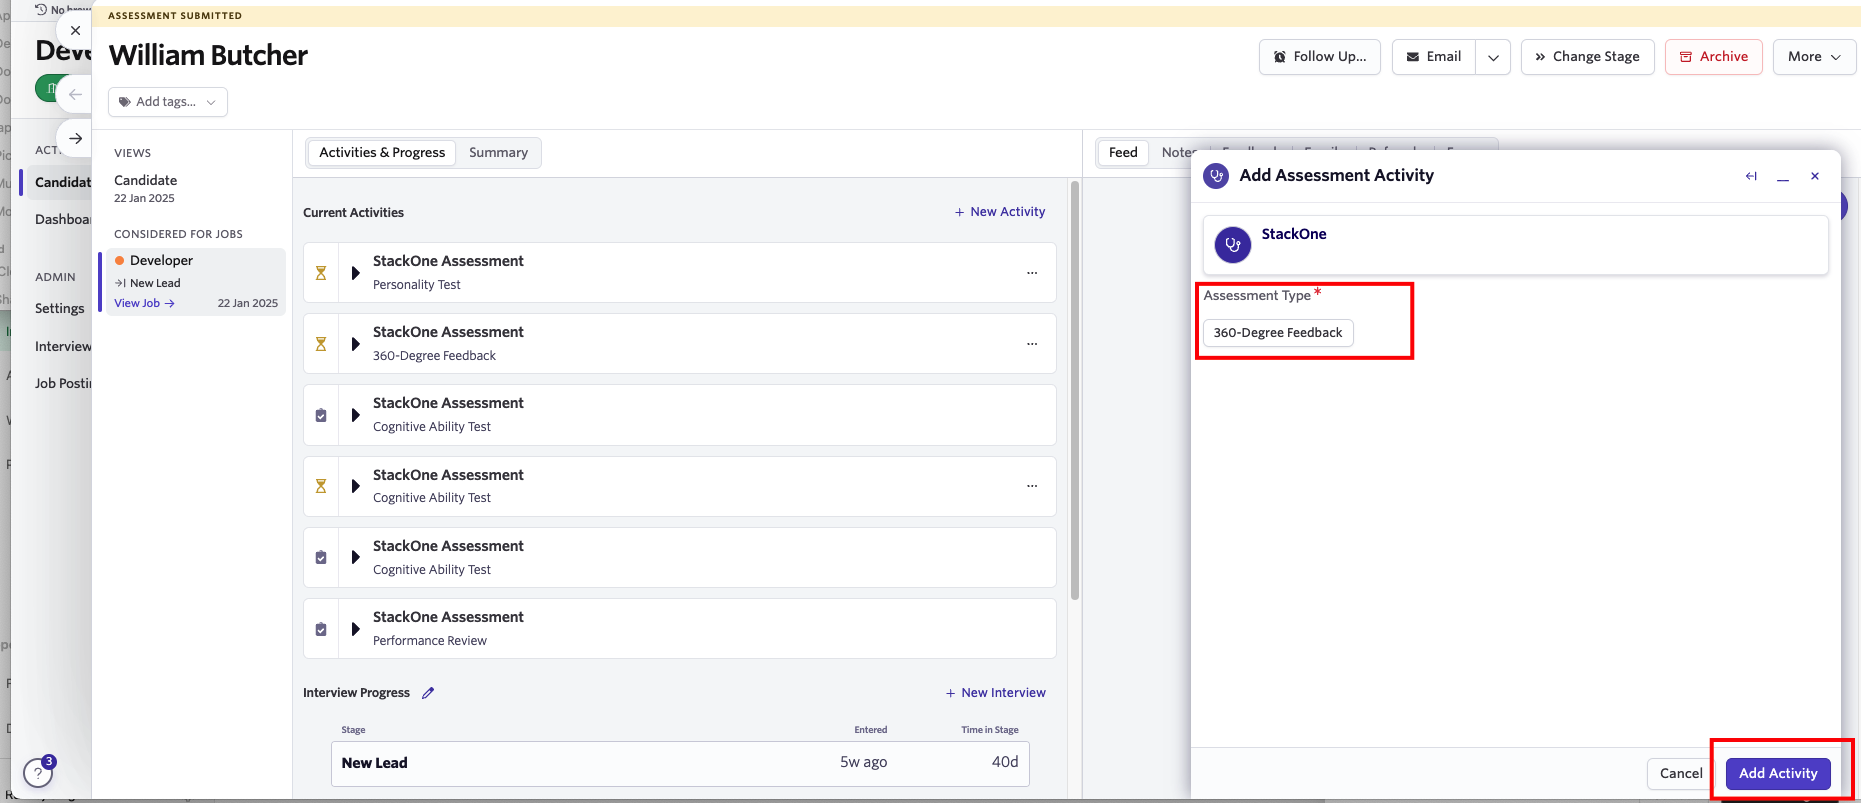
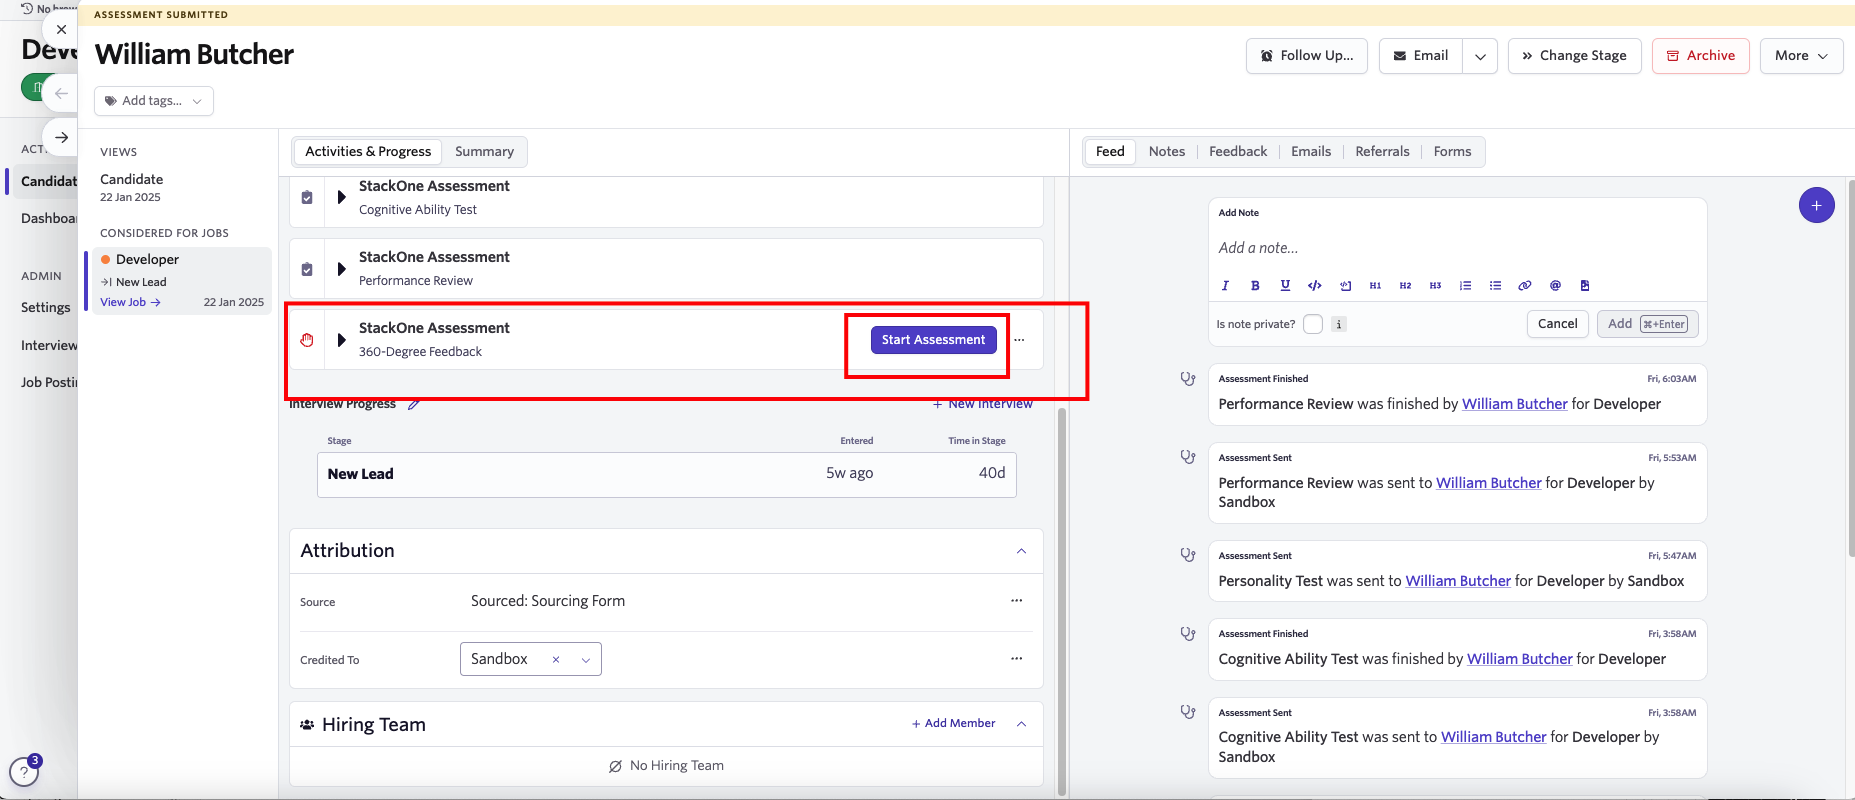
New Activity to add an background check at this stage. Click on Assessment that appears after New Activity is clicked.Add Assessment Activity pop up. Please click on the Stackone assessment in Add Assessment Activity. Select the Assessment Type from the dropdown list.Add Activity button at the bottom right corner of the Add Assessment Activity.Start Assessment button in the Activity section.Sending StackOne background check test to a Candidate
1
To send an background check test to the candidate
Click the 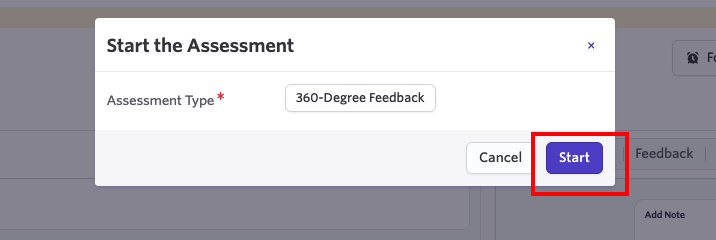
Start Assessment button in the Activity section of the selected candidate. A confirmation pop-up will appear, displaying the selected background check type. You can also modify the background check type using the dropdown list. Click Start to send the test.View Candidate’s Result in Ashby
1
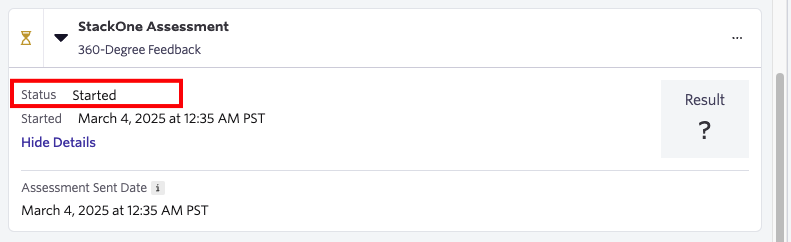
To get the result details
A detailed result, along with a 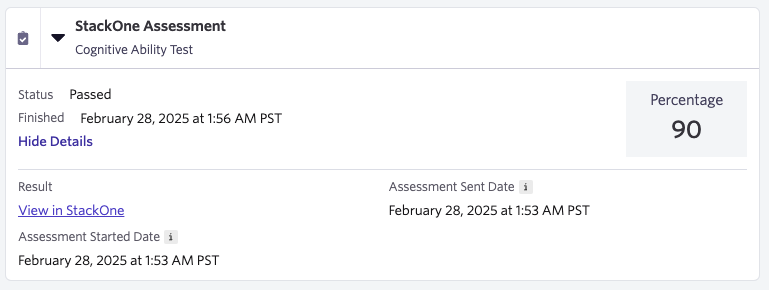
Full Report link, will appear once the candidate has completed the assessment