Ensure you have Admin privileges for your Braze account.
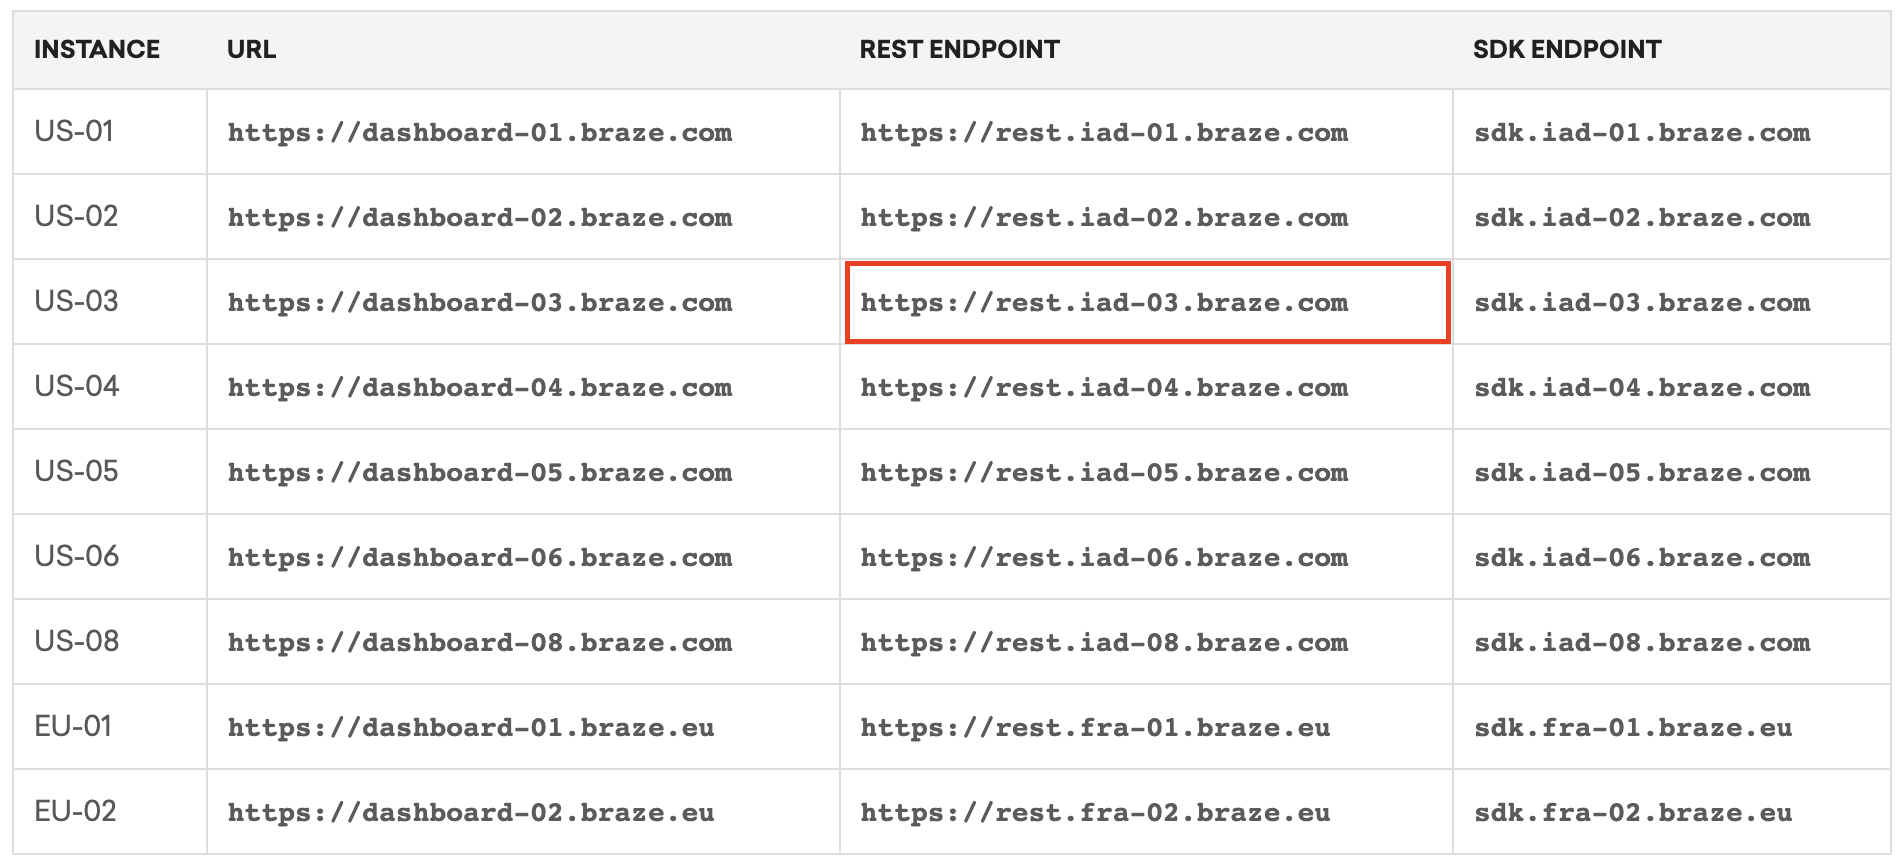
Finding your Instance URL
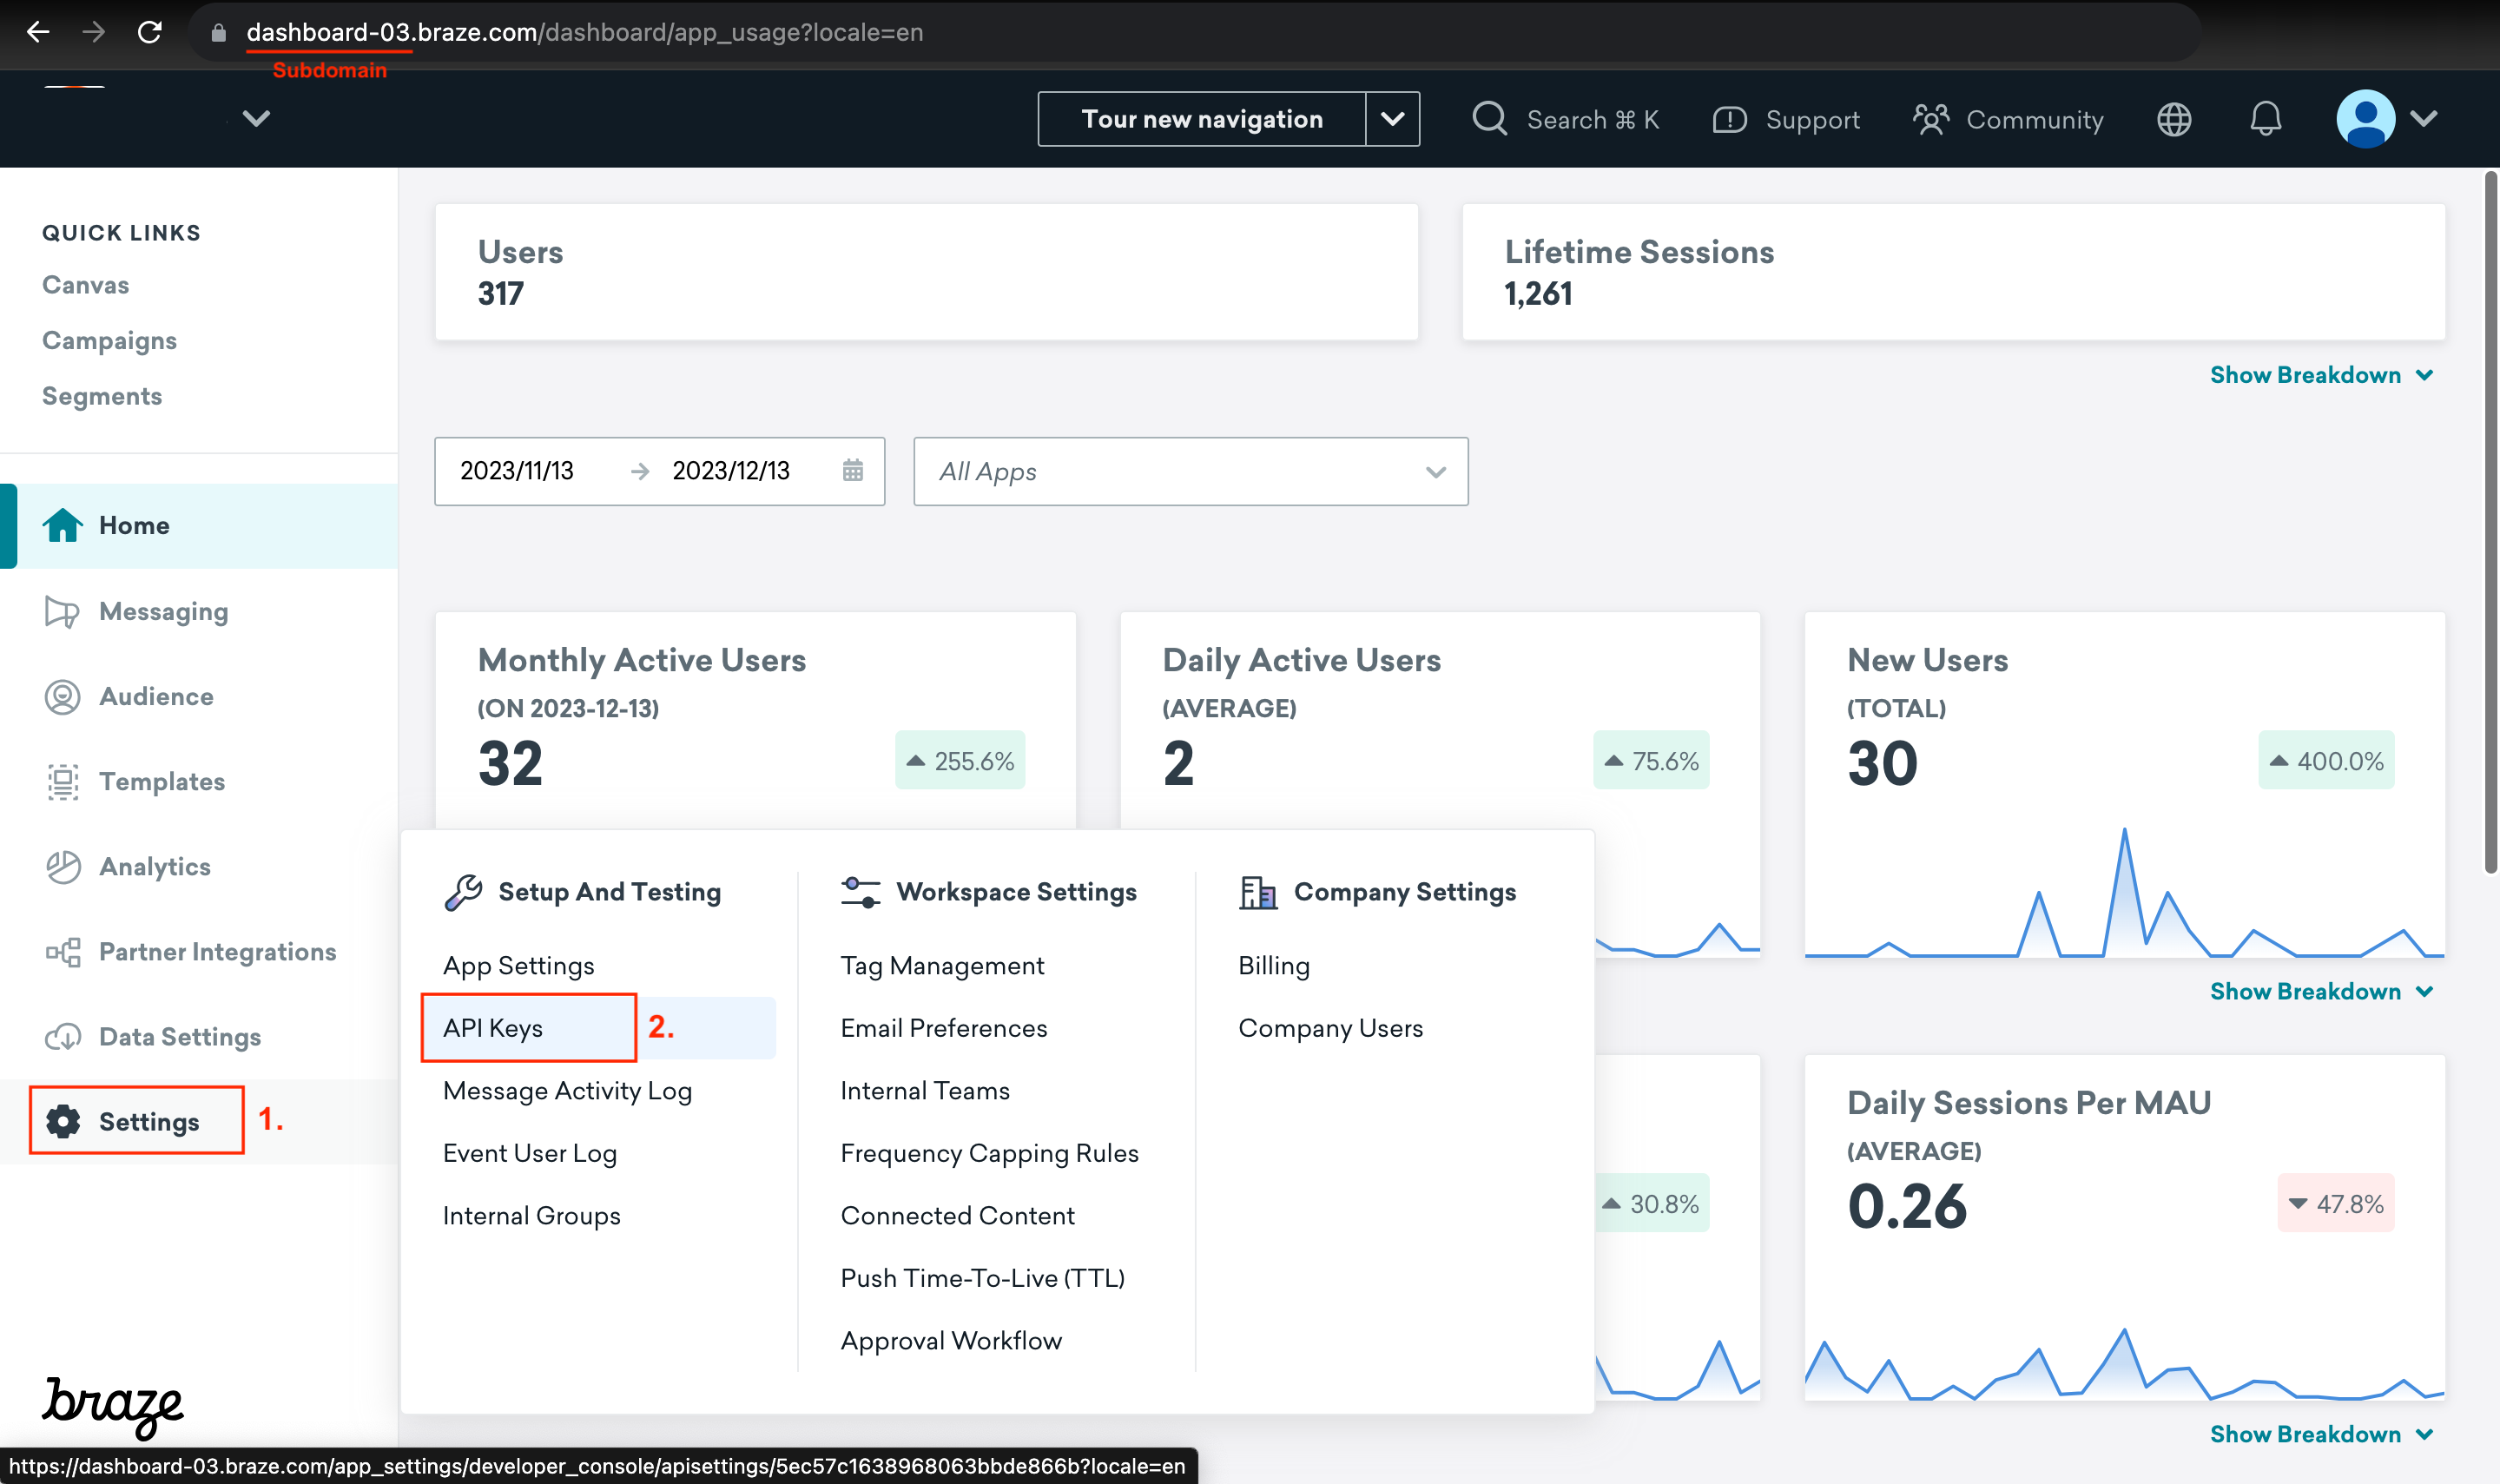
Login to Braze dashboard
Login to your Braze dashboard.
Note the subdomain
Note the subdomain in your browser’s URL bar (e.g., dashboard-03).
Select and copy Rest Endpoint
Select and copy the Rest Endpoint that matches your subdomain under URL. E.g., if our subdomain is dashboard-03, the rest endpoint would be https://rest.iad-03.braze.com Generating your API Key
Navigate to API Keys
On the Braze dashboard, select Settings from the left menu and choose API Keys. Create New API Key
Select Create New API Key. Enter API Key Name
Enter any API Key Name.
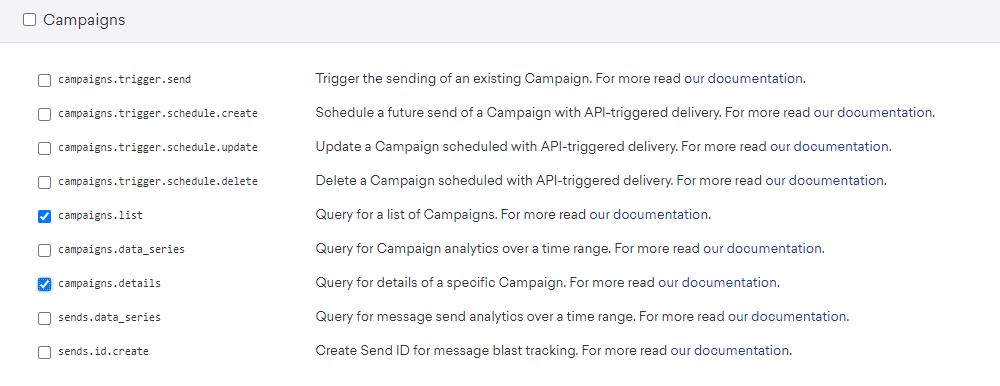
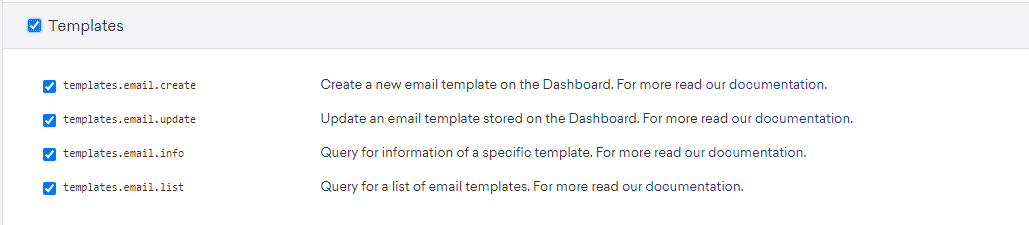
Enable Permissions
Enable the following permissions:
-
campaigns.list
-
campaigns.details
-
templates.email.create
-
templates.email.update
-
templates.email.info
-
templates.email.list
Save API Key
Select Save API Key.
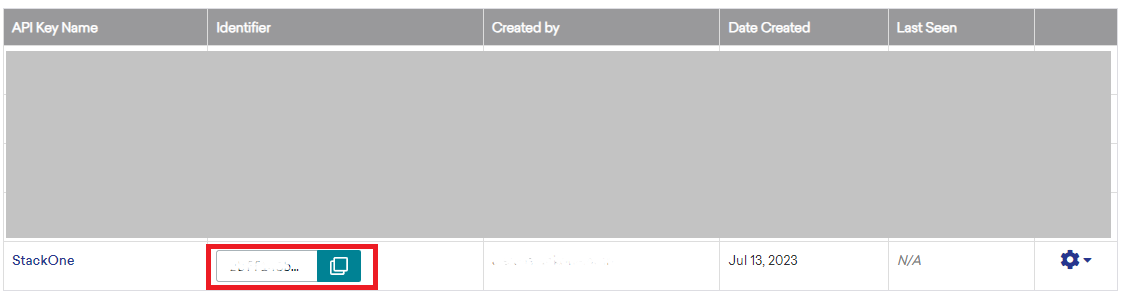
Copy the API Key
Your newly created API key will be listed under the Rest API Keys table. Copy the Identifier from the table. This will be your API Key. Linking Braze to StackOne
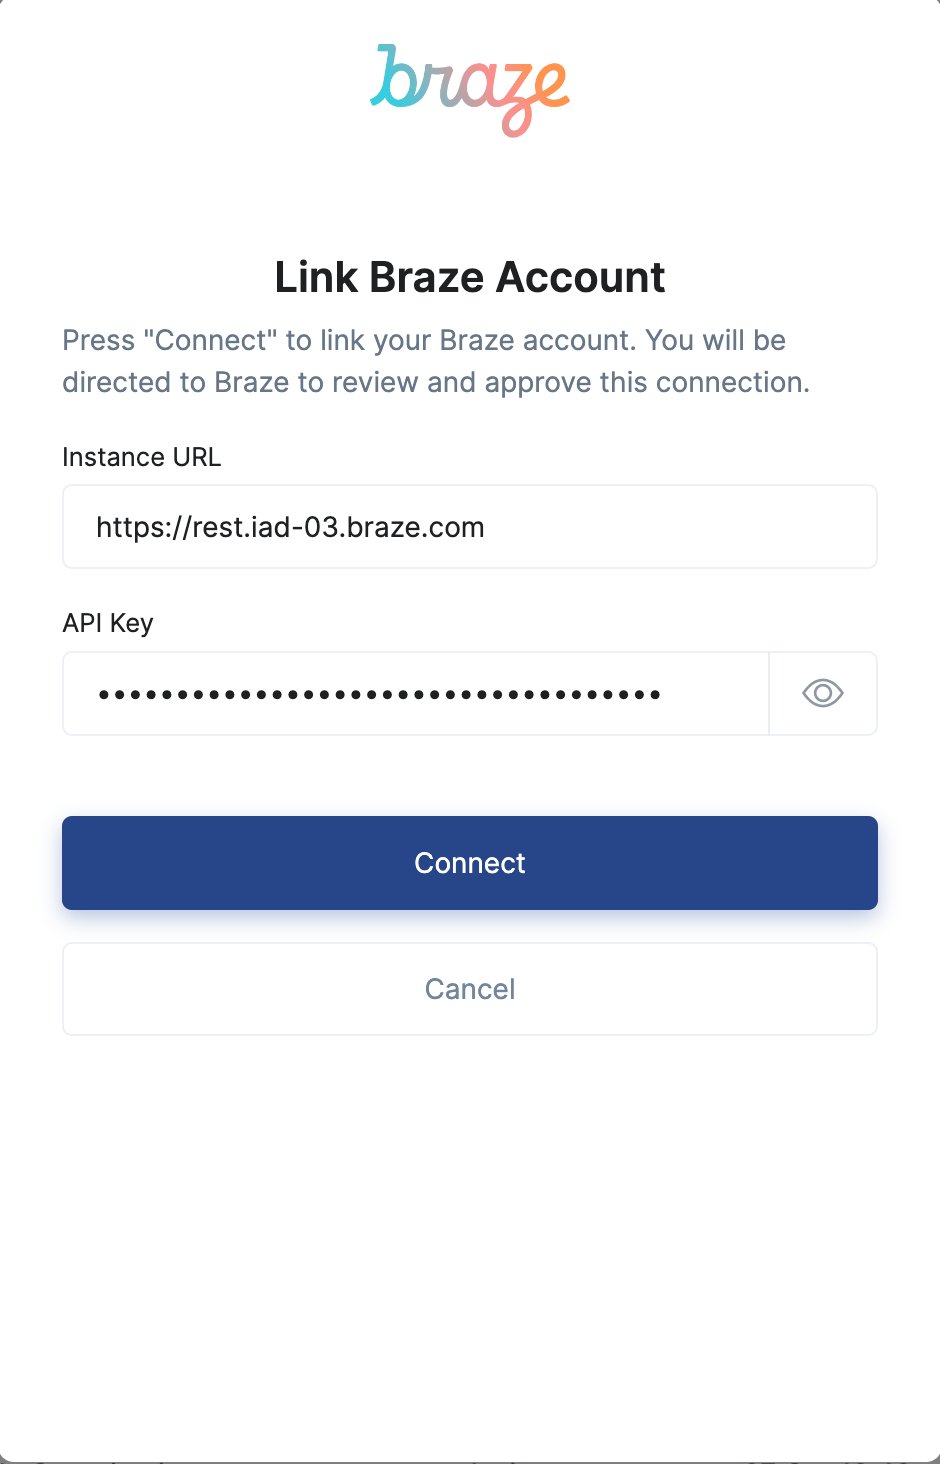
Enter the Details
Upon reaching the Link Account page, enter the gathered details and proceed by clicking the Connect button. Useful Links