> ## Documentation Index
> Fetch the complete documentation index at: https://hub.stackone.com/llms.txt
> Use this file to discover all available pages before exploring further.
# Docebo
> If you've been directed to StackOne to integrate with Docebo, the following steps will help you understand the process and any necessary actions to configure successful integration.
This guidance assumes you have Admin privileges for your Docebo account.
## Create Integrations App
Log into your Docebo account.
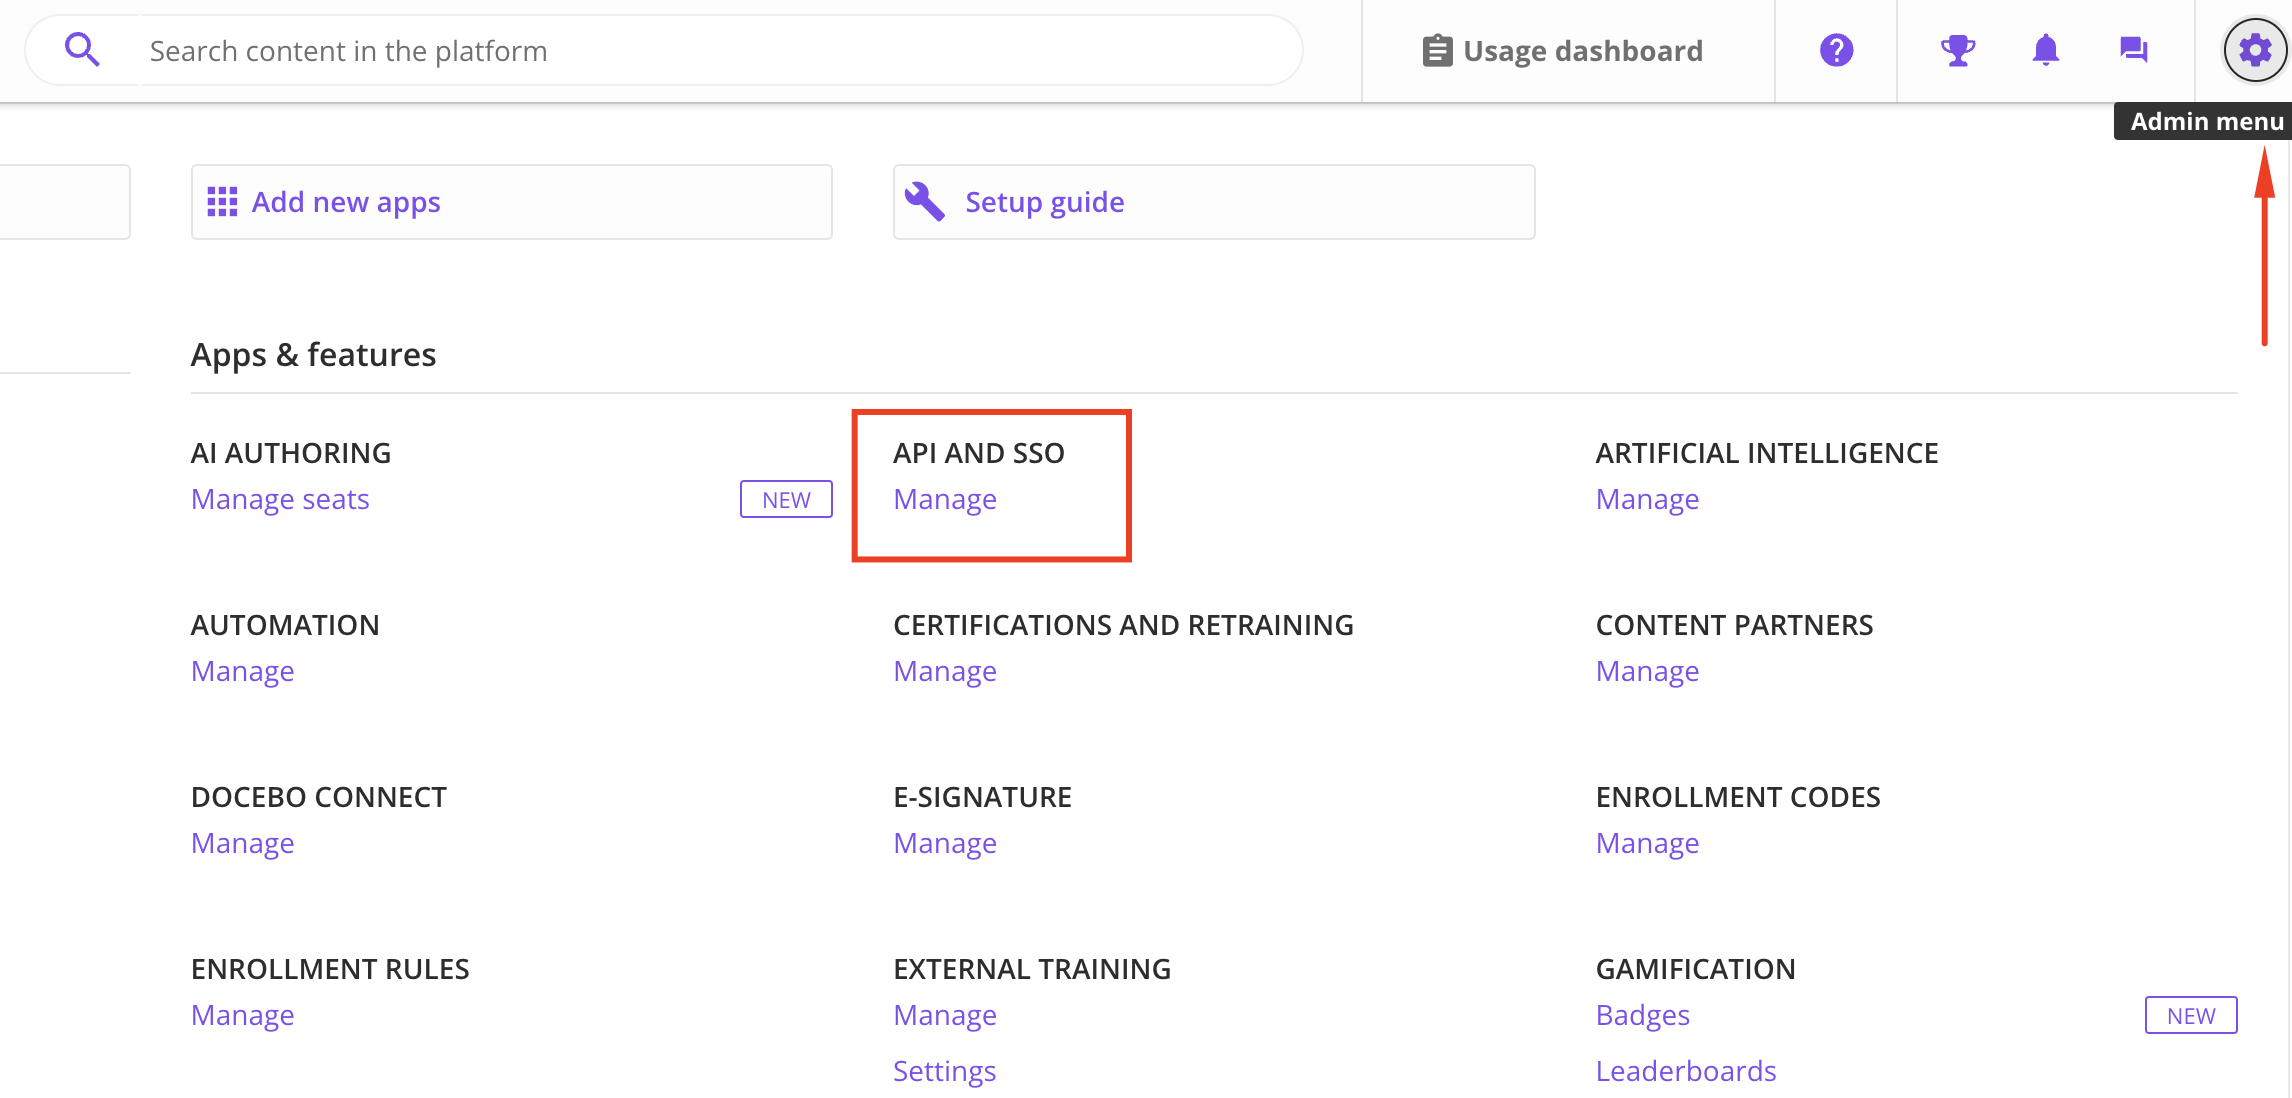
Click on `Admin Menu` in the top right corner.
Select `Manage` under `API AND SSO`.
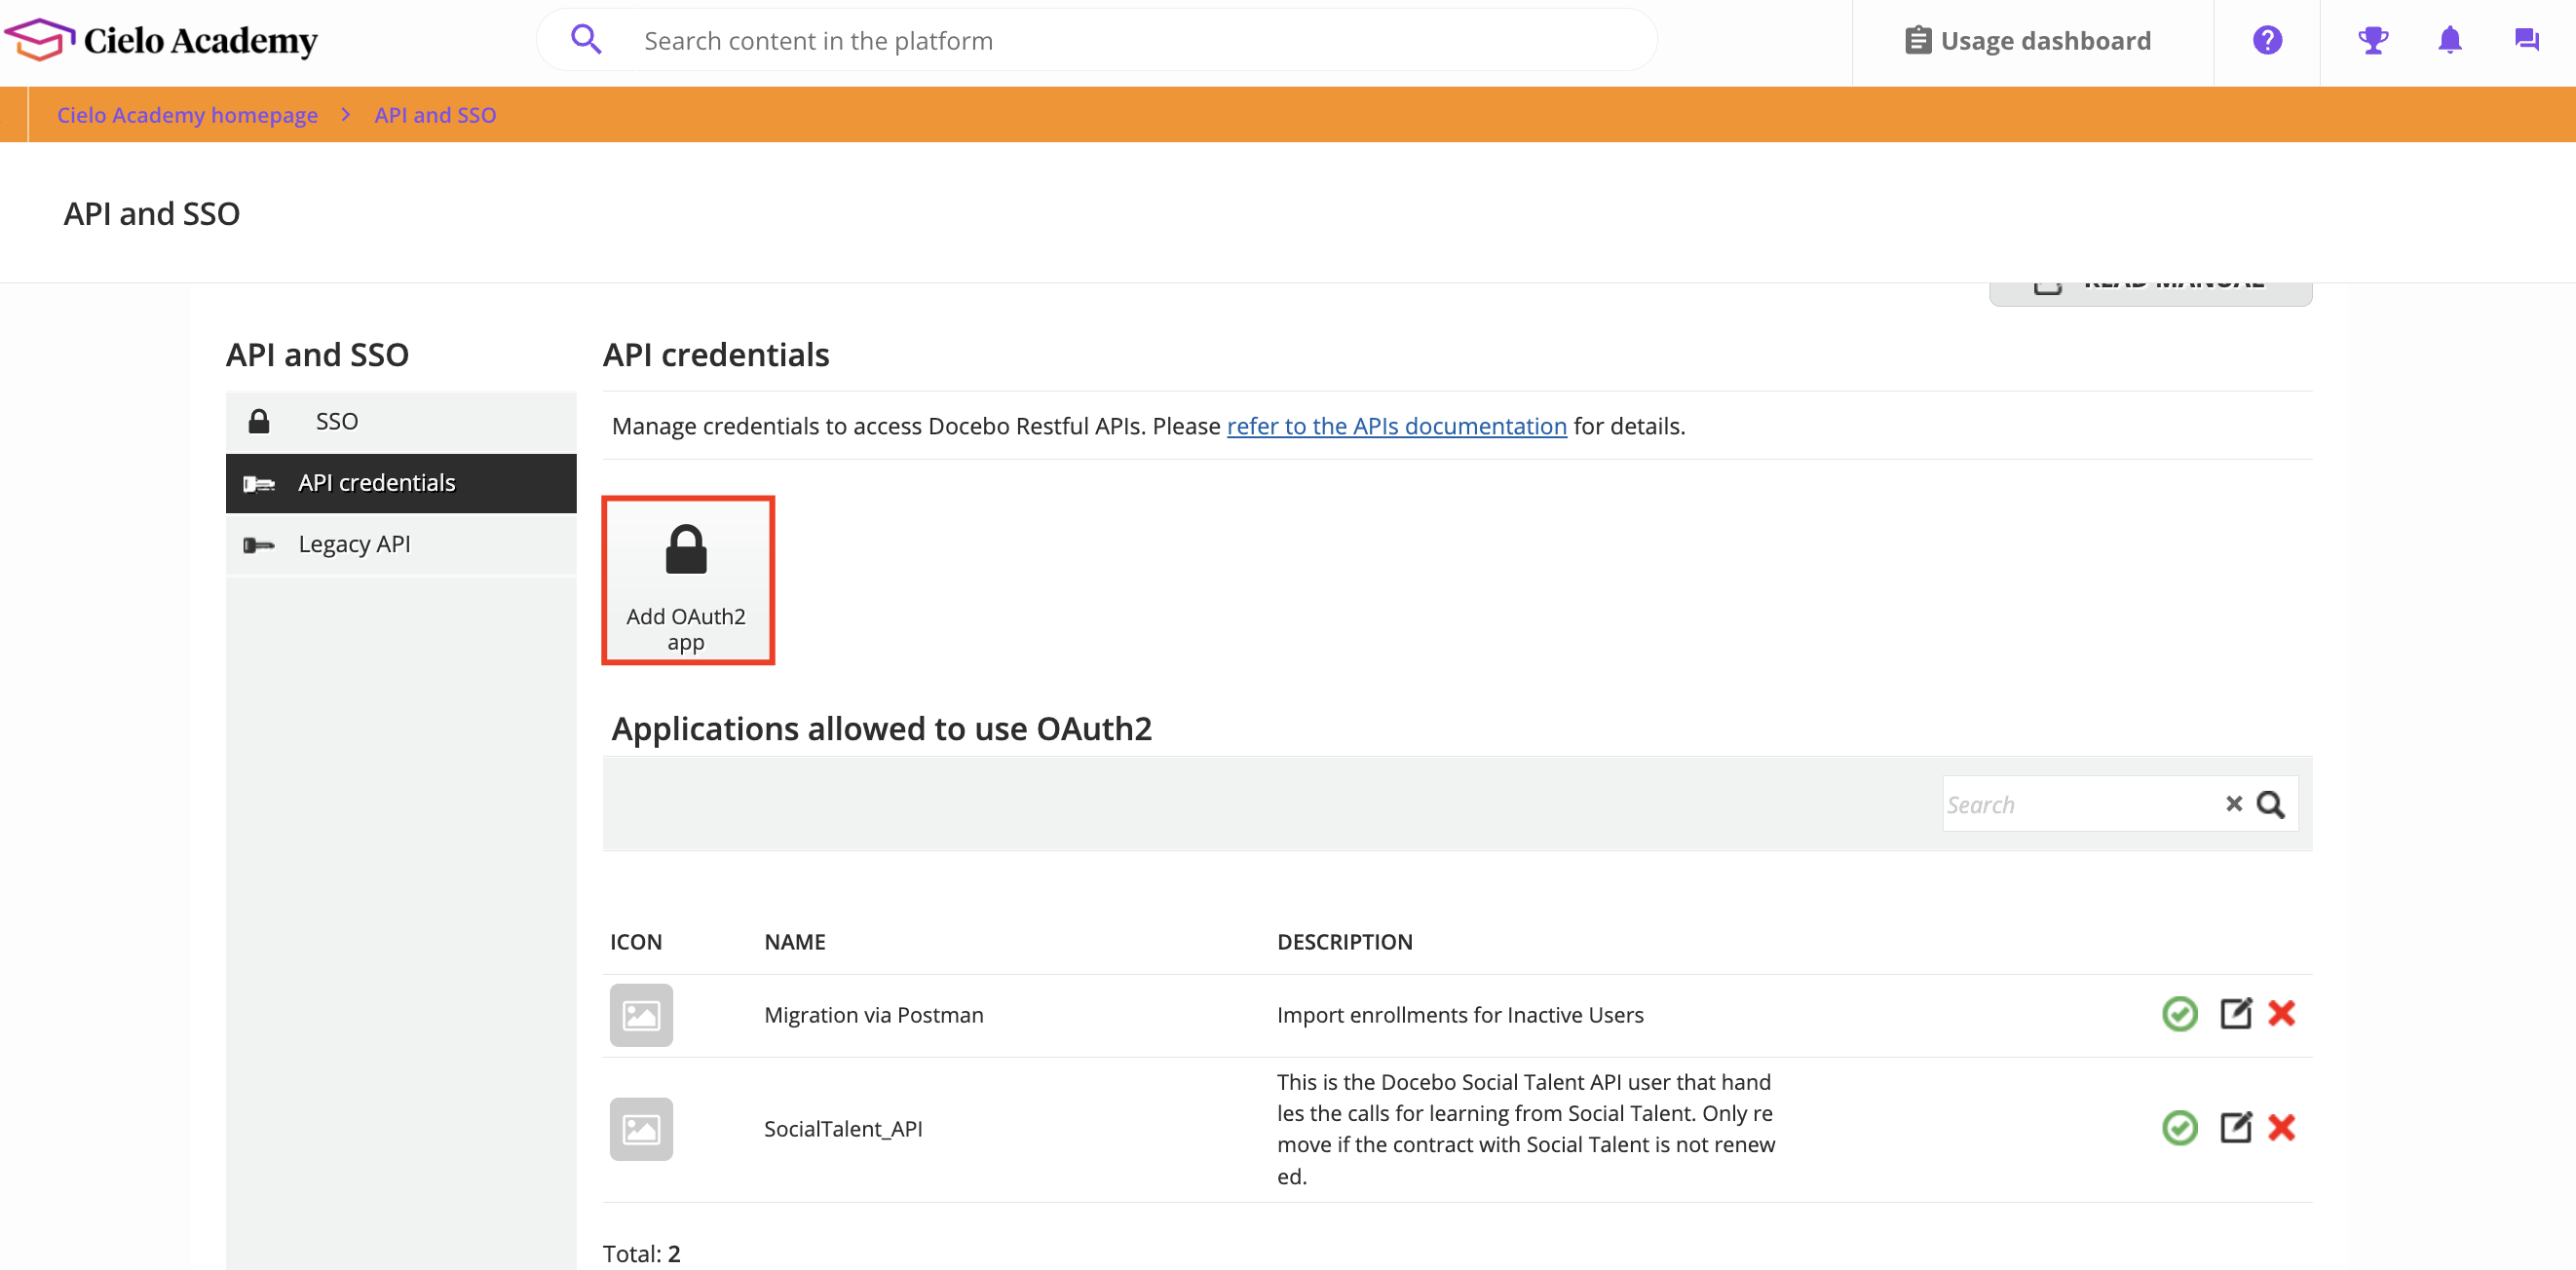
 From the `API and SSO` menu on the left of the screen select `API Credentials`.
Configure a new authentication app by selecting `Add OAuth2 App`.
From the `API and SSO` menu on the left of the screen select `API Credentials`.
Configure a new authentication app by selecting `Add OAuth2 App`.
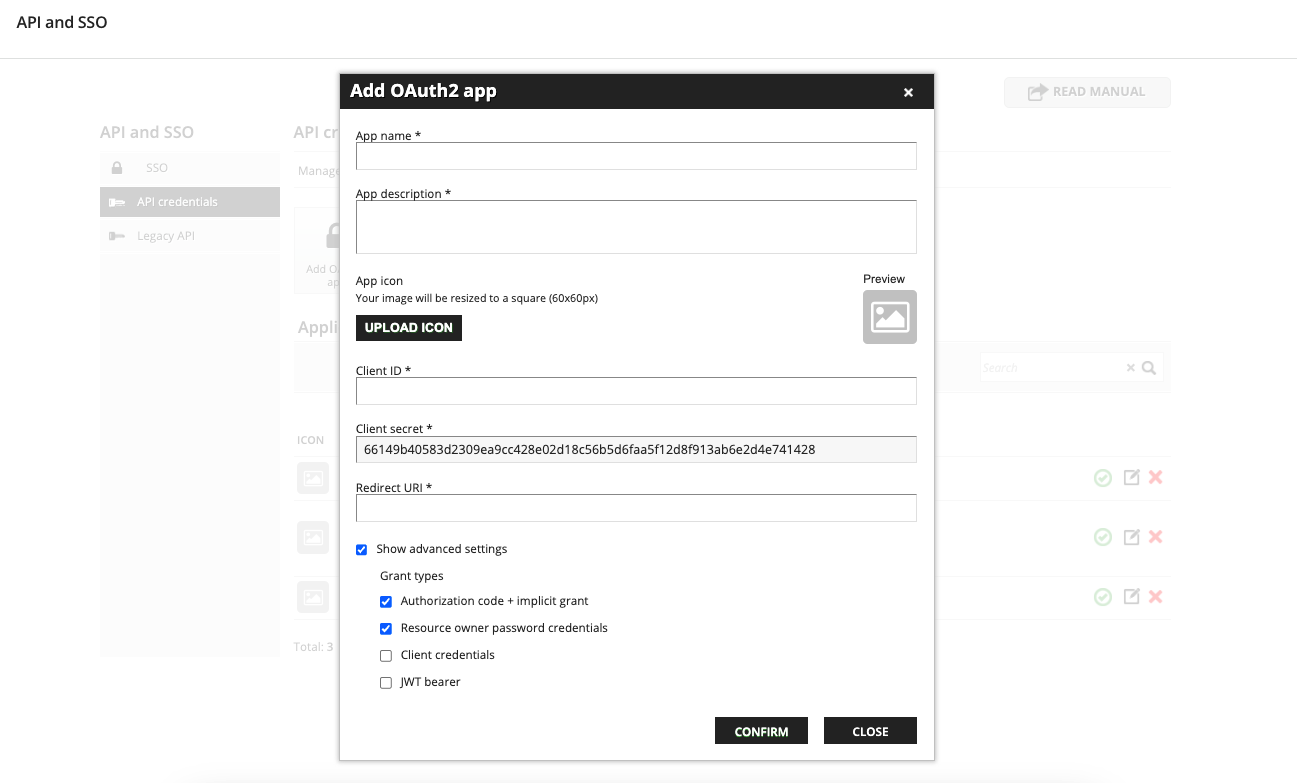
 Enter the name of the app (e.g. Production, Development)
Enter `Description` and `Client ID`.
Enter the Redirect URI (e.g. Production: [https://api.stackone.com/connect/oauth2/docebo/callback](https://api.stackone.com/connect/oauth2/docebo/callback))
`Production: https://api.stackone.com/connect/oauth2/docebo/callback`
Select the required `Grant Types`.
Record the `Client ID` and `Client Secret` for use in the next steps.
Click `Confirm`.
Enter the name of the app (e.g. Production, Development)
Enter `Description` and `Client ID`.
Enter the Redirect URI (e.g. Production: [https://api.stackone.com/connect/oauth2/docebo/callback](https://api.stackone.com/connect/oauth2/docebo/callback))
`Production: https://api.stackone.com/connect/oauth2/docebo/callback`
Select the required `Grant Types`.
Record the `Client ID` and `Client Secret` for use in the next steps.
Click `Confirm`.
 Enable the OAuth app by clicking the green tick icon.
 You can find the domain by taking the root URL from the address bar of your Docebo account and only taking the part before .docebosaas.com and after the https\://.
E.g. If your url is `https://my-domain.docebosaas.com` the domain is `my-domain`.
You have the option to also push content to a specific Catalog as well as the system.
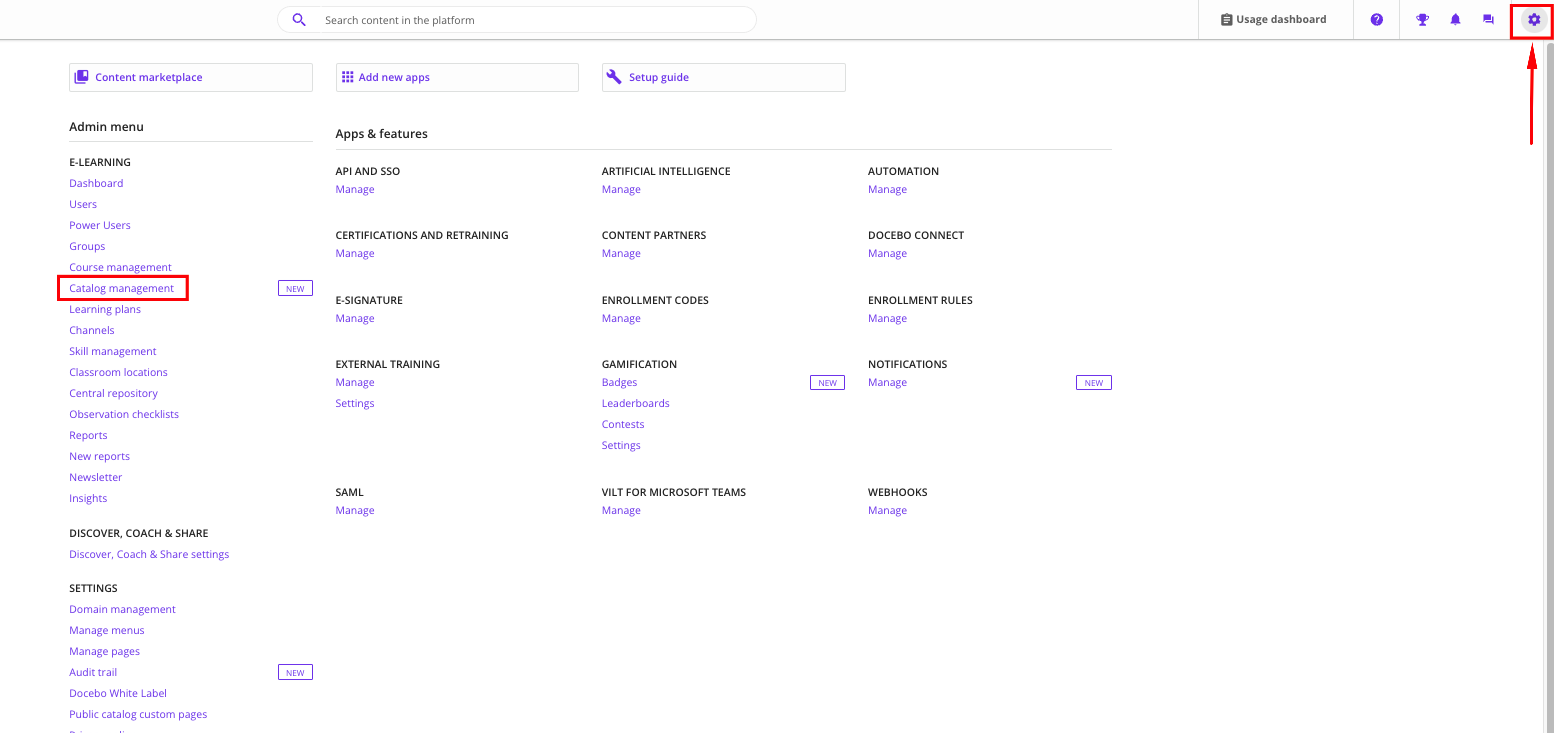
Navigate to `Admin Menu` and select `Catalog Management`.
You can find the domain by taking the root URL from the address bar of your Docebo account and only taking the part before .docebosaas.com and after the https\://.
E.g. If your url is `https://my-domain.docebosaas.com` the domain is `my-domain`.
You have the option to also push content to a specific Catalog as well as the system.
Navigate to `Admin Menu` and select `Catalog Management`.
 Click on the catalog where you would like to upload your content.
 The Catalog ID can be found in the address bar.
E.g. If your url is `https://my-domain.docebosaas.com/catalog/manage/catalogs/23/properties` the Catalog ID is `23`.
The Catalog ID can be found in the address bar.
E.g. If your url is `https://my-domain.docebosaas.com/catalog/manage/catalogs/23/properties` the Catalog ID is `23`.
 Go to `Admin Menu` → `Settings` → `Advanced Settings`.
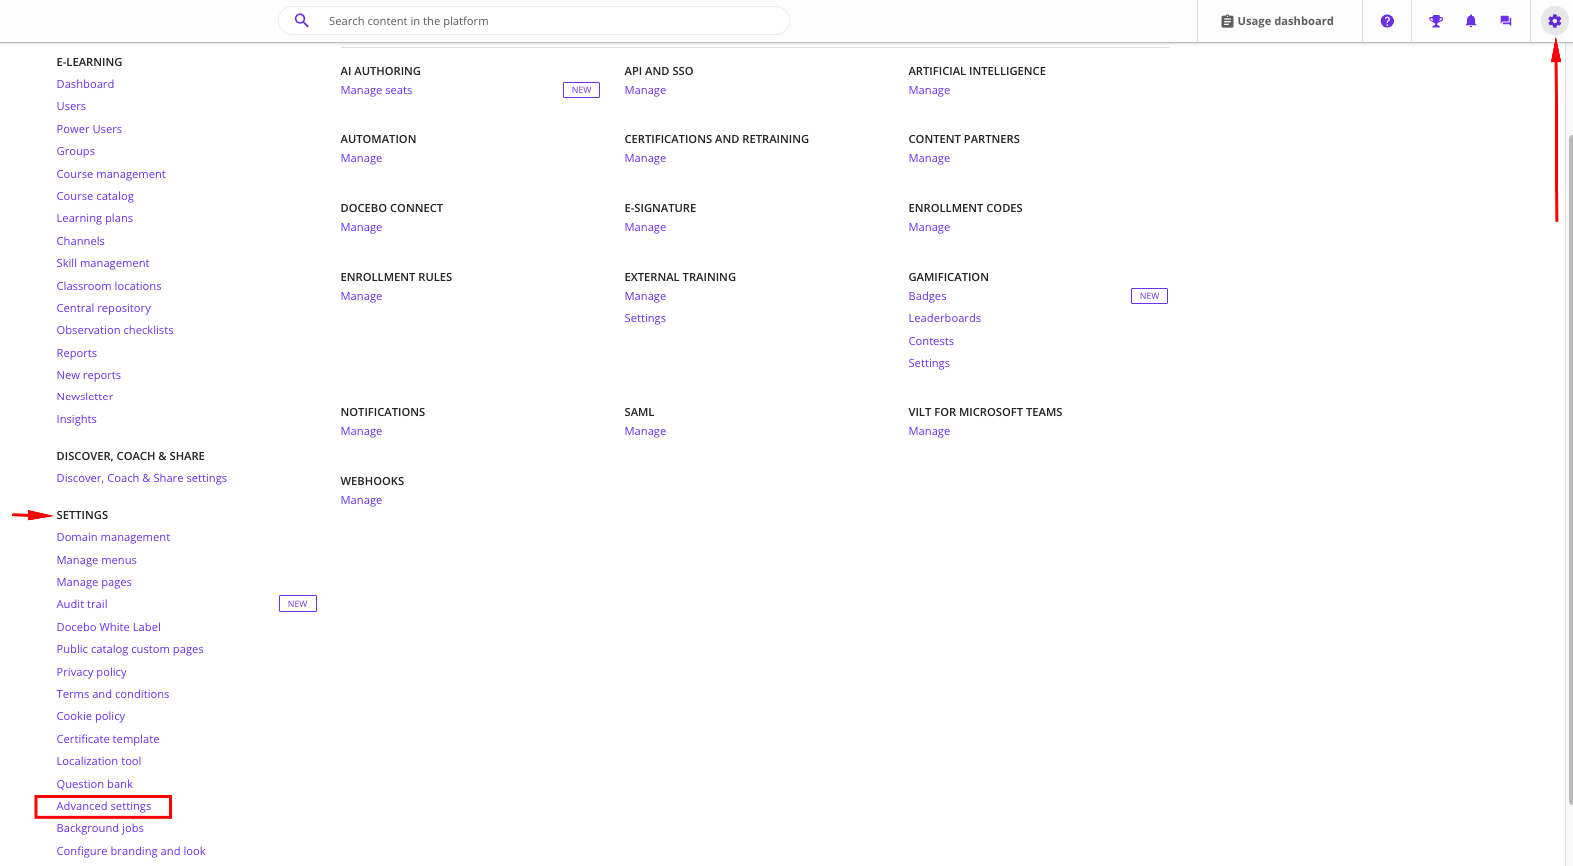 Select the `E-learning` tab and scroll down to `xAPI (Tin Can) external content`.
Add your content domain ( e.g., [https://www.test.com/](https://www.test.com/)\* ). You can configure up to 20 domains, and use wildcard (\*) if you want to upload full URLs.
Click `Add` and then `Save`.
Use this domain in the `content_url` field of your API request when upserting content.
Select the `E-learning` tab and scroll down to `xAPI (Tin Can) external content`.
Add your content domain ( e.g., [https://www.test.com/](https://www.test.com/)\* ). You can configure up to 20 domains, and use wildcard (\*) if you want to upload full URLs.
Click `Add` and then `Save`.
Use this domain in the `content_url` field of your API request when upserting content.
 ## Linking your Account
In the modal enter the `Client ID`, `Client Secret`, `Subdomain`, `Username`, `Password` and `Catalog Id` from the previous steps.
## Linking your Account
In the modal enter the `Client ID`, `Client Secret`, `Subdomain`, `Username`, `Password` and `Catalog Id` from the previous steps.
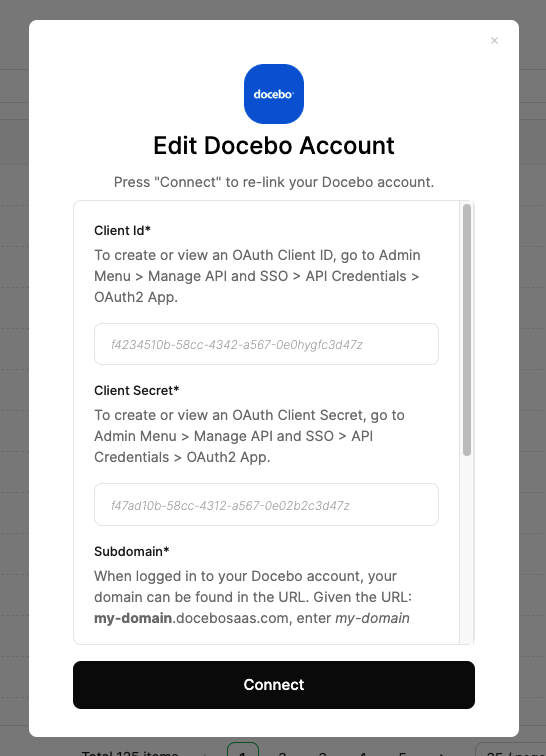
 Click `Connect`.