

Create Integrations App
1
Log into Docebo
Log into your Docebo account.
2
Navigate to API AND SSO
Click on 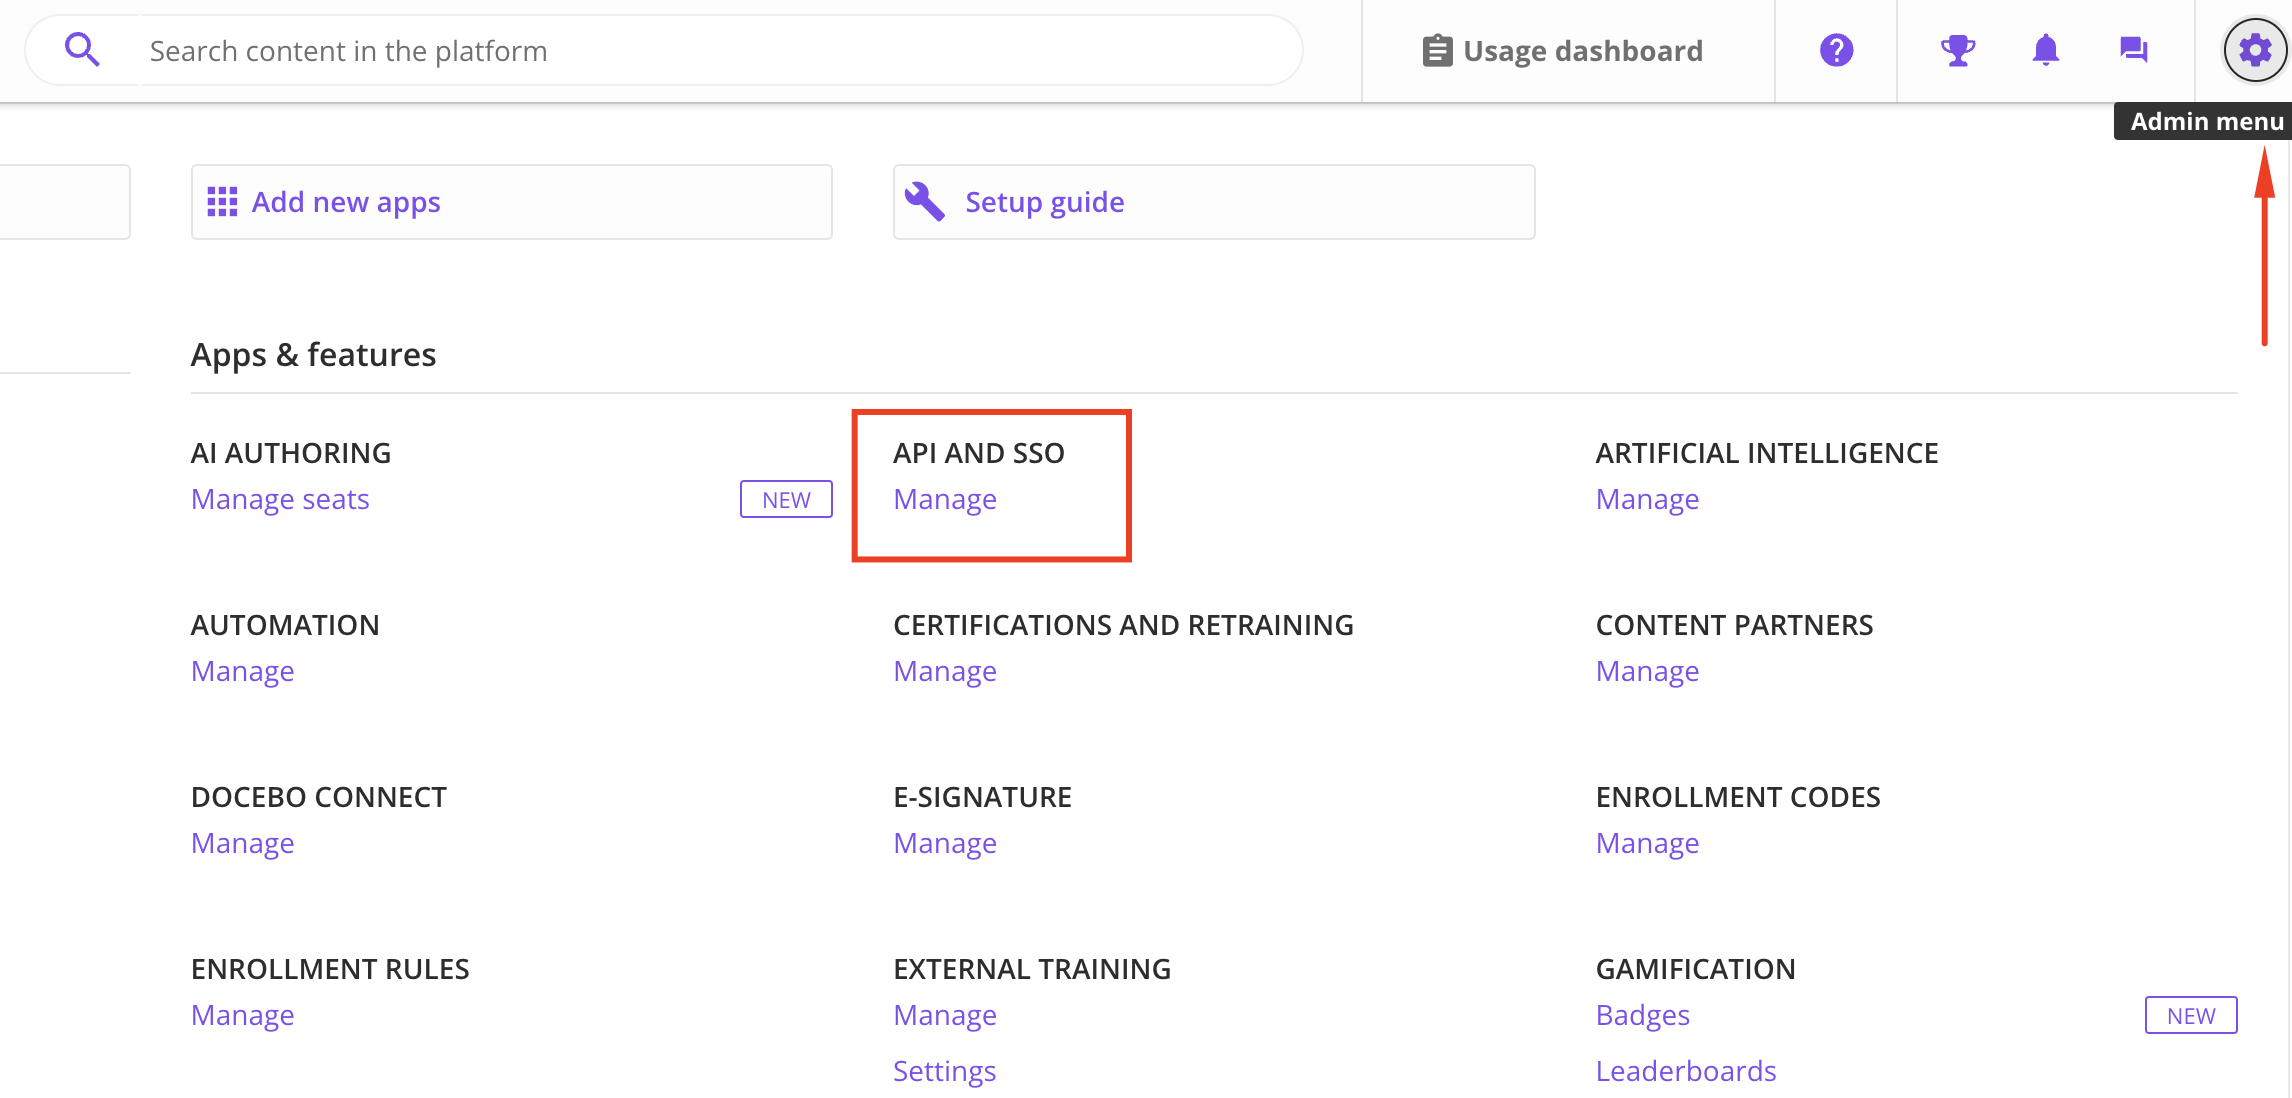
Admin Menu in the top right corner.Select Manage under API AND SSO.3
Add OAuth App
From the 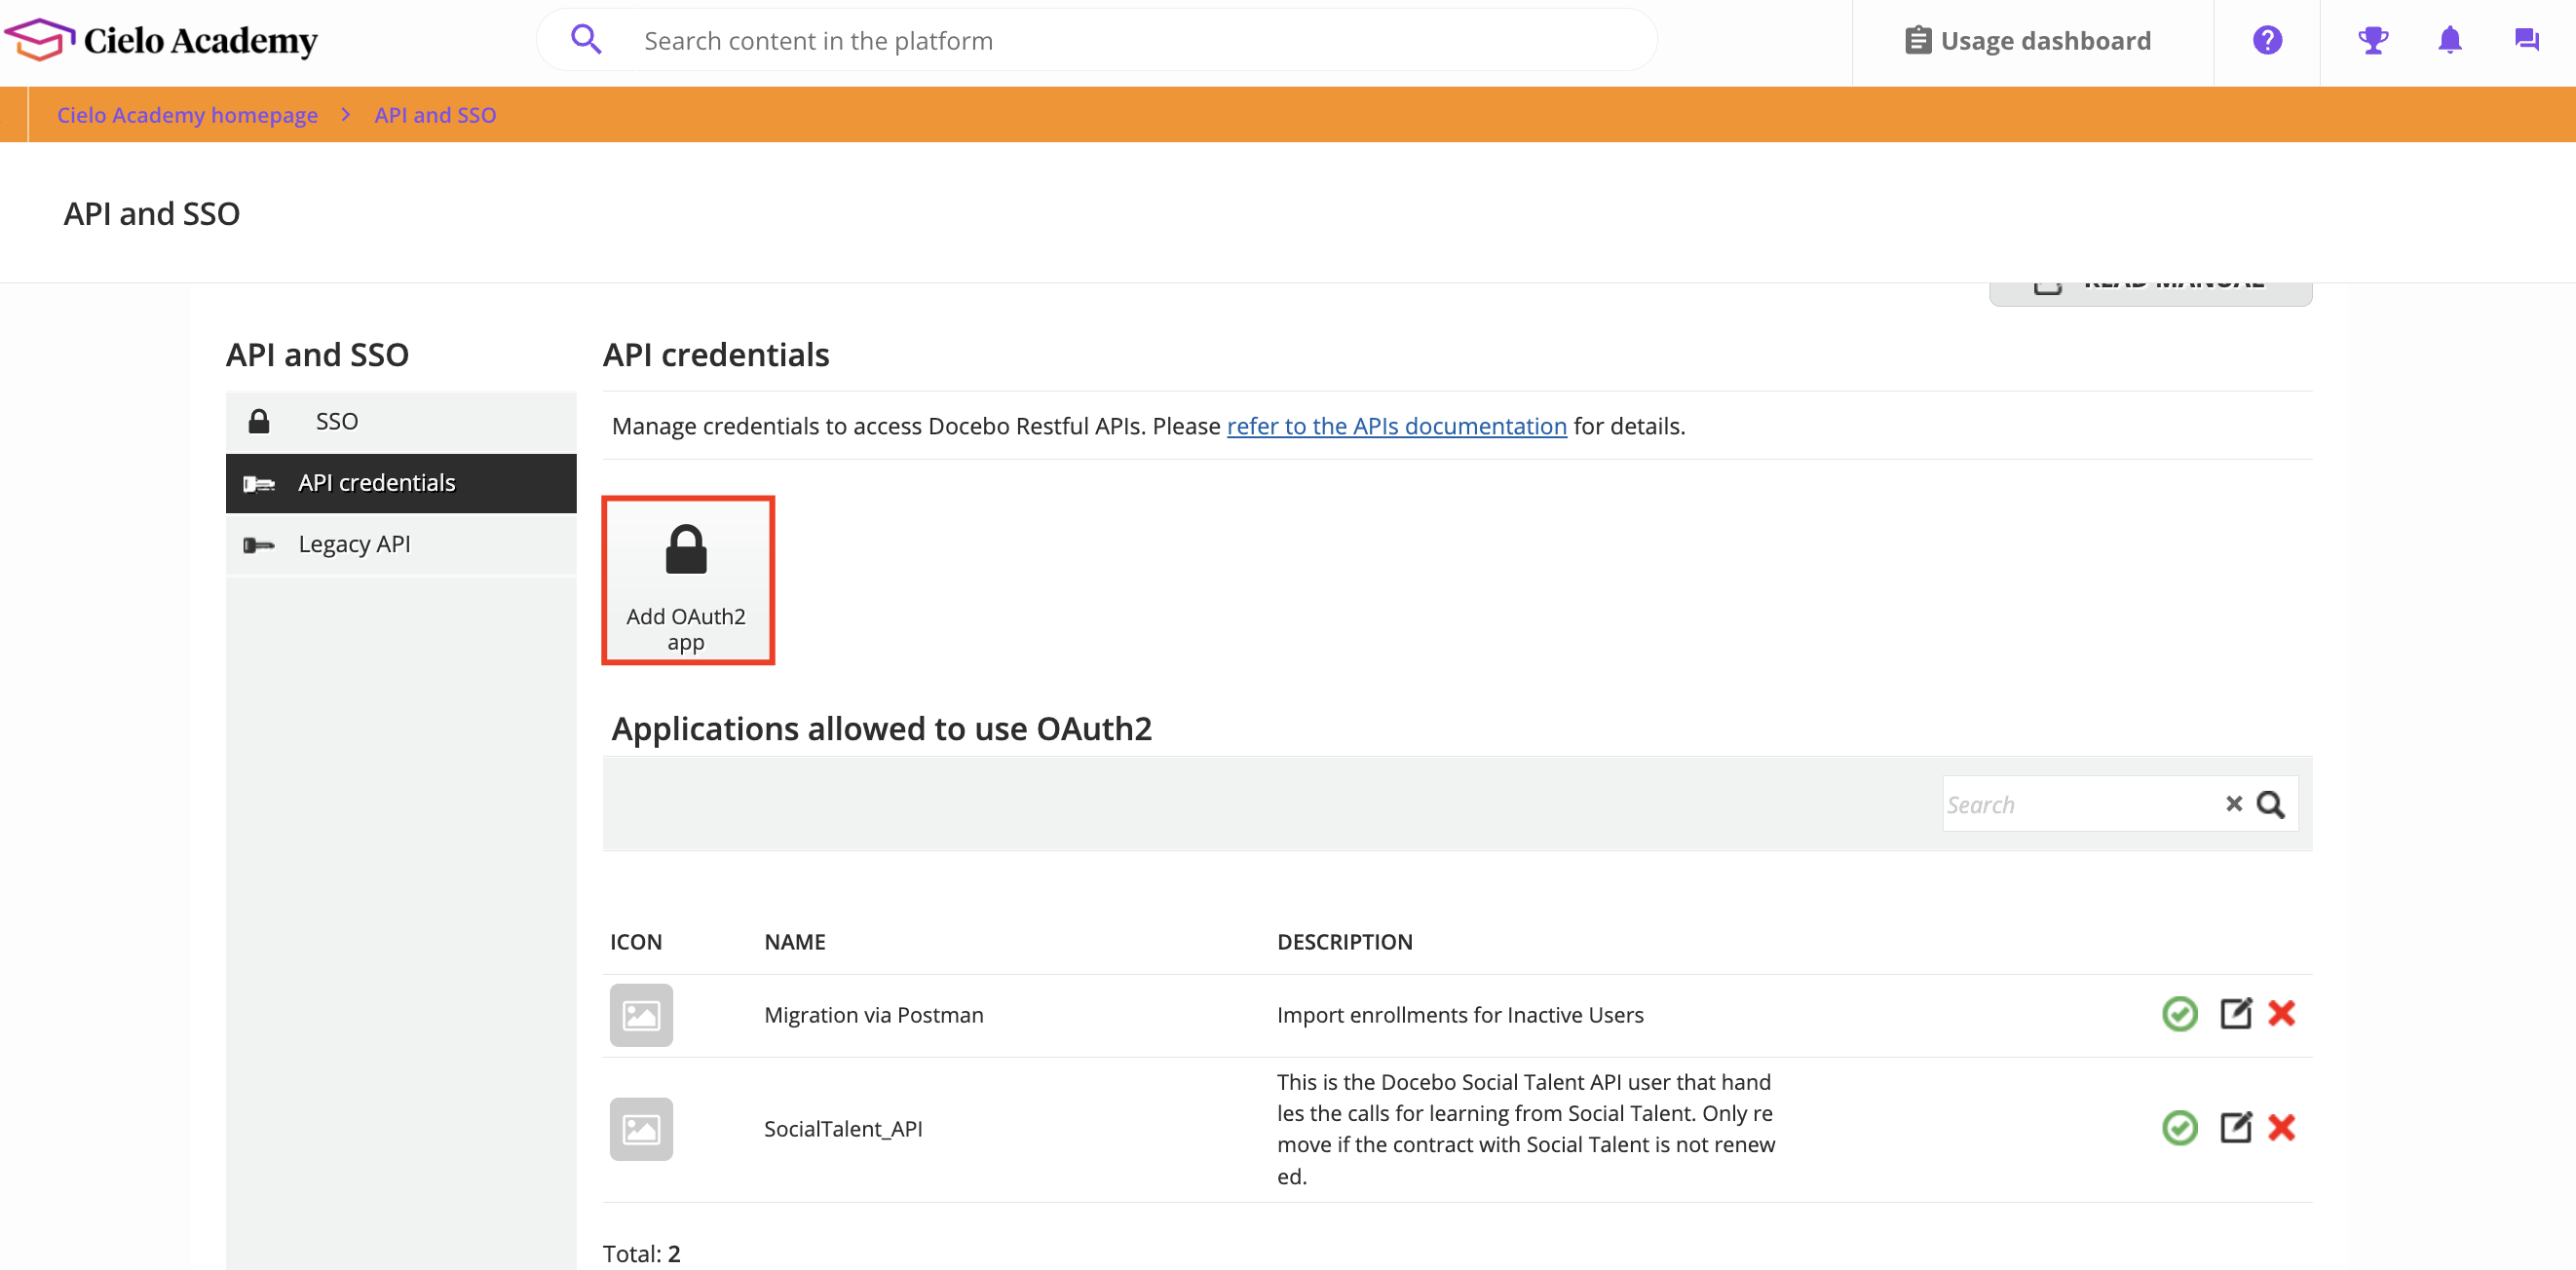
API and SSO menu on the left of the screen select API Credentials.Configure a new authentication app by selecting Add OAuth2 App.4
Create a New OAuth App
Enter the name of the app (e.g. Production, Development)Enter 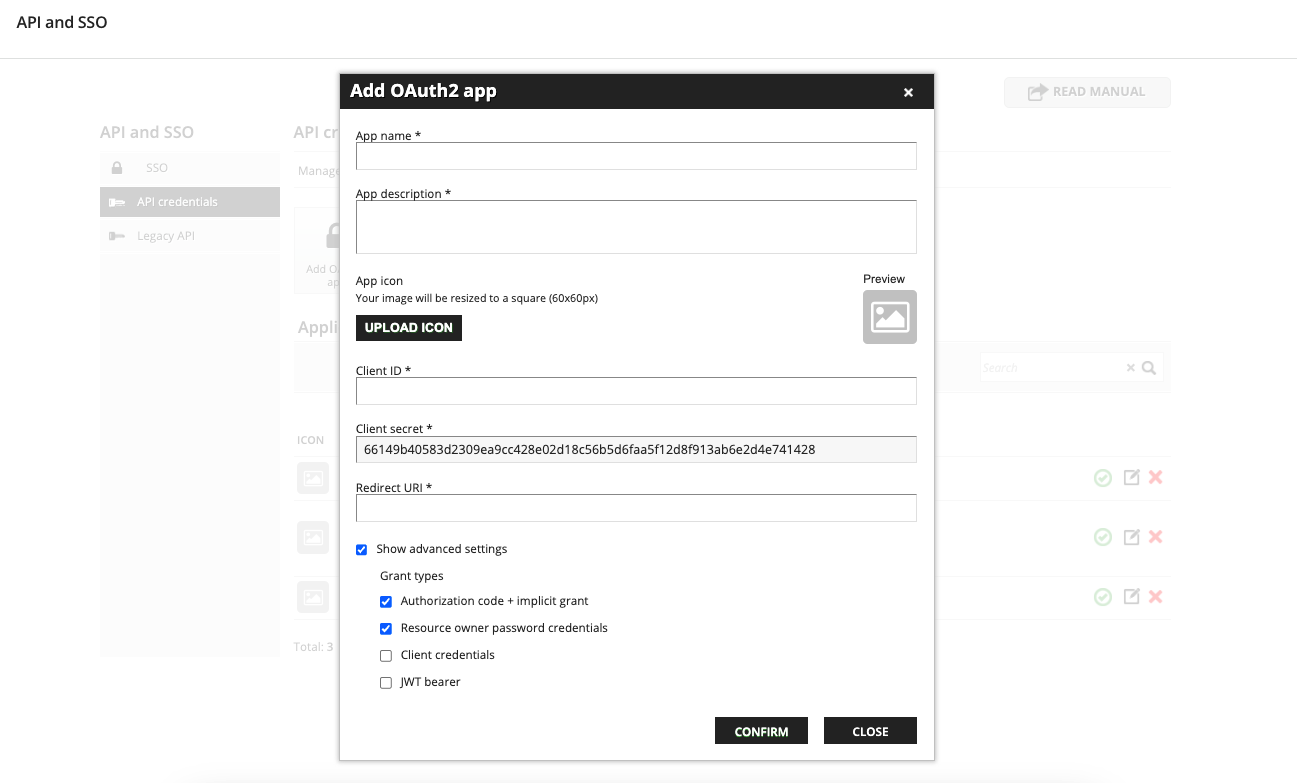
Description and Client ID.Enter the Redirect URI (e.g. Production: https://api.stackone.com/connect/oauth2/docebo/callback)Production: https://api.stackone.com/connect/oauth2/docebo/callbackSelect the required Grant Types.Record the Client ID and Client Secret for use in the next steps.Click Confirm.5
Enable the OAuth App
Enable the OAuth app by clicking the green tick icon.
6
Find Domain
You can find the domain by taking the root URL from the address bar of your Docebo account and only taking the part before .docebosaas.com and after the https://.E.g. If your url is
https://my-domain.docebosaas.com the domain is my-domain.7
Find Catalog ID
You have the option to also push content to a specific Catalog as well as the system.Navigate to 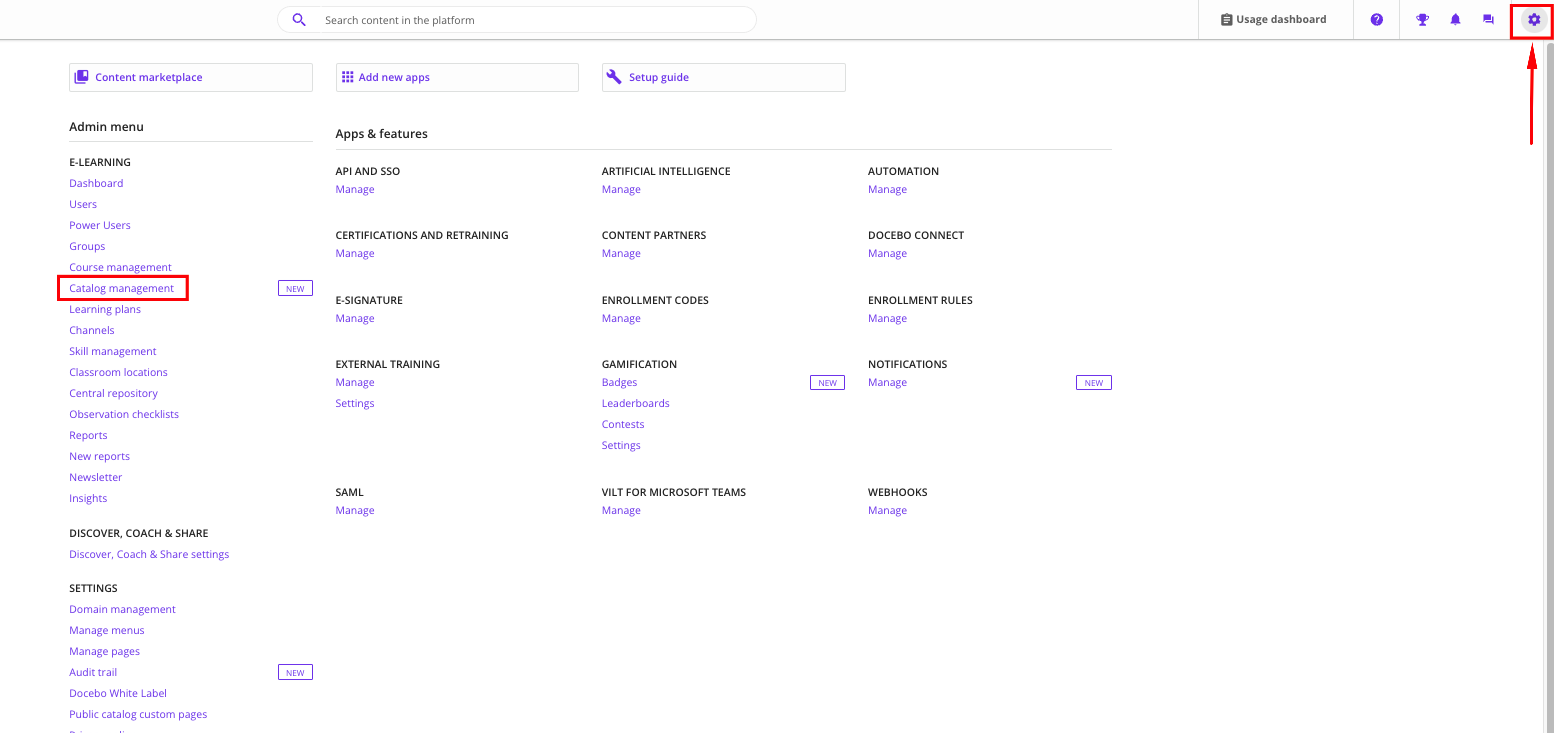
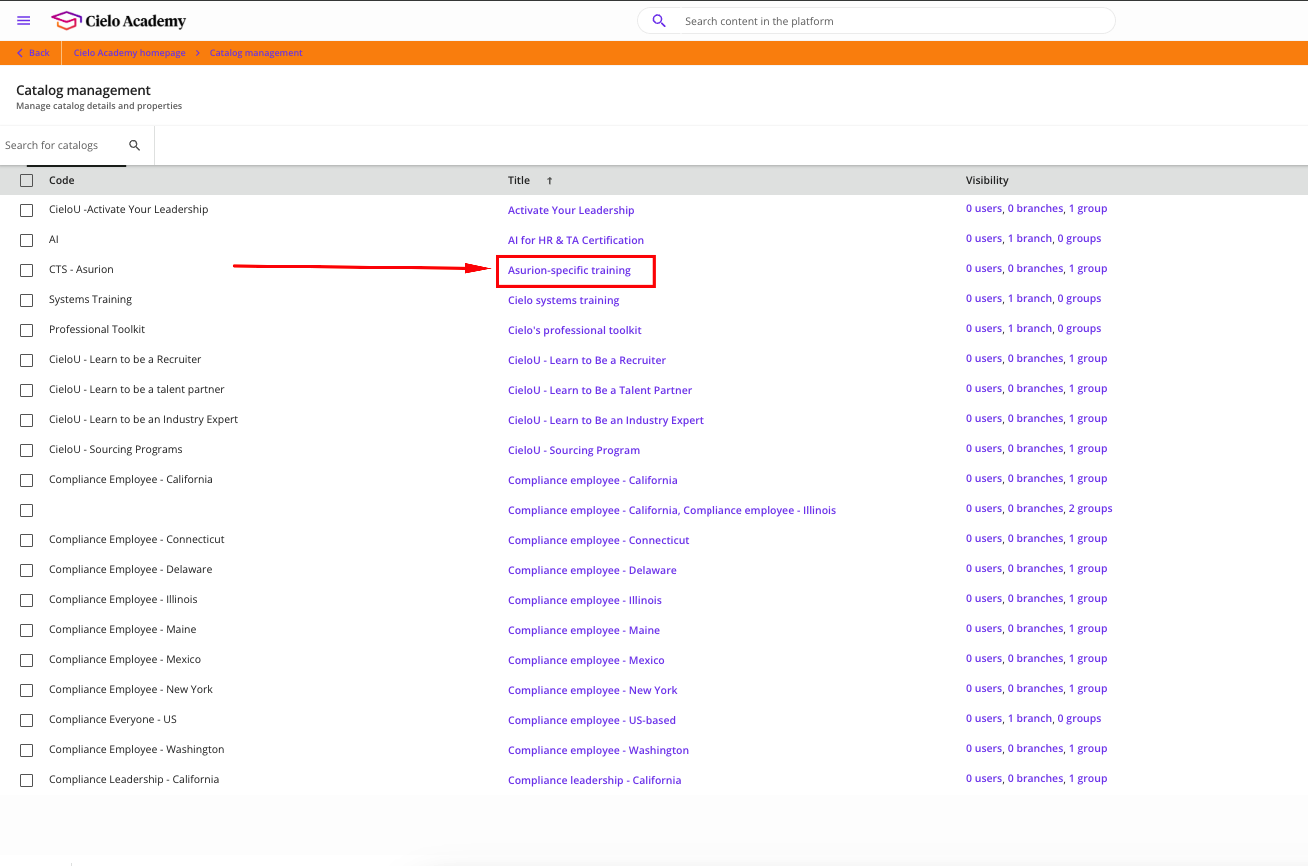
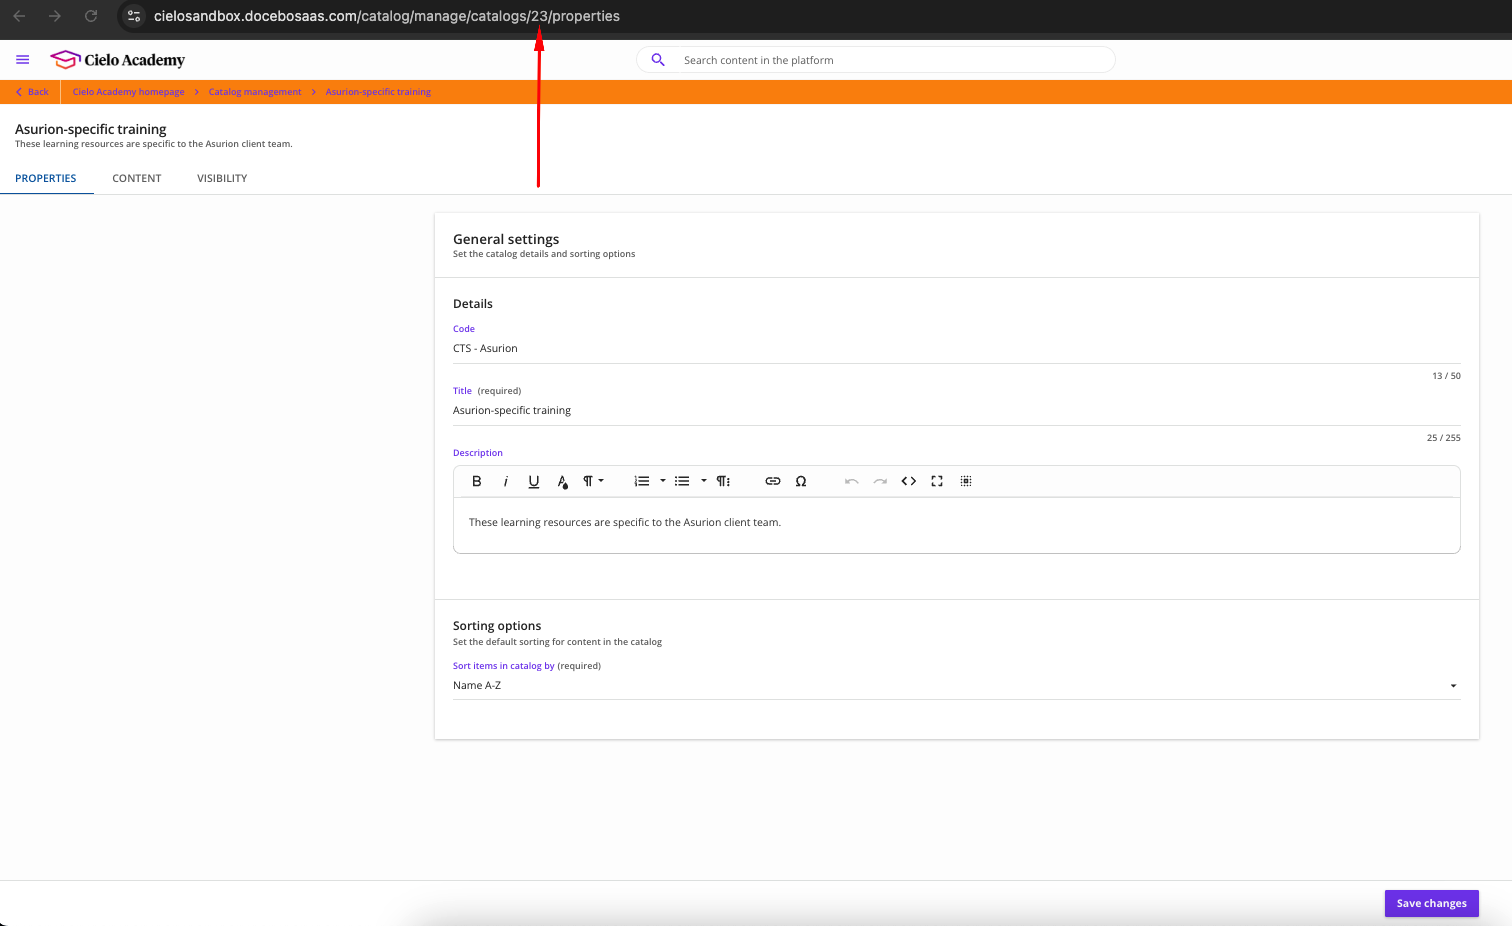
Admin Menu and select Catalog Management.https://my-domain.docebosaas.com/catalog/manage/catalogs/23/properties the Catalog ID is 23.8
Linking xAPI Content as Training Material
Go to 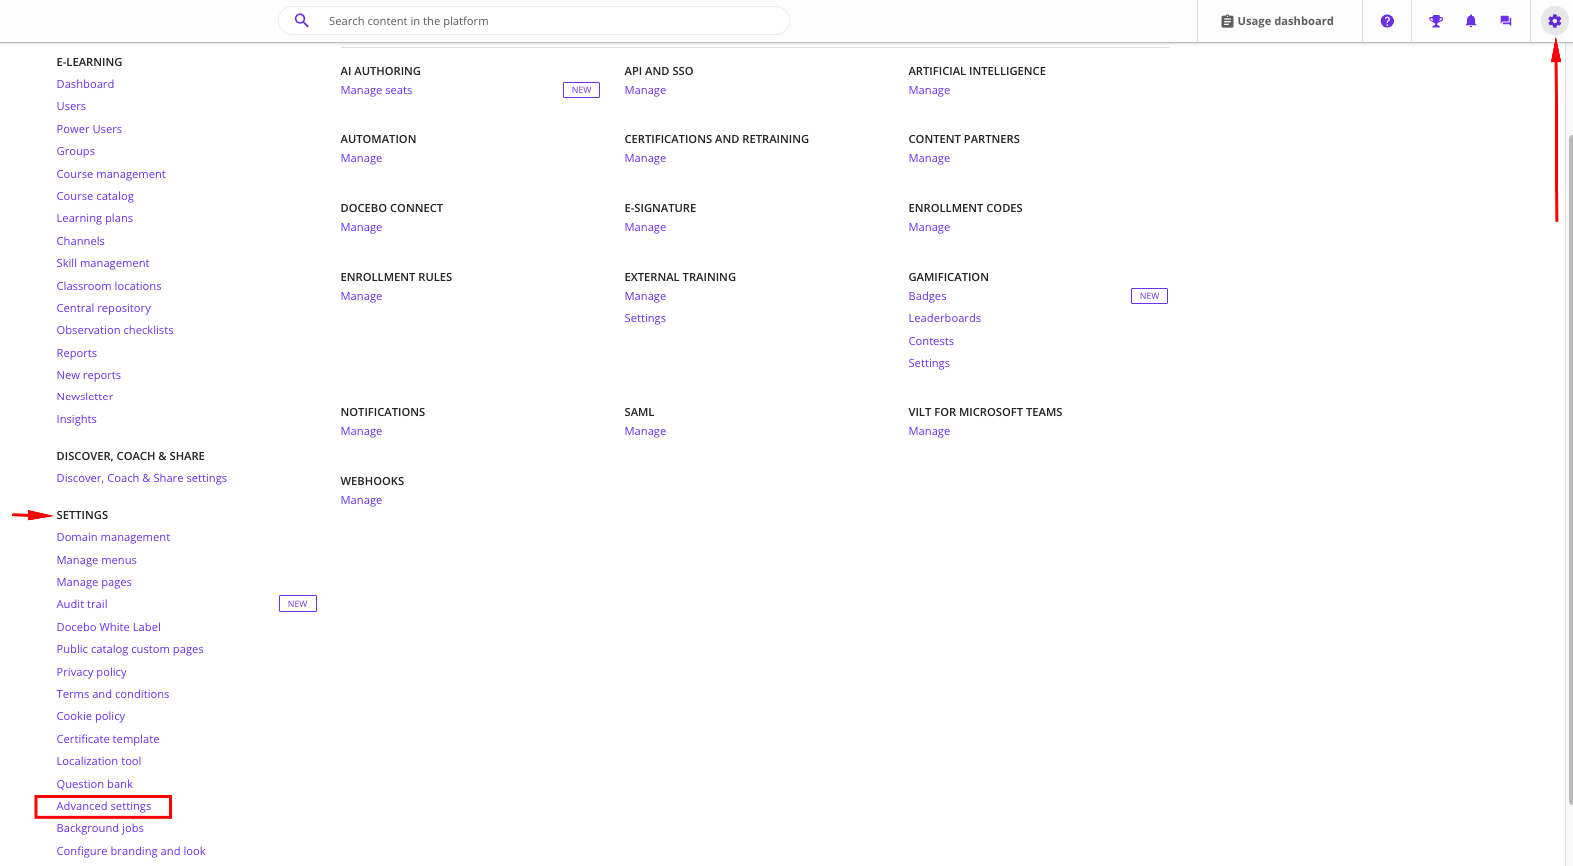
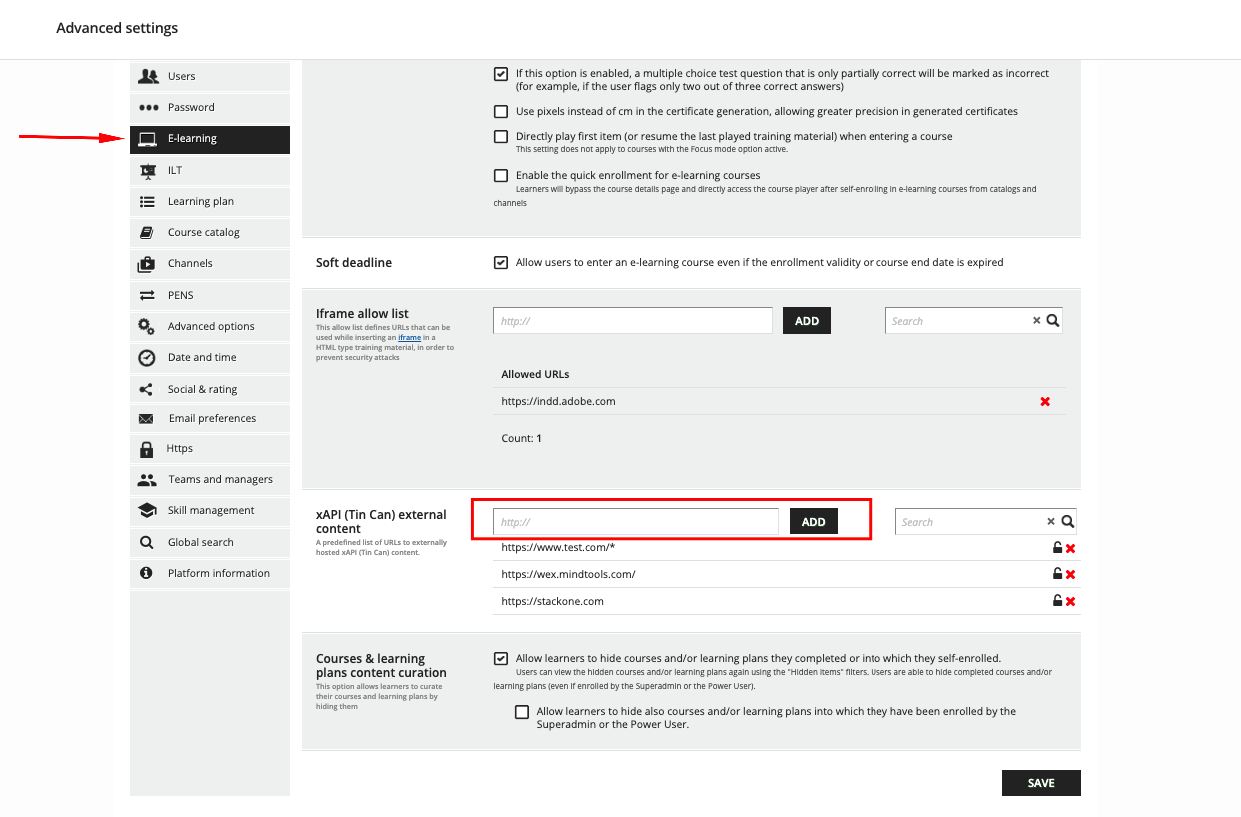
Admin Menu → Settings → Advanced Settings.E-learning tab and scroll down to xAPI (Tin Can) external content.Add your content domain ( e.g., https://www.test.com/* ). You can configure up to 20 domains, and use wildcard (*) if you want to upload full URLs.Click Add and then Save.Use this domain in the content_url field of your API request when upserting content.Linking your Account
1
Enter Credentials
In the modal enter the 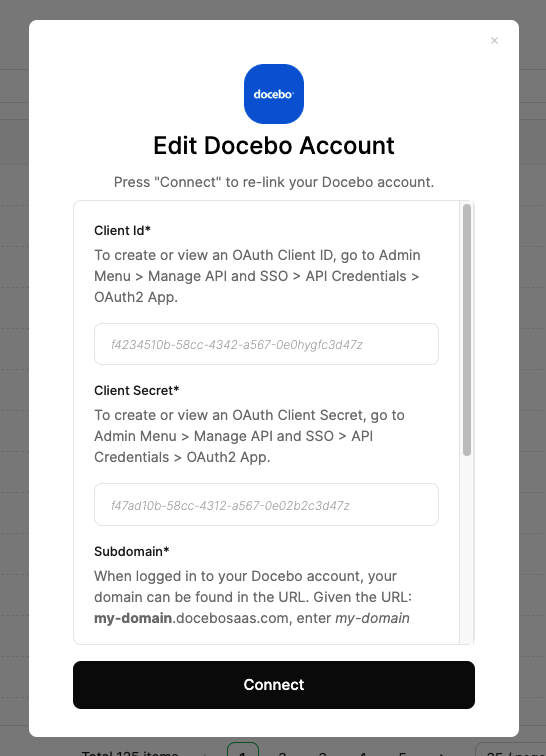
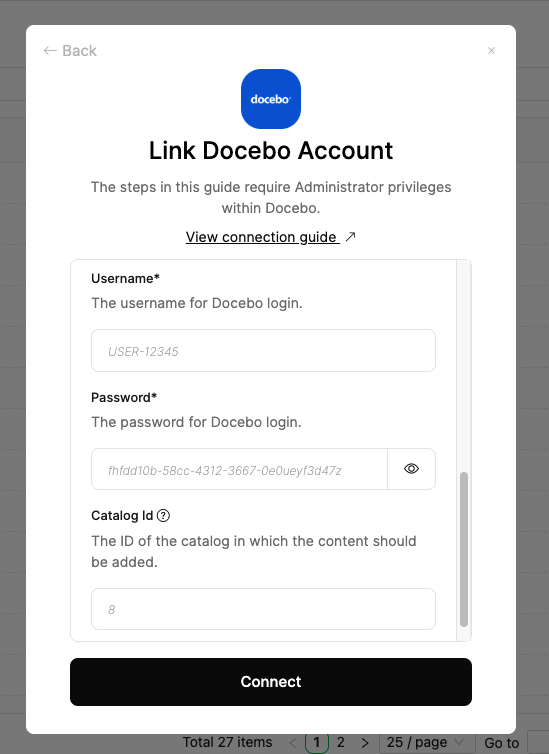
Client ID, Client Secret, Subdomain, Username, Password and Catalog Id from the previous steps.Connect.SSO Configuration
Proper SSO (Single Sign-On) configuration is essential for completions to be recorded correctly. A learner’s course completion is recorded using the Docebouser_id, so that identifier has to be included in the completion request.
The SSO handshake happens directly between Docebo and your content provider, so the identifier can’t be added automatically. Instead, you expose it through a custom SSO field that your content provider reads and passes on.
Custom Field Configuration
1
Set Custom Field
In your Docebo SSO configuration, add a custom field called
lms_user_id and set it to the Docebo user_id value.2
Verify Custom Field
Ensure the
lms_user_id field is populated and accessible through the SSO configuration, so your content provider receives it when a learner launches content.lms_user_id is the standard SSO field name used across LMS integrations. Only the value it maps to changes per provider. For Docebo, that value is the user_id.Important Notes
Shared Responsibility: You configure the
lms_user_id field in your Docebo SSO. Your content provider reads that value from the SSO handshake and includes it in the completion request. Confirm together that lms_user_id matches the Docebo user_id.