If you’ve been directed to StackOne to integrate with Webflow, the following steps will help you understand the process and any necessary actions to configure a successful integration.Documentation Index
Fetch the complete documentation index at: https://hub.stackone.com/llms.txt
Use this file to discover all available pages before exploring further.
Log in to Webflow
Log in to your Webflow app at https://webflow.com/login
Get your Webflow Site ID
One Webflow IAM connection will be associated with a single Webflow site.Navigate to Sites
Select 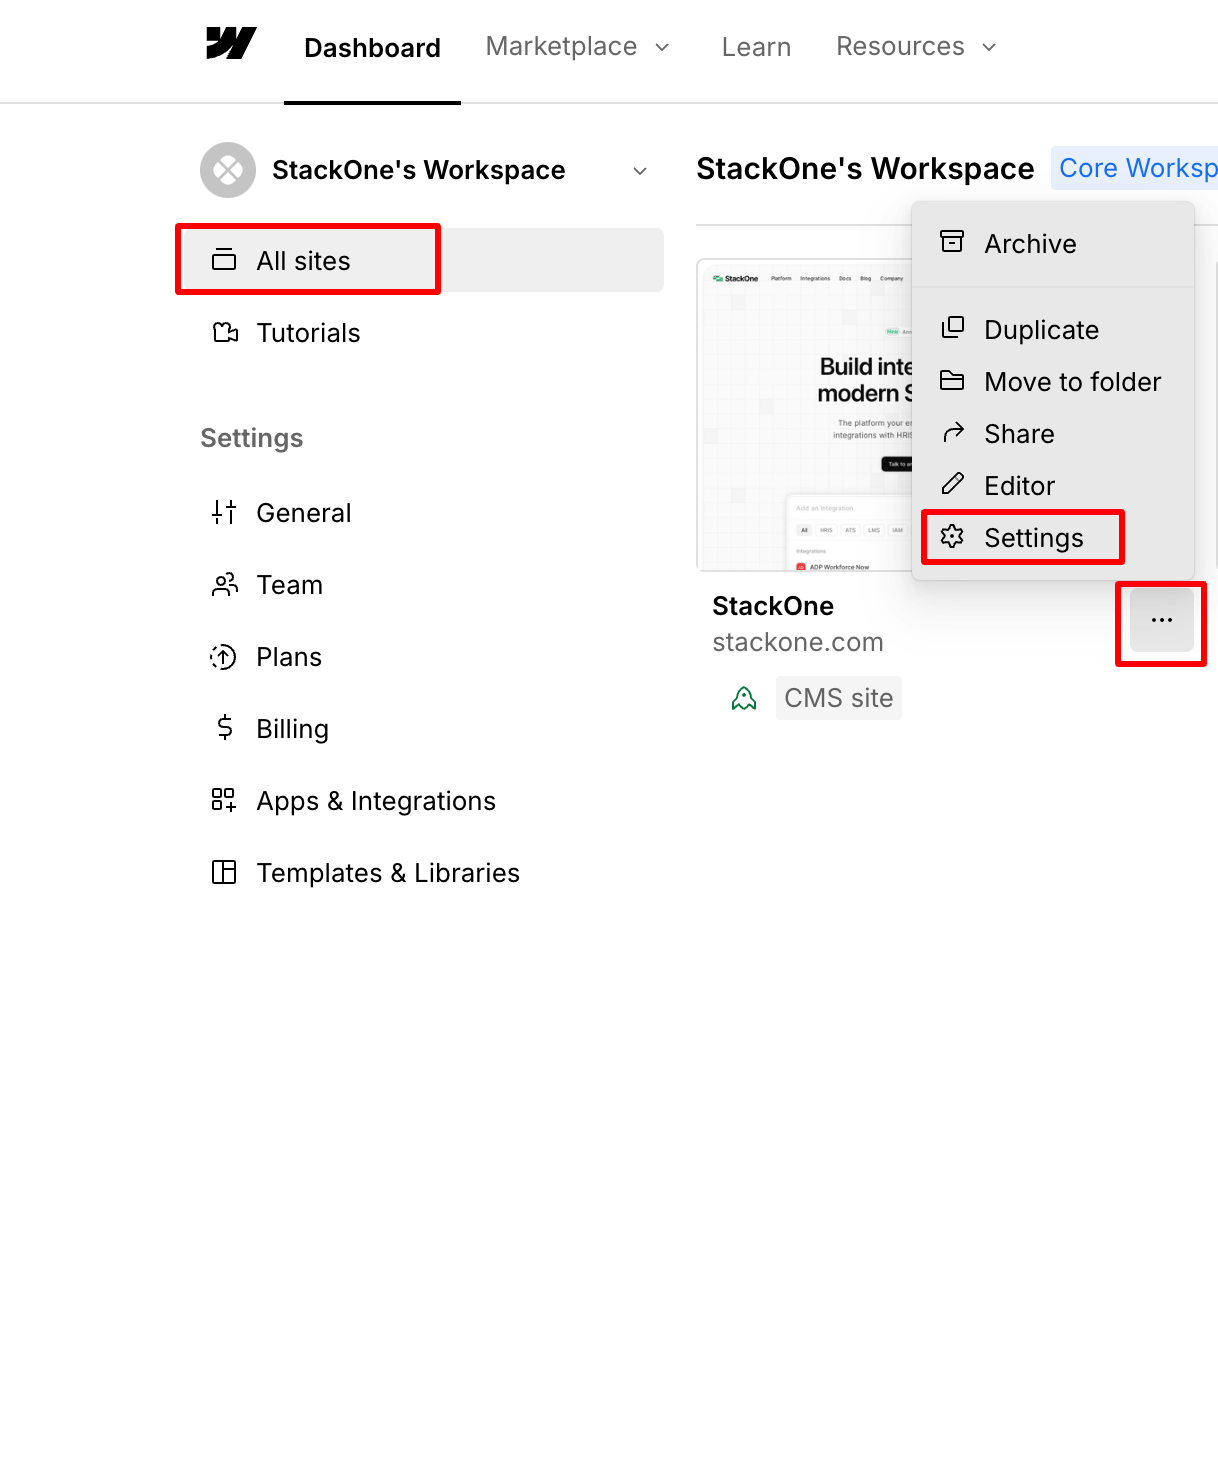
All sites from the left menu and select Settings from the three dots in front of your Site.
Create a New OAuth Application
This connection will authenticate on behalf of a registered Application in Webflow.Navigate to Apps
Select 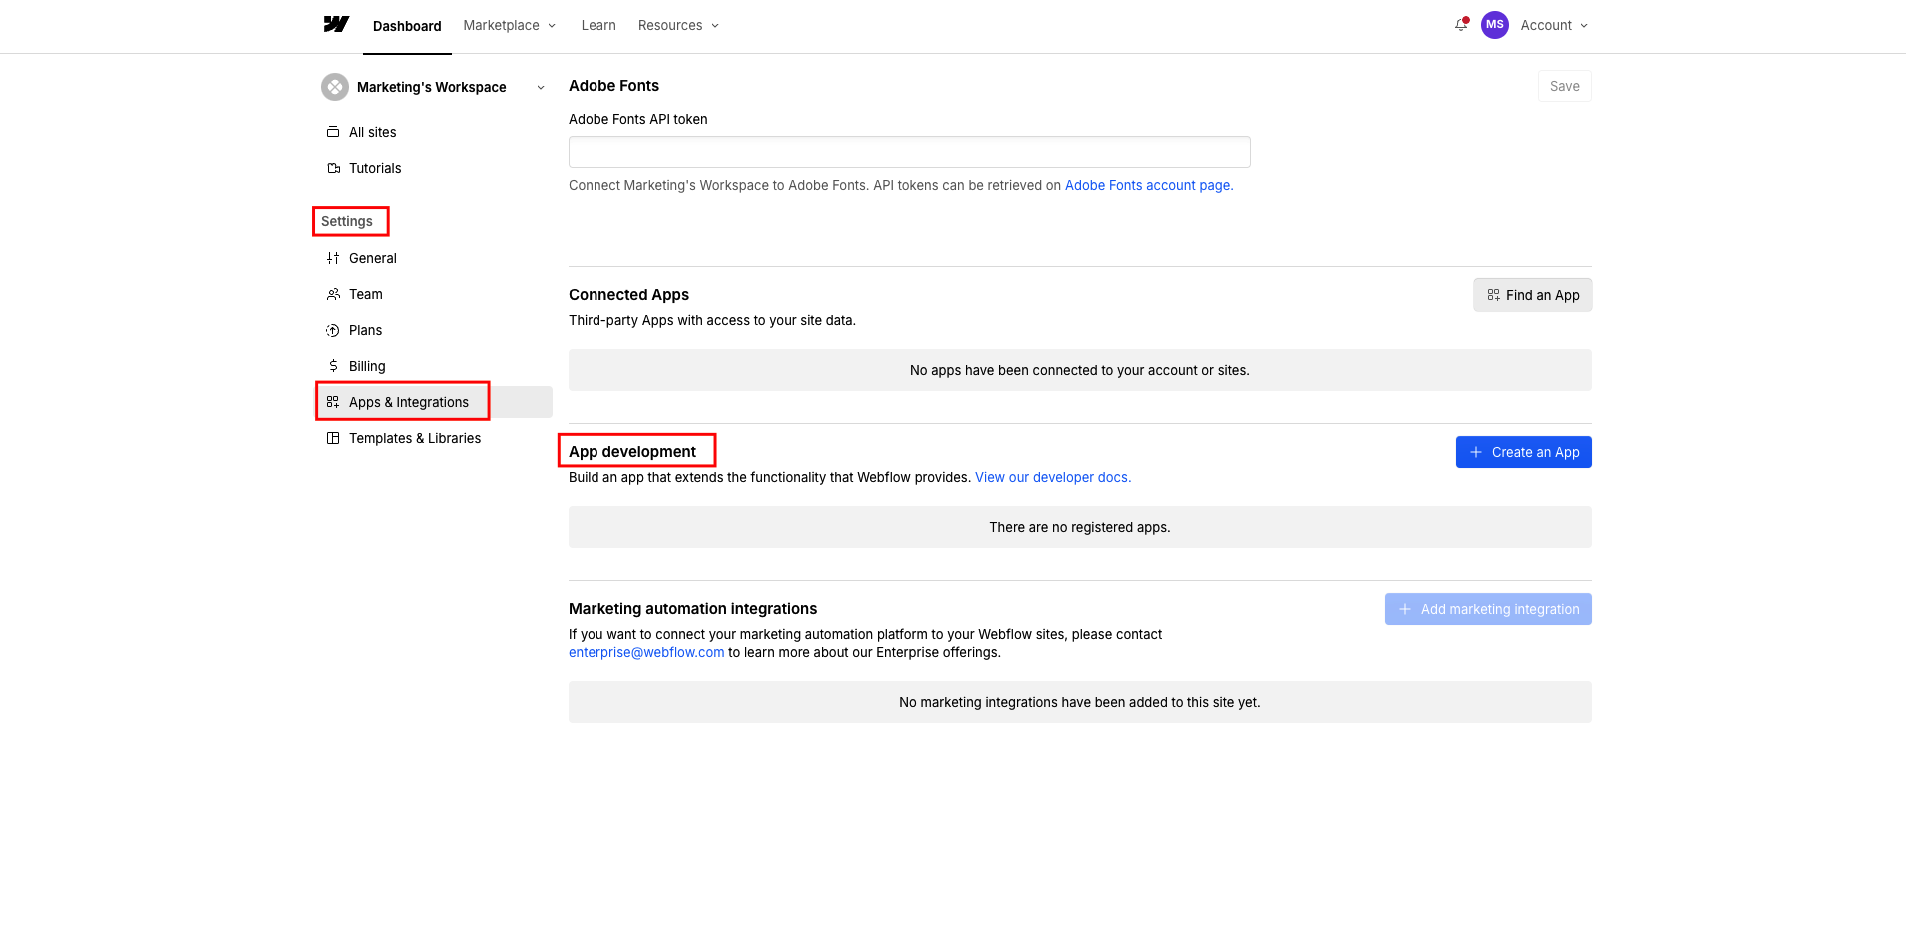
Settings > Apps & Integrations from the left menu and scroll down to App development.
Enter Application Details
Enter the following details for your new application: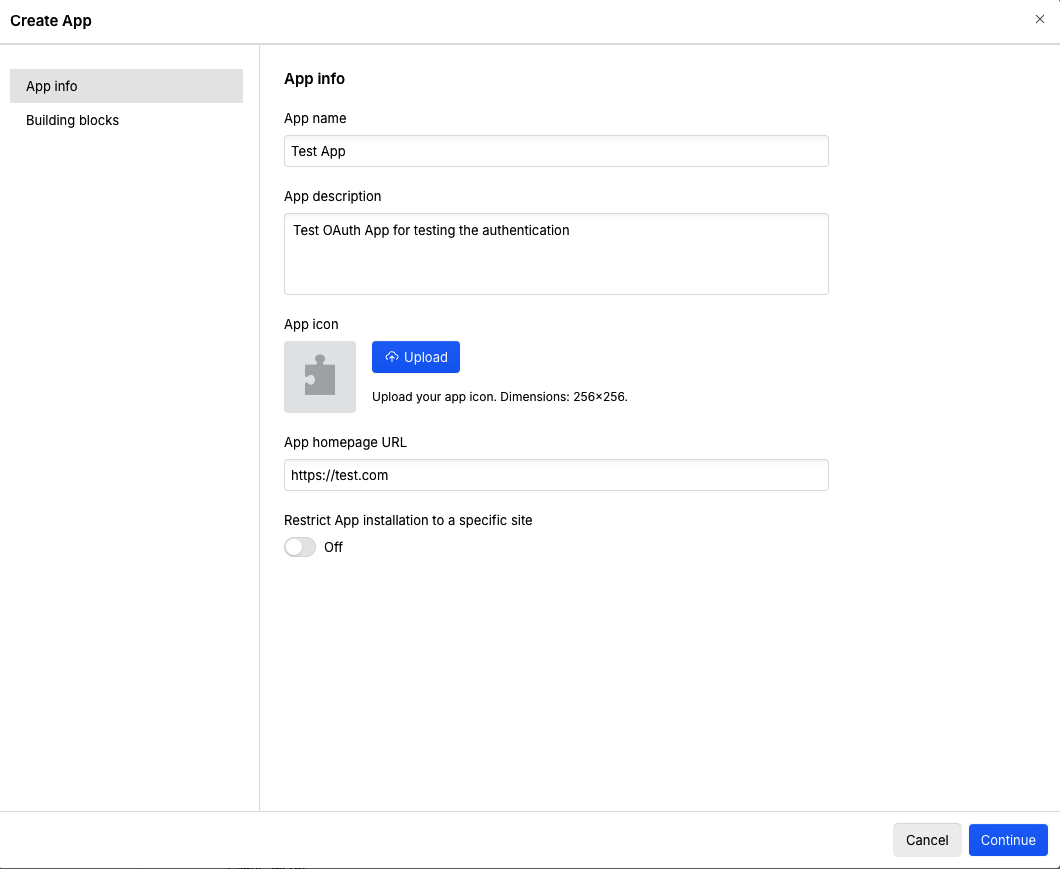
- App name
- App description
- App homepage URL: this can be the URL of your organization’s homepage
Enter Redirect URI
Enable the 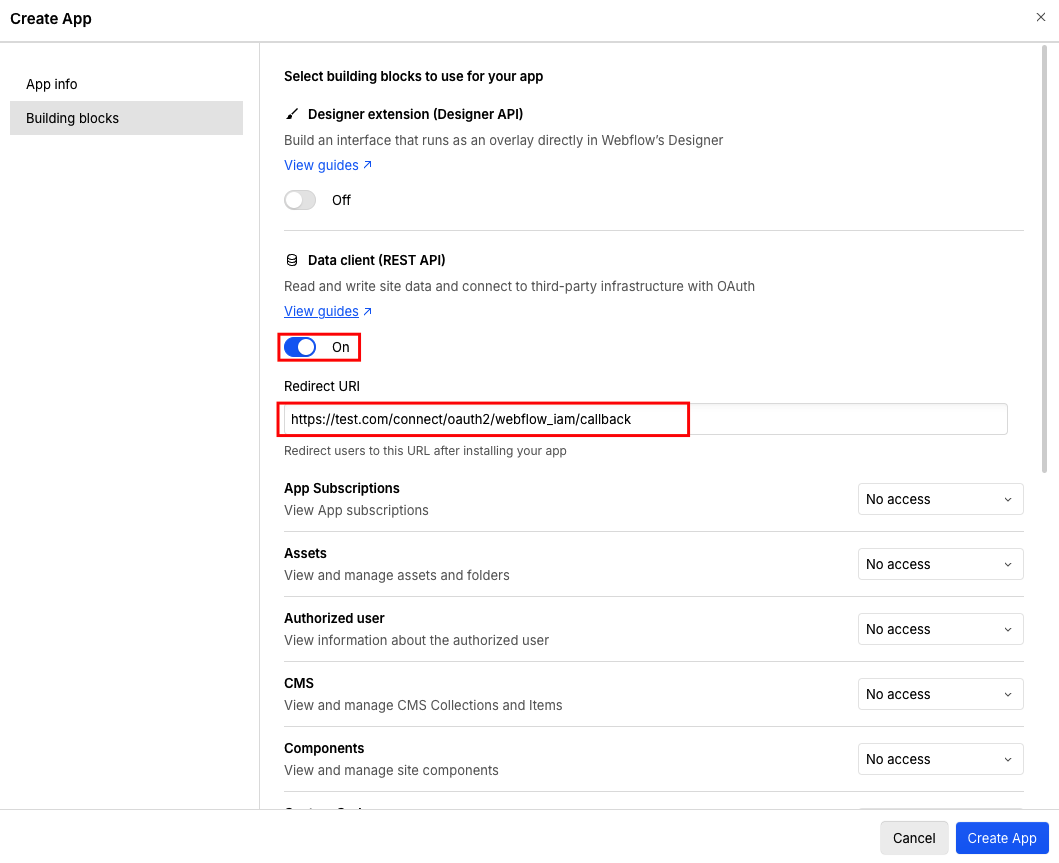
Data client (REST API) toggle button and Enter the Redirect URI: https://api.stackone.com/connect/oauth2/webflow_iam/callbackSelect Application Scopes
Scroll down and select 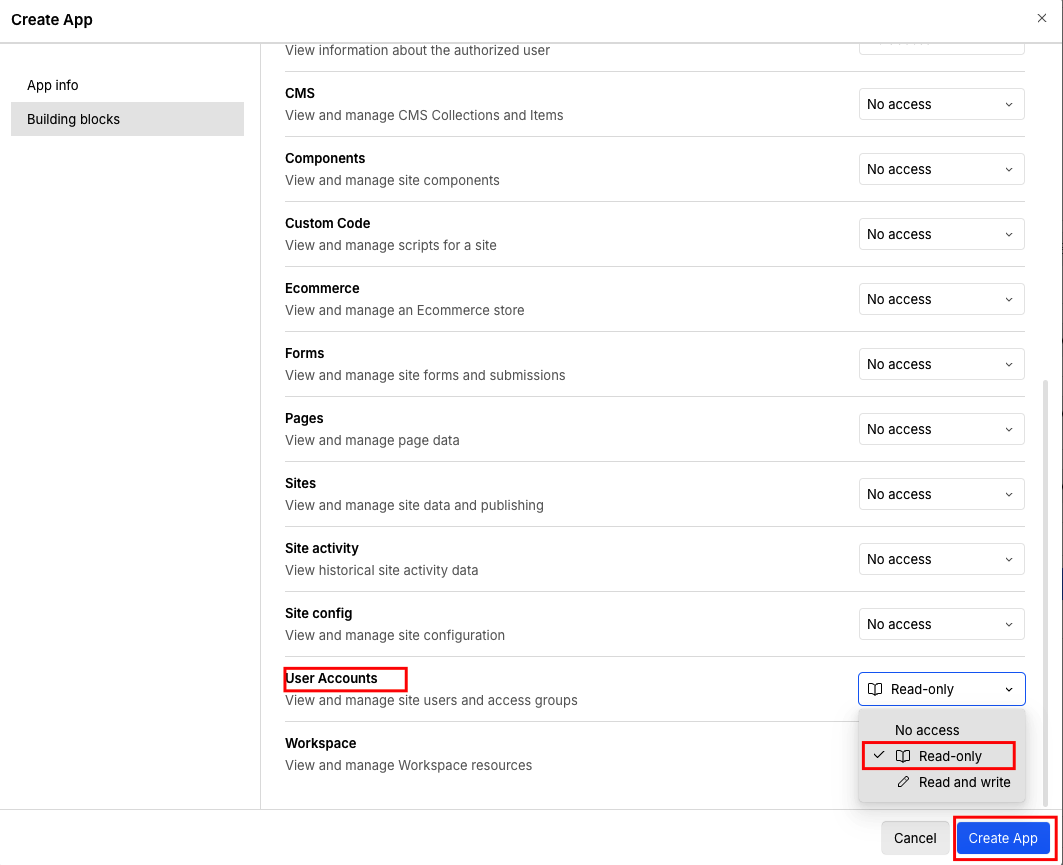
Read-only access for User Account and then click the Create App button.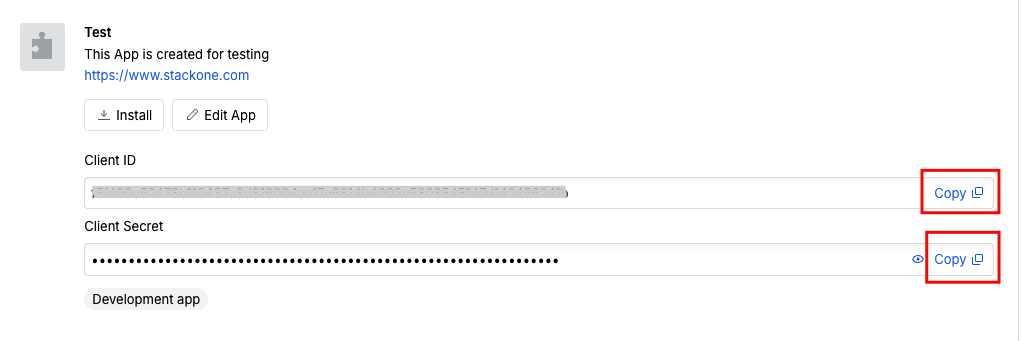
Connecting with StackOne
Enter Credentials
Upon reaching the Link Account page, enter the credentials from the previous steps: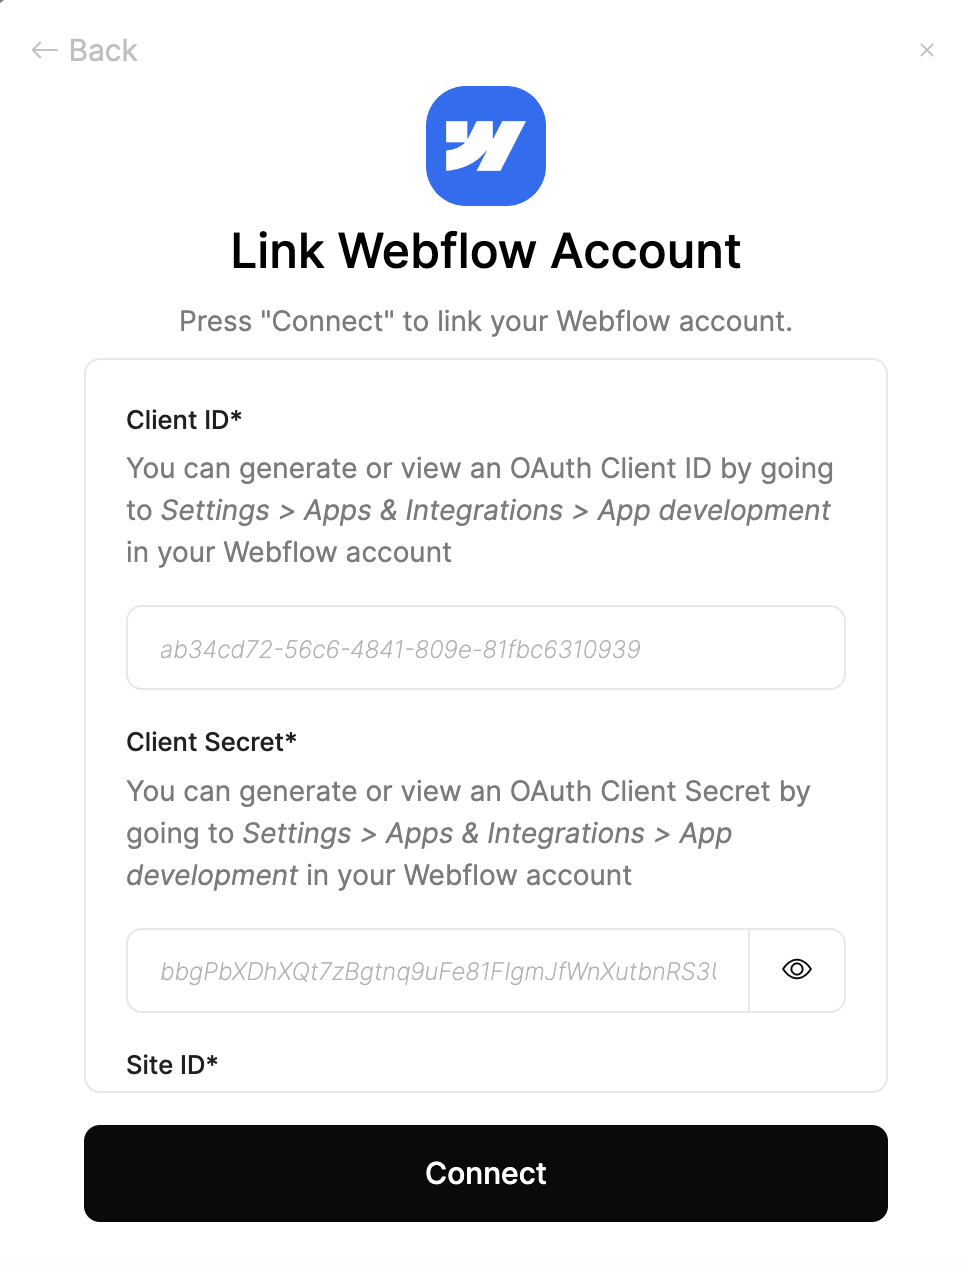
- Client ID
- Client Secret
- Site ID
- Application Scopes:
users:read
Authorize Application Access
A window will appear, and you may be prompted to log in again to Webflow.Note: If you are redirected to the Webflow homepage after logging in here, please close the window and connect again.Details about the specified application will be displayed.Under 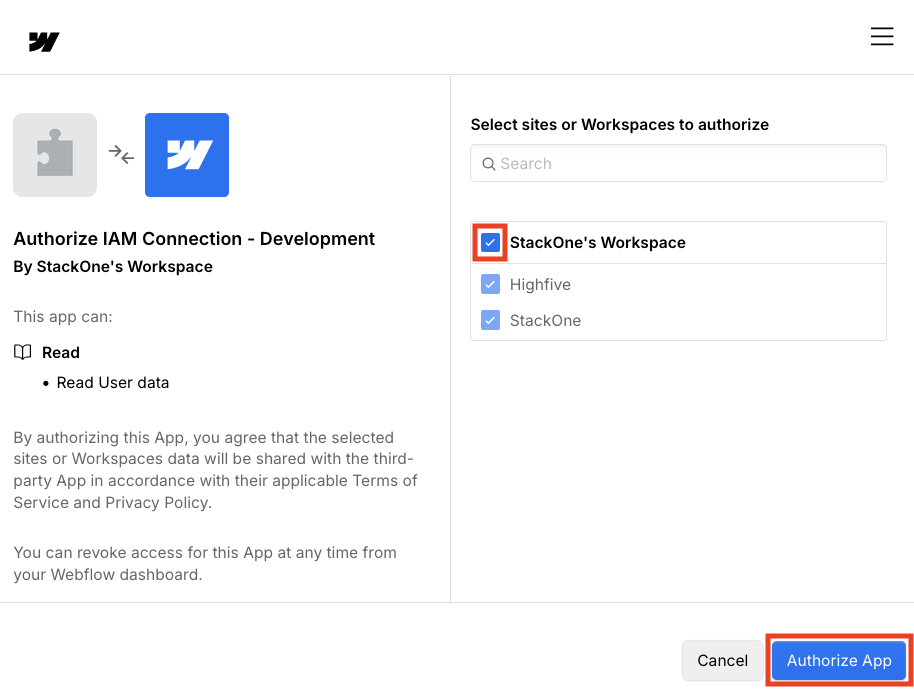
Select sites or Workspaces to authorize, select the Workspace containing the site to be associated with the connection.Click the Authorize App button to proceed.Available data
This integration has the following IAM Resources available from the provider:- Users
- Groups