Finding your Workday Tenant
1
Log into Workday
Log into your Workday account. Look at the address bar at the top of the browser window where the URL is displayed. Find your tenant immediately after 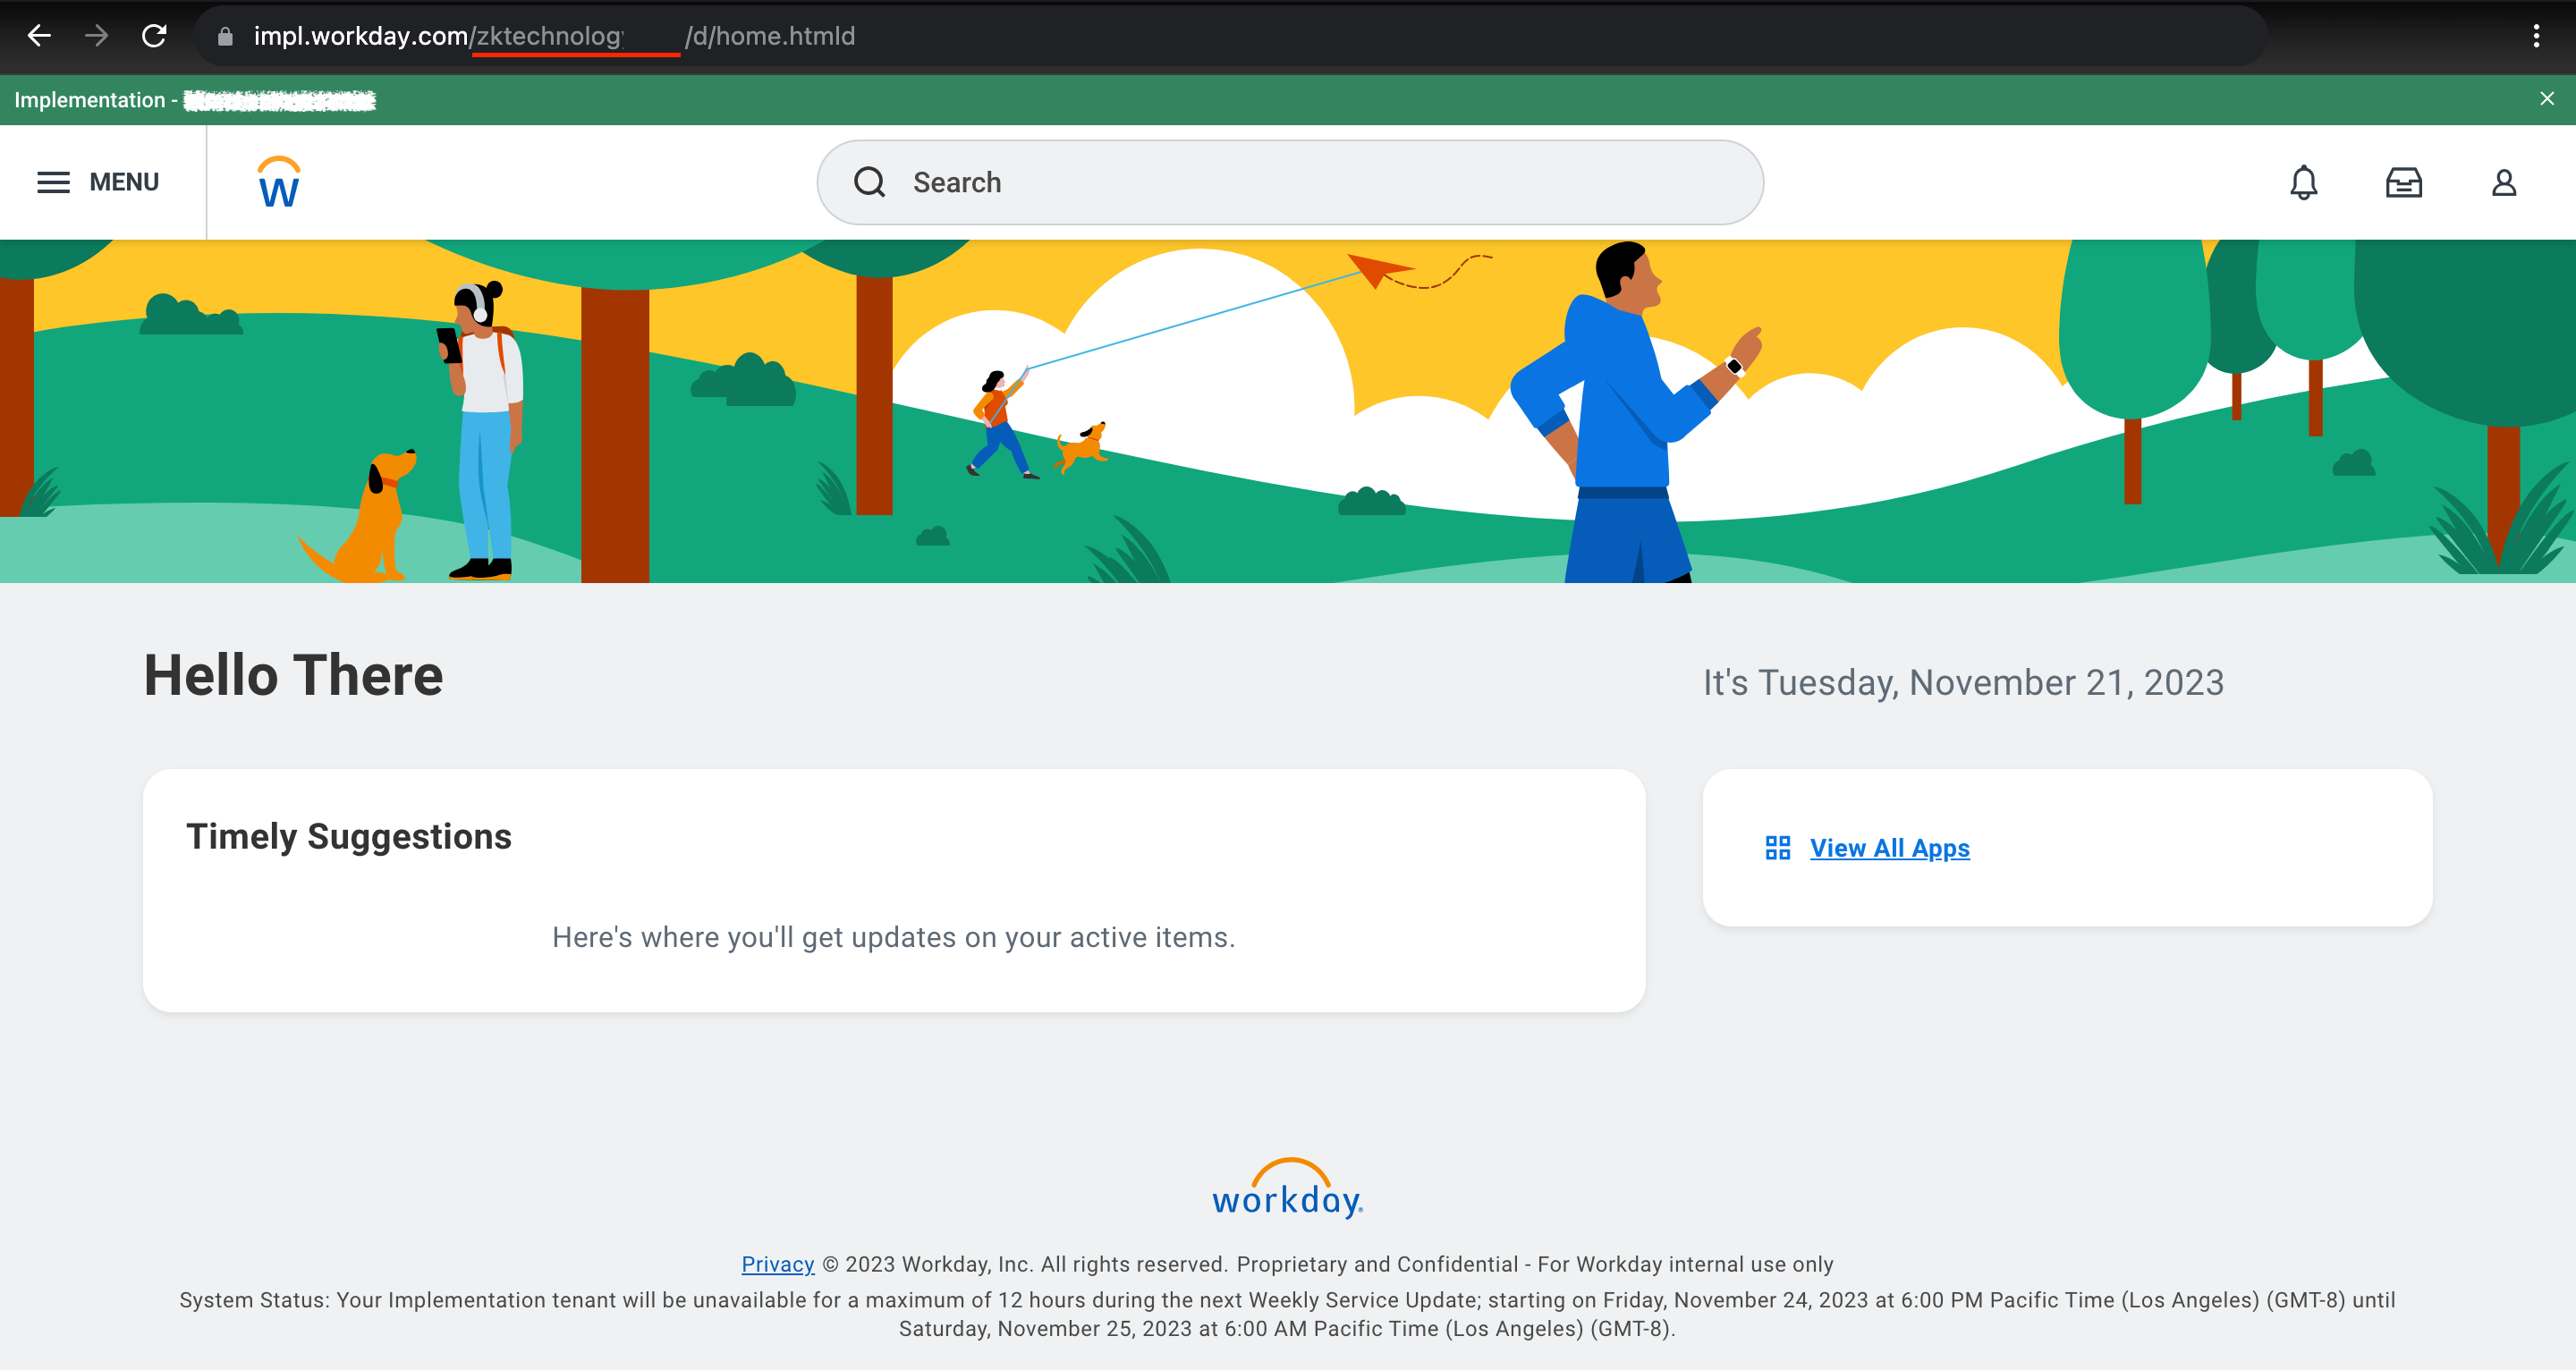
workday.com/.For example, if your URL is https://my-instance.workday.com/my-tenant/d/etc, your tenant is my-tenant.Finding the Web Services Endpoint
1
Go to Public Web Services
Go to the 
Public Web Services report.2
Find Human Resources
Find Human Resources and hover over it to be able to interact with the menu. Via the three-dots menu, go to 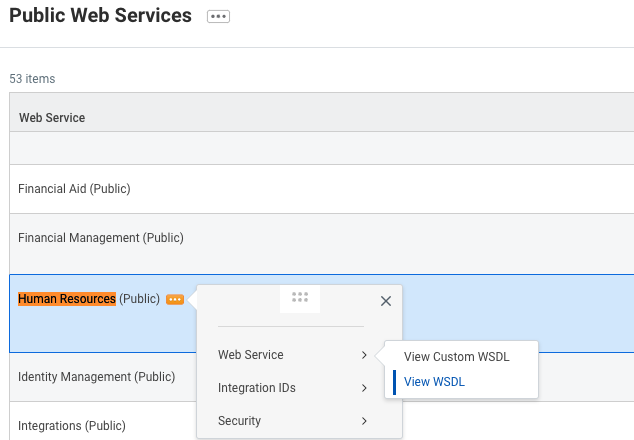
Web Service and click on View WSDL (note that the page may take a minute to fully load).3
Search for wsdl:service
Search for 
wsdl:service in the file OR navigate directly to the very bottom of the page. You should see something like this:service in the location attribute. Do not include the https:// prefix. In the example tenant above, this would be wd2-impl-services1.workday.com/ccx but it may be different for your tenant (e.g., wd5-services1.myworkday.com/ccx).Save this value to be used in a later step.Set up an Integration System User
1
Search for Create Integration System User
Log in to your Workday tenant in the Workday portal. In the Search field, search for “Create Integration System User”.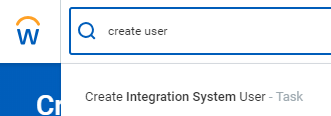
2
Choose the Task
Choose the “Create Integration System User” task.
3
Enter Account Information
Enter a username and password in the Account Information section on the “Create Integration System User” page.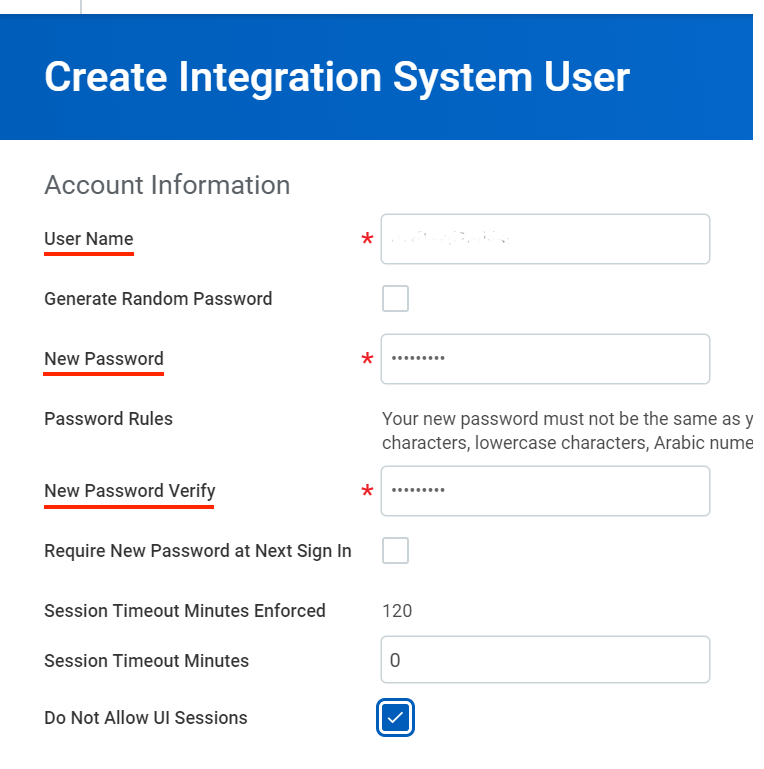
4
Click OK
Click OK.
Add the Integration System User to Security Groups
1
Search for Create Security Group
In the Search field, search for “Create Security Group”. Select the “Create Security Group” task.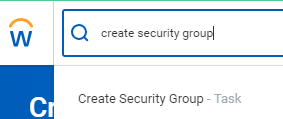
2
Select Security Group Type
On the “Create Security Group” page, select “User-Based Security Group” from the Type of Tenanted Security Group pull-down menu. Enter a name in the Name field.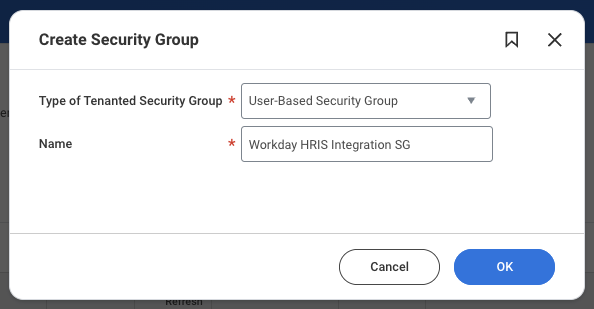
Some Workday Business Processes require User-Based Security Groups to access by default.
3
Click OK
Click OK.
4
Assign Security Group
On the “Assign Users to User-Based Security Group” page, assign the Integration System User you created in the previous step. Click OK.
Configure Domain Security Policy Permissions
1
Edit Permissions
The Workday HRIS integration currently requires all of the permissions listed below to be enabled for full support.Workday’s API may return an error response if any of these permissions are missing.
“View” access may be required for accessing Custom Report and WQL data.
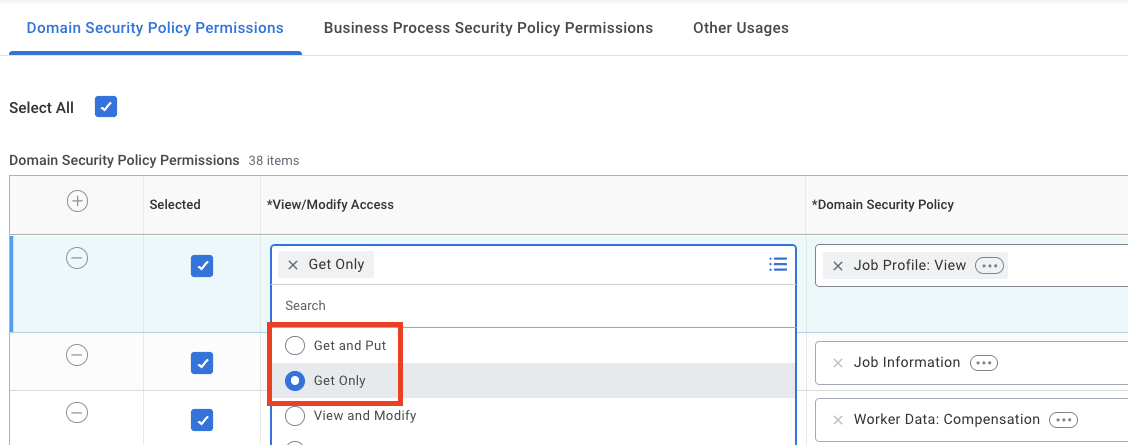
Please note that Security Group Permissions can be customized within a Workday organization, and this list does not account for such customizations.
- Access Leave Type (Segmented)
- Business Process Administration
- Integration Build
- Job Information
- Job Profile: View
- National ID Identification
- System Auditing
- View: National Identifiers - All
- Manage:
- Location
- Organization Integration
- Person Data:
- Citizenship Status
- Date of Birth
- Disabilities
- Gender
- Home Address
- Home Contact Information
- ID Information
- Marital Status
- Name
- Personal Data
- Personal Information
- Personal Photo
- Work Address
- Work Contact Information
- Reports:
- Manager
- Time Tracking
- Set Up:
- Payroll
- Payroll (ROE) - CAN
- Time Off
- Time Off (Calculations - Absence Specific)
- Worker Data:
- Add Worker Documents
- All Positions
- Compensation
- Current Staffing Information
- Employment Data
- Leave of Absence
- Leave of Absence (Leave of Absence Manager View)
- Organization Information
- Public Worker Reports (requires ‘View’ access)
- Time Off
- Time Off (Time Off)
- Time Off (Time Off Balances)
- Time Off (Time Off Balances Manager View)
- Time Off (Time Off Manager View)
- Workers
Edit Required Business Process Security Policies
1
Edit Required Business Process Security Policies
Open the “Edit Business Process Security Policy” task for the “Request Time Off” business process.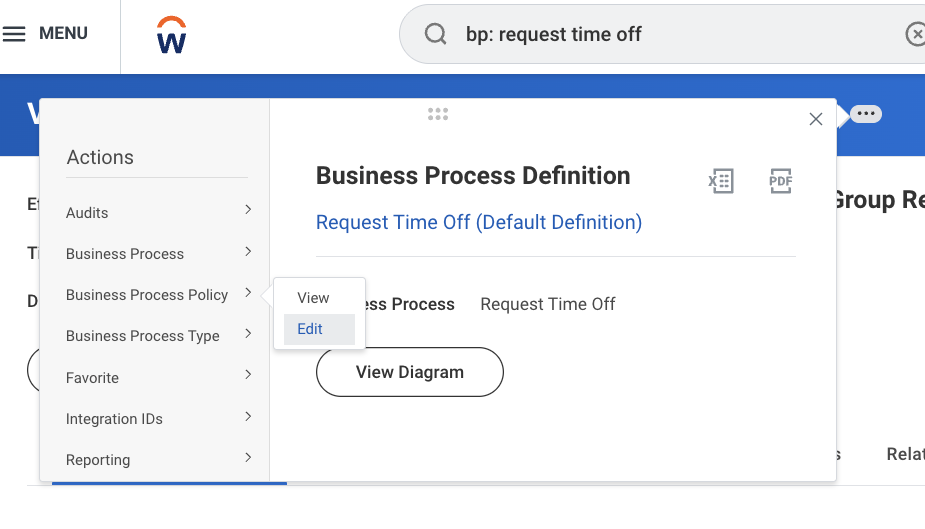
2
Grant Initiation Access
Under “Who Can Start the Business Process” > “Initiating Action: Request Time Off (REST Service)”, add the Security Group you created in the previous steps.Then click OK.
Approve the Security Policy Changes
1
Search for Activate Pending Security Policy Changes
In the Search bar, search for “Activate Pending Security Policy Changes”. Review the policies that need approval in the summary of the changes in the security policy. Approve the pending security policy changes to activate them.
Identifying and Troubleshooting Additional Required Permissions
The API client accesses Workday using the permissions of the Integration System User that is linked via the refresh token. The Integration System User’s permissions are determined by the User-Based Security Group you created and assigned to that user (and any others assigned). If you encounter API errors related to missing permissions, you may need to identify and add additional permissions to this Security Group.
1
Troubleshooting REST Endpoint and Report Field Access
If you receive API errors indicating that a specific REST endpoint or report field is inaccessible, you can identify the required permissions using the “View Security for Securable Item” report.
This report allows you to search for Tasks, Reports, Report Fields, Background Processes, and Data Sources to view their required Functional Areas, Security Policies, and currently-permitted Security Groups.
- In the Search bar, search for “View Security for Securable Item”.
- In the modal, search for the specific REST endpoint, report, or report field that is causing the error (e.g., search for “Leave Type” if you’re getting an error about the
leaveTypefield). - From the search results, click the “View Security” button for the relevant item.
- There are often multiple items with the same name, so you may need to click the “View Security” button for each item.
- Review the “Domain Security” section to see which Security Groups currently have access.
- Check if your User-Based Security Group is listed. If it is not listed:
- Note the required Domain Security Policy permissions shown in the modal.
- Navigate to “Maintain Permissions for Security Group” and add the required permissions to your Security Group.
- After adding permissions, activate the changes using “Activate Pending Security Policy Changes”.
2
Troubleshooting Calculated Field Access
For calculated fields used in reports, you must check the security requirements using the “View Calculated Field” report.
- In the Search bar, search for “View Calculated Field”.
- Search for the specific calculated field that is causing access issues.
- Open the calculated field and open the three-dots menu to navigate to “Security” > “View Security”.
- Review the modal to see:
- The Security Groups currently permitted to access the calculated field.
- The Security Policies that are required for access.
- If your User-Based Security Group is not listed:
- Note the required Security Policies shown in the modal.
- Navigate to “Maintain Permissions for Security Group” and add the required Domain Security Policy permissions to your Security Group.
- After adding permissions, activate the changes using “Activate Pending Security Policy Changes”.
Register the Rest API Client
1
Go to Register API Client
Go to the 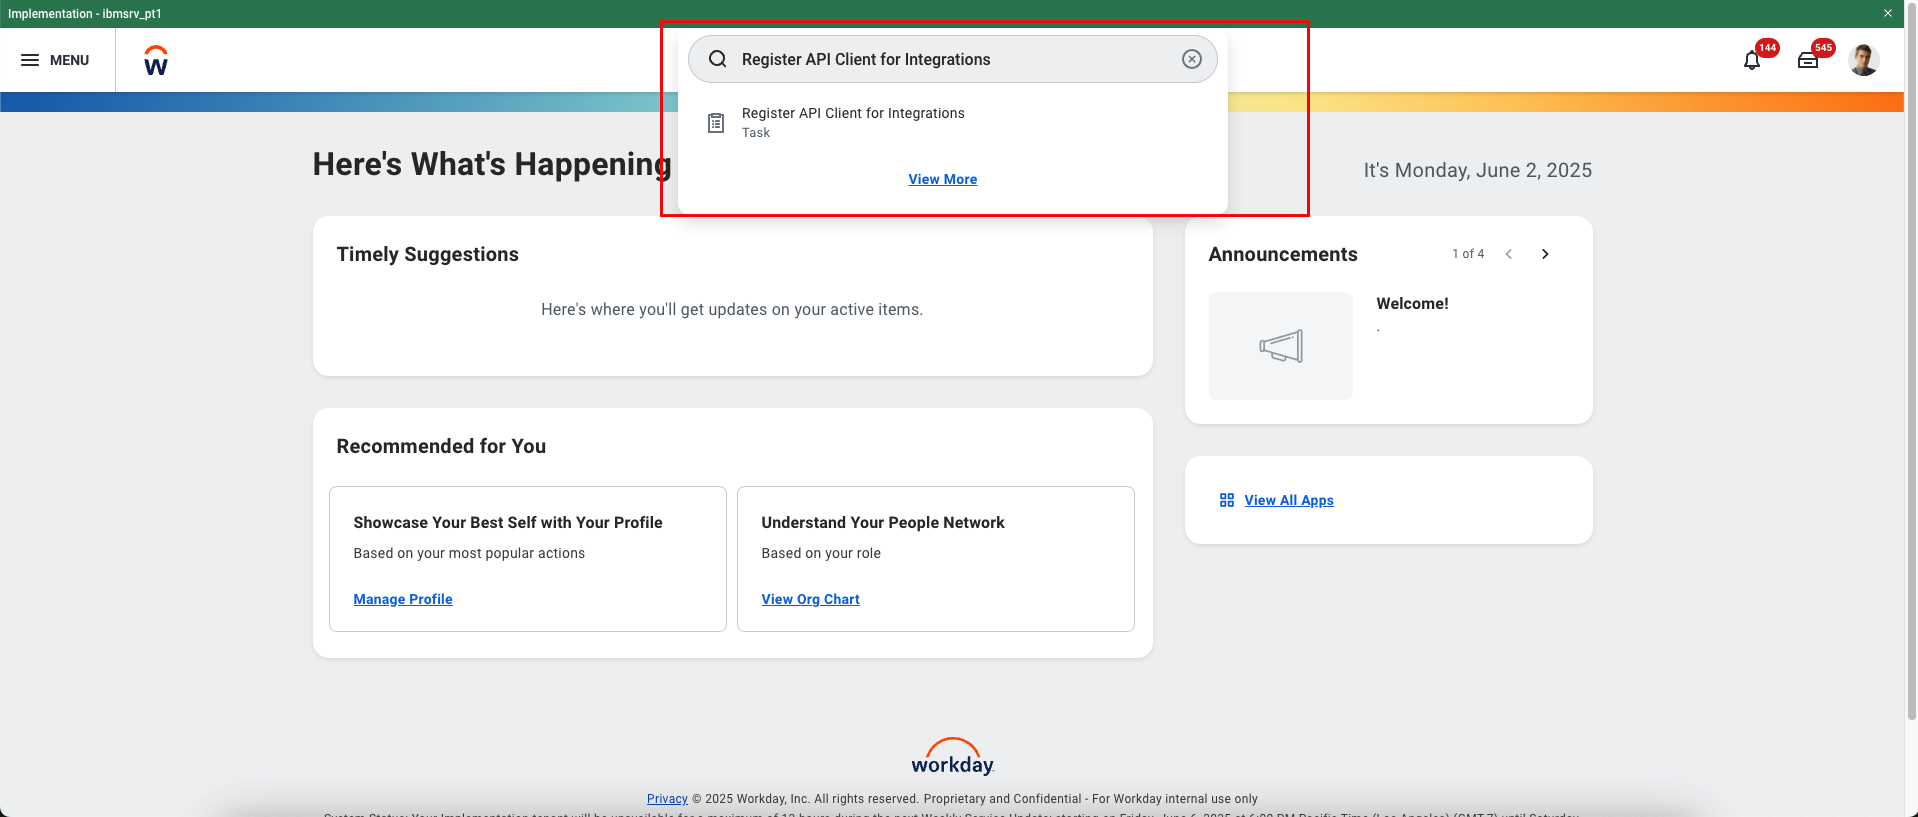
Register API Client for Integration Task.2
Register API Client
Register the API Client with the following details.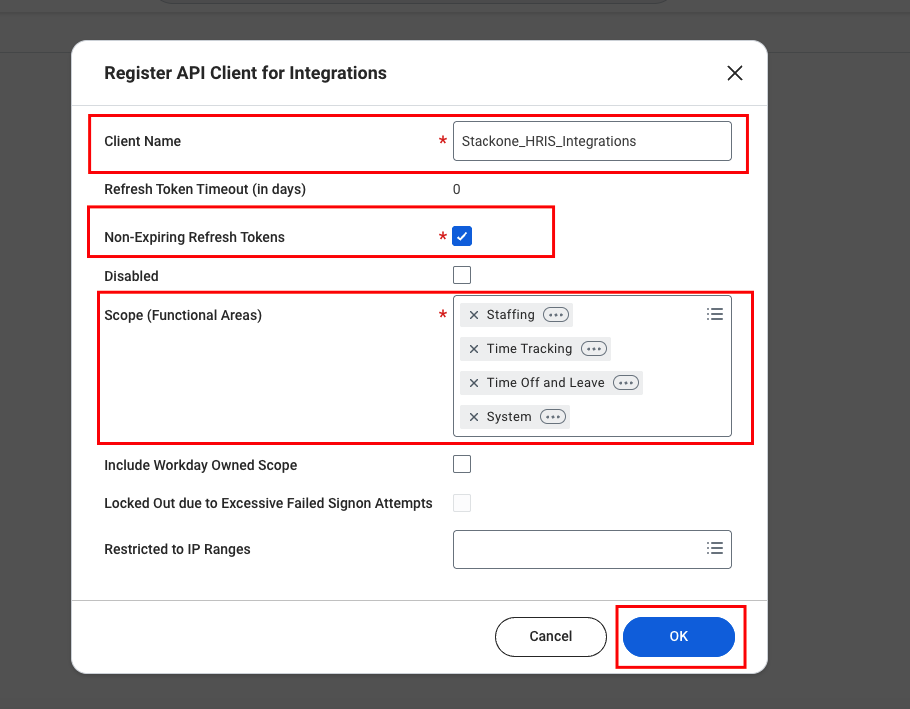
- Client Name: e.g. StackOne_Integrations
- Non-Expiring Refresh Tokens: Check the box
- Scopes: Select the required functional scopes to enable data access via API.
- Advanced Compensation
- Core Compensation
- Implementation
- Integration
- Jobs & Positions
- Organizations and Roles
- Personal Data
- Staffing
- System
- Tenant Non-Configurable
- Time Off and Leave
- Time Tracking
- Workday Designer
- Worker Profile and Skills
3
Copy the credentials
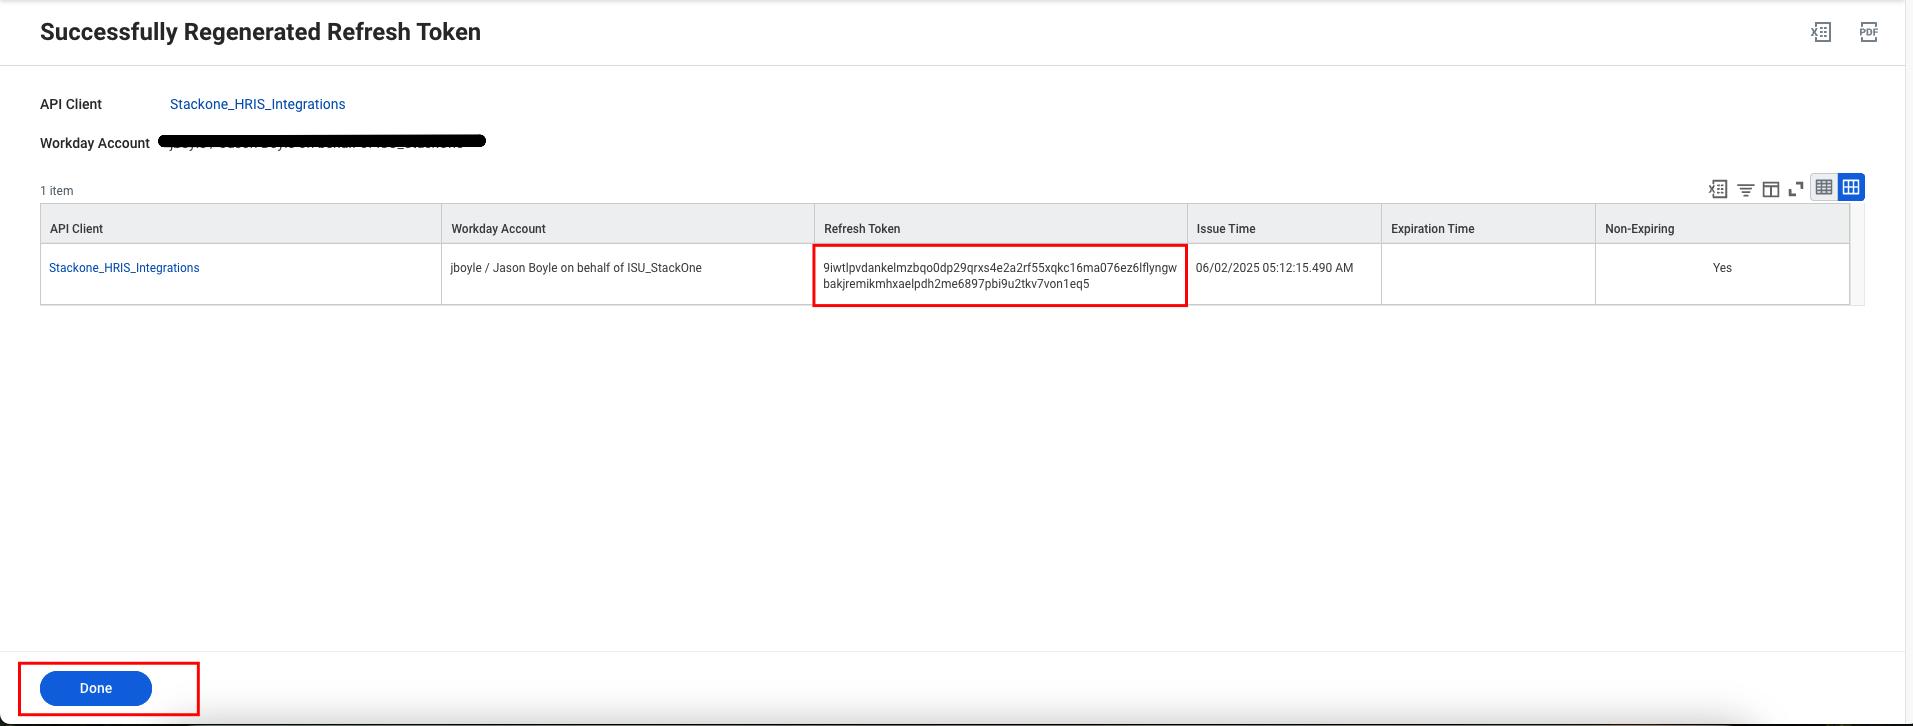
After registering the client, you will be redirected to a page displaying the Client ID and Client Secret. Make sure to copy and securely store these credentials.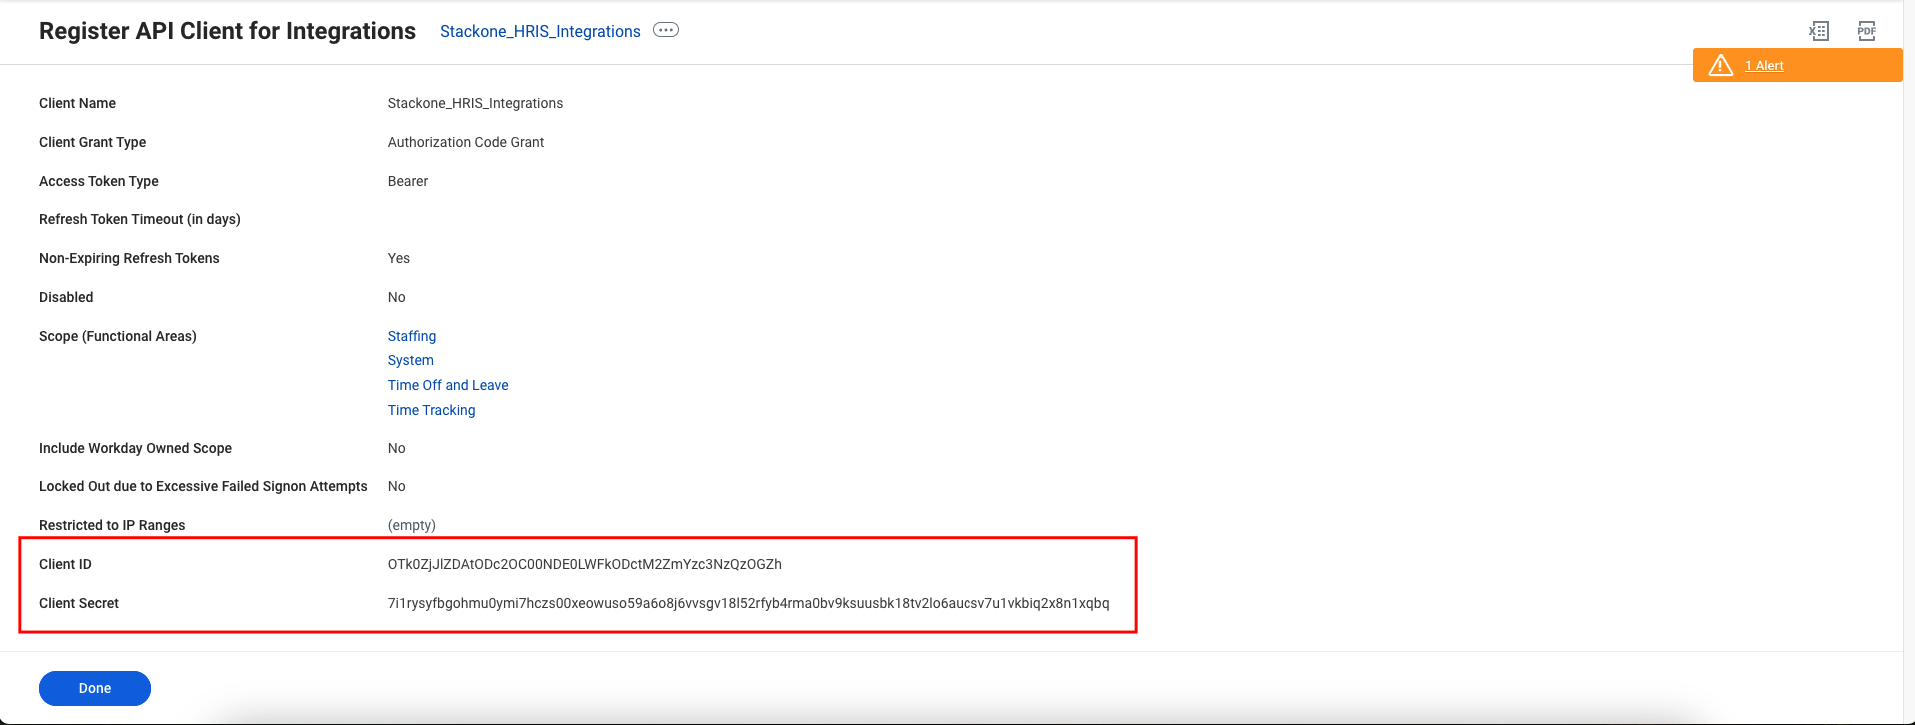
4
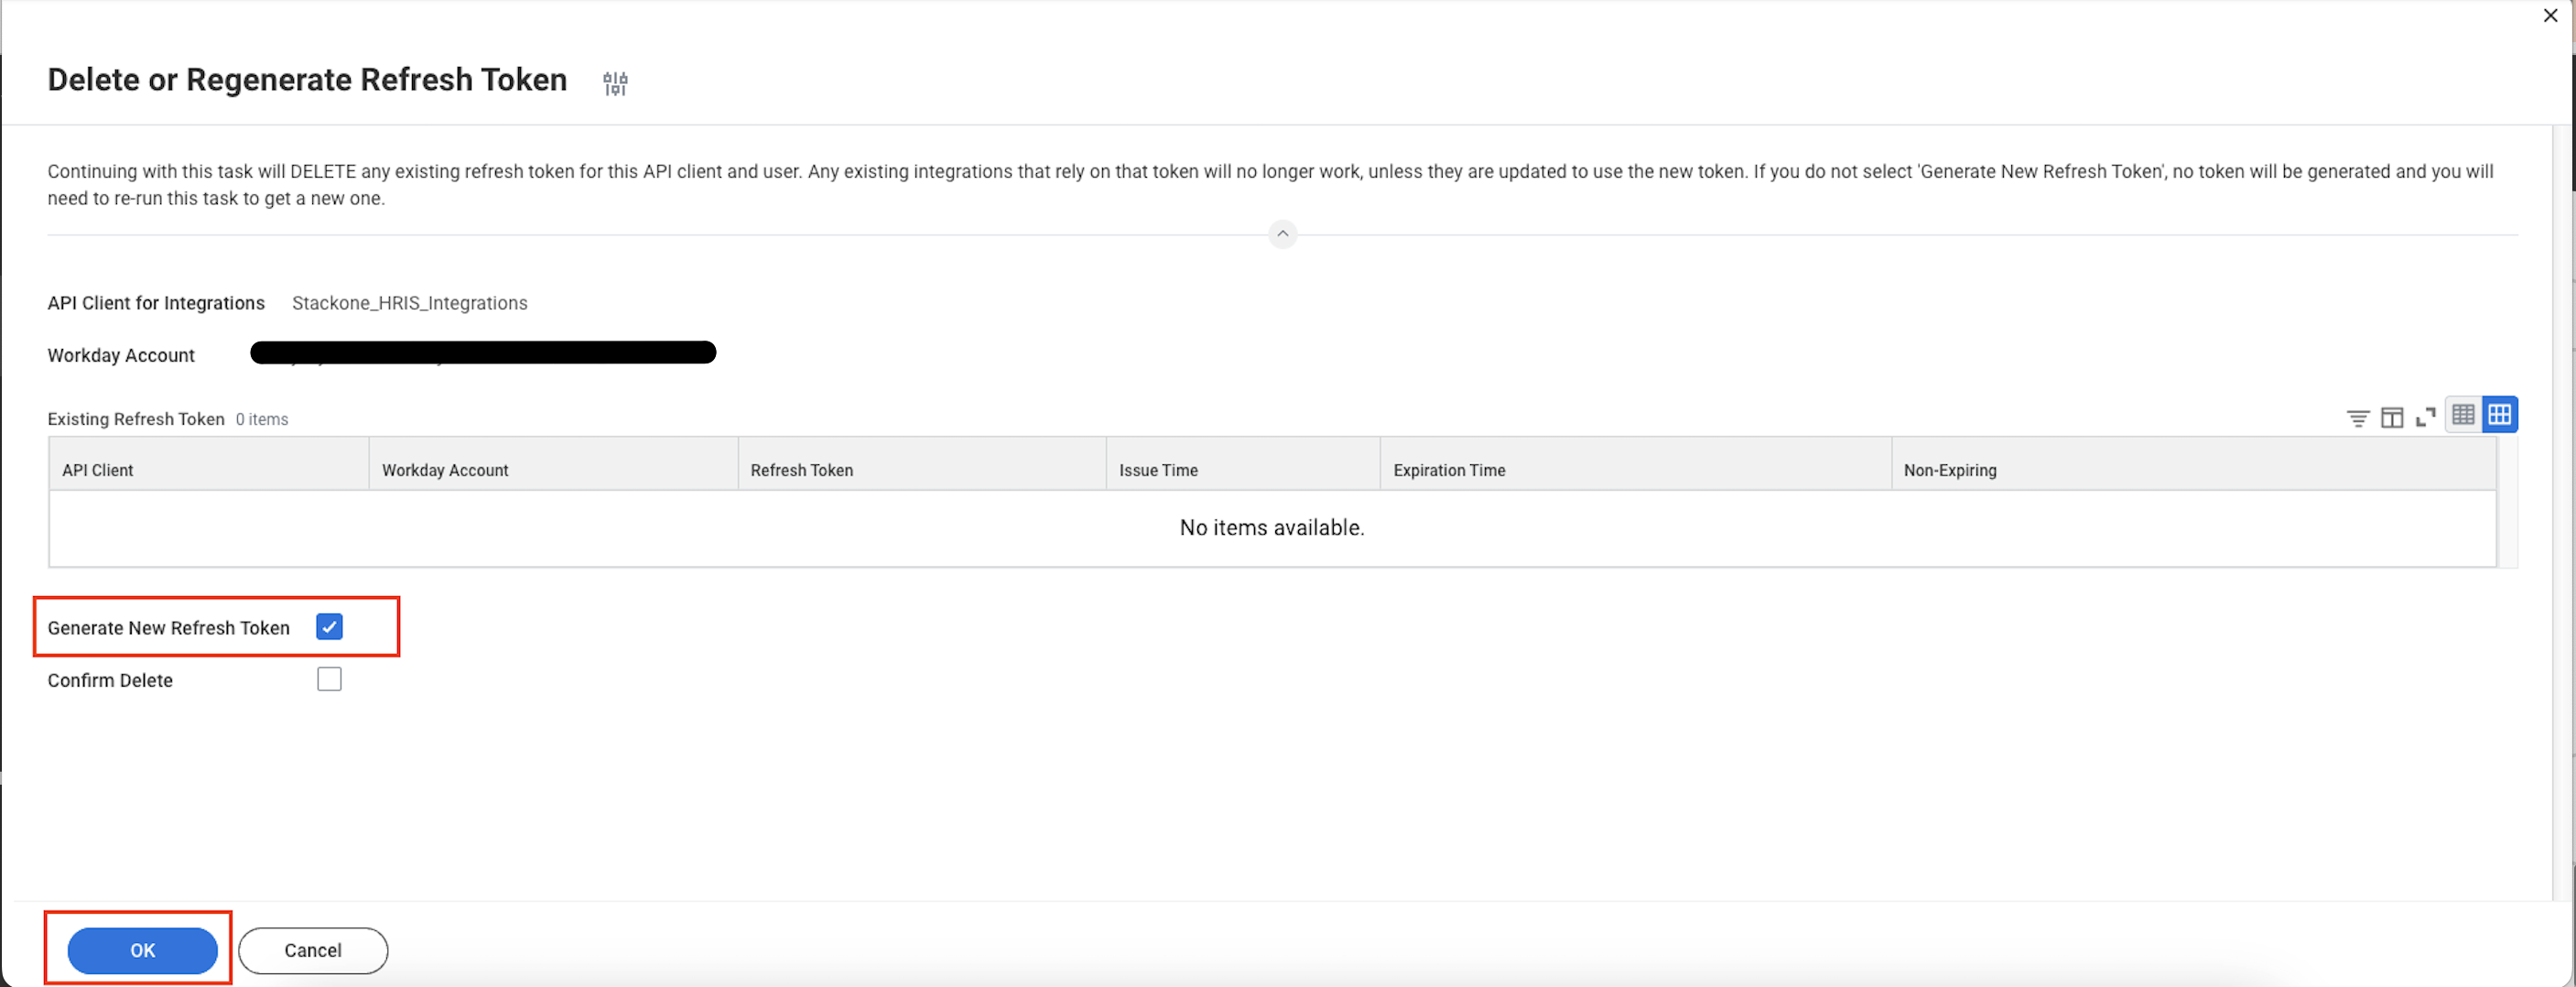
Generate the Refresh token
Follow the steps below to generate the refresh tokens.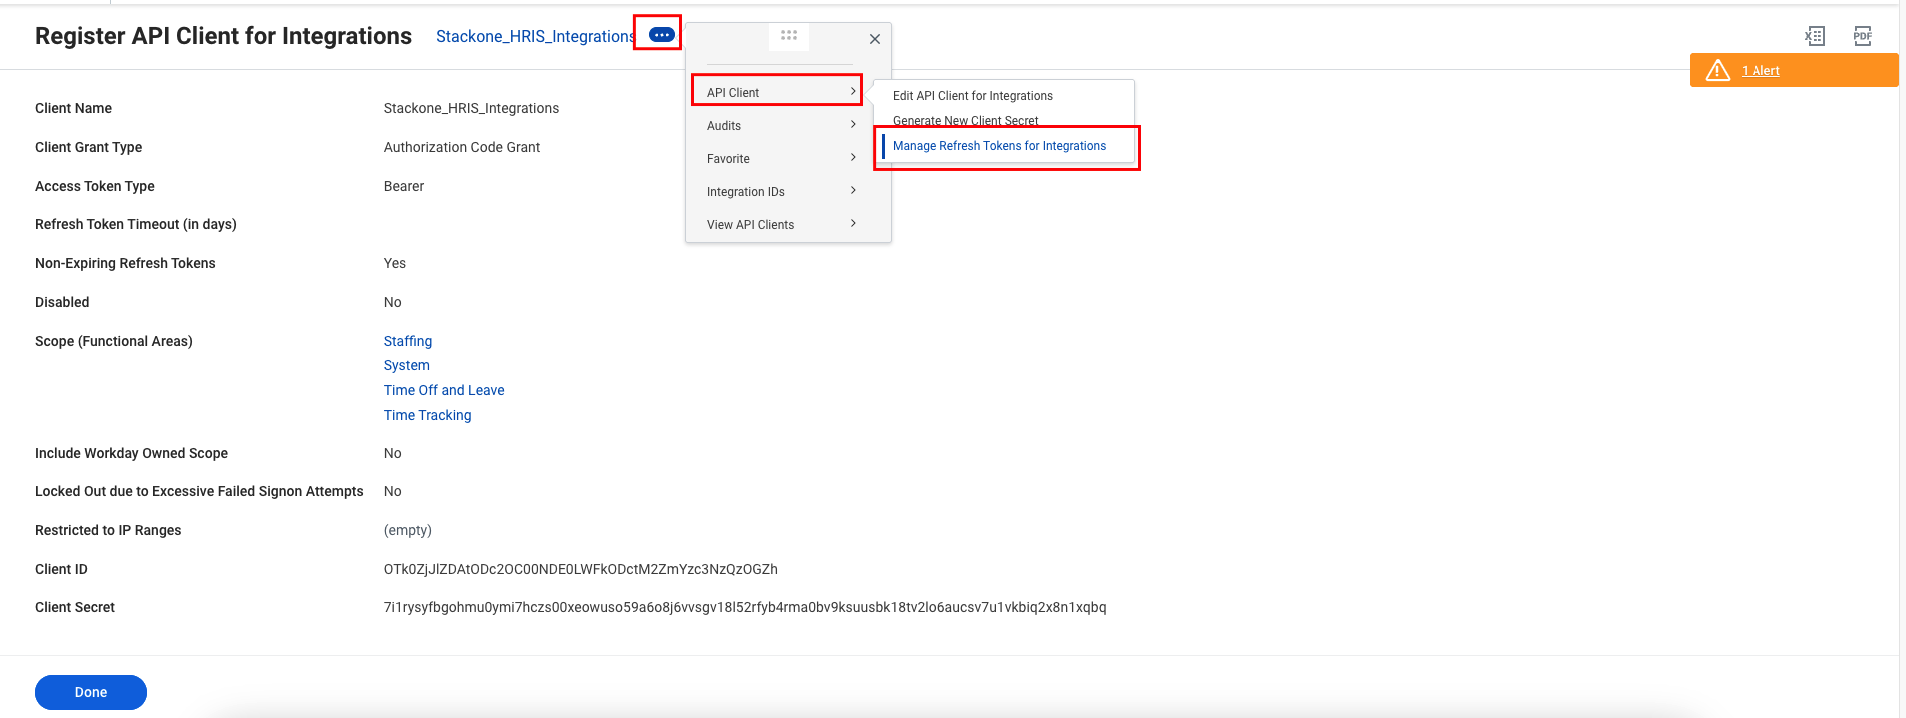
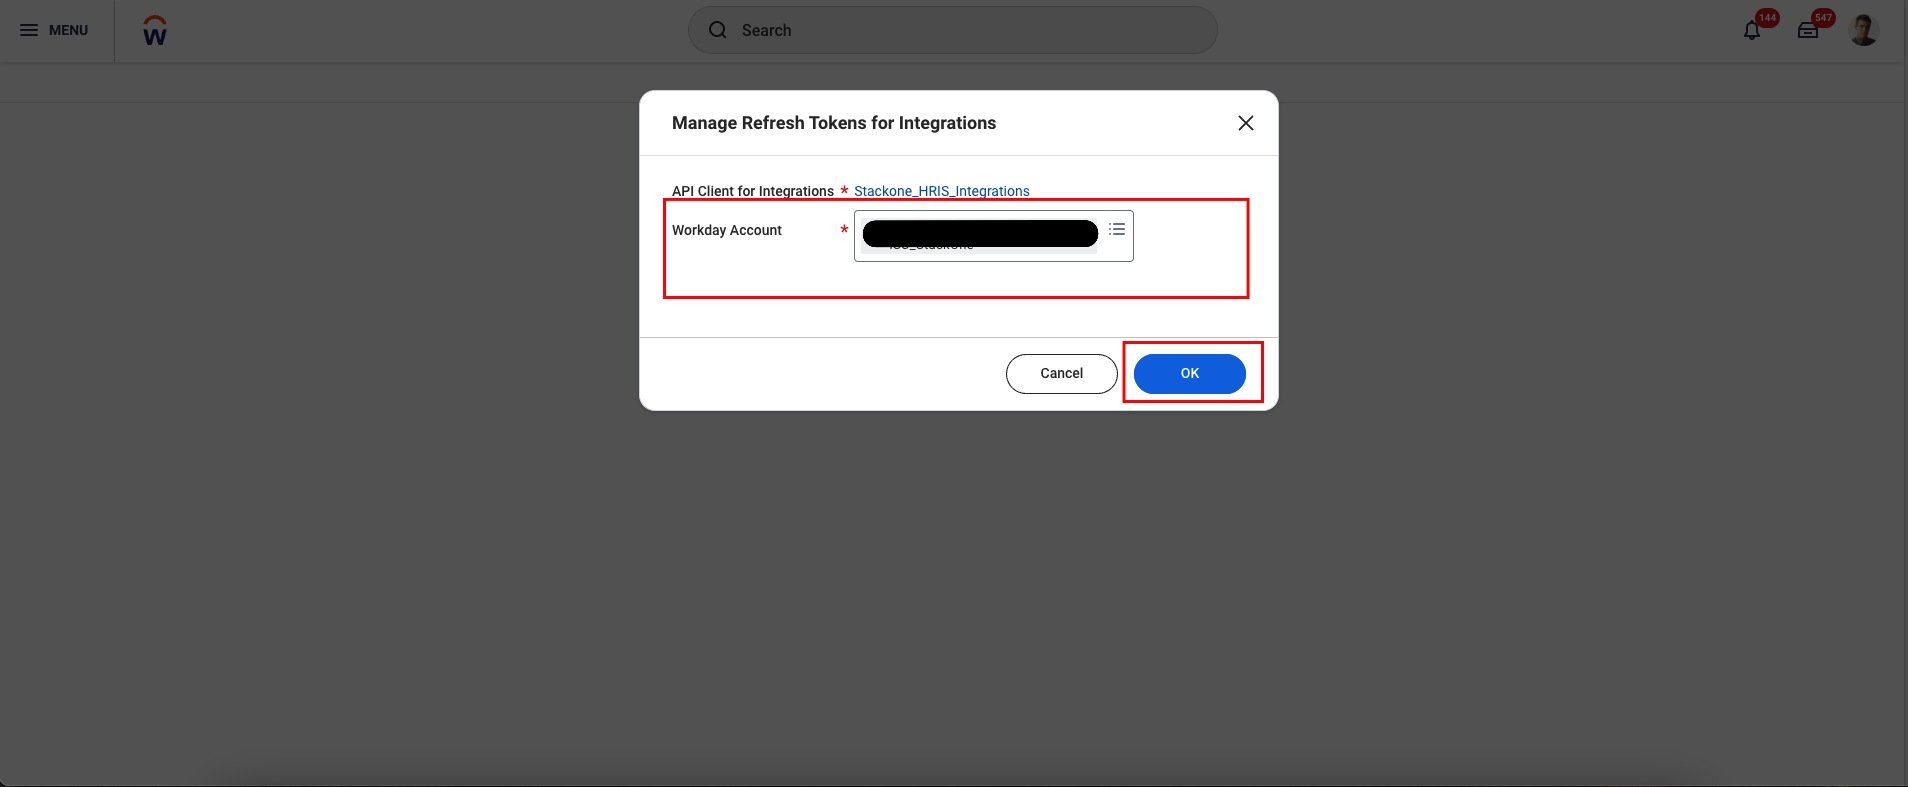
- At the top of the page, click the menu (⋯) icon.
- Select API Client from the menu.
- Click on Manage Refresh Tokens for Integrations.
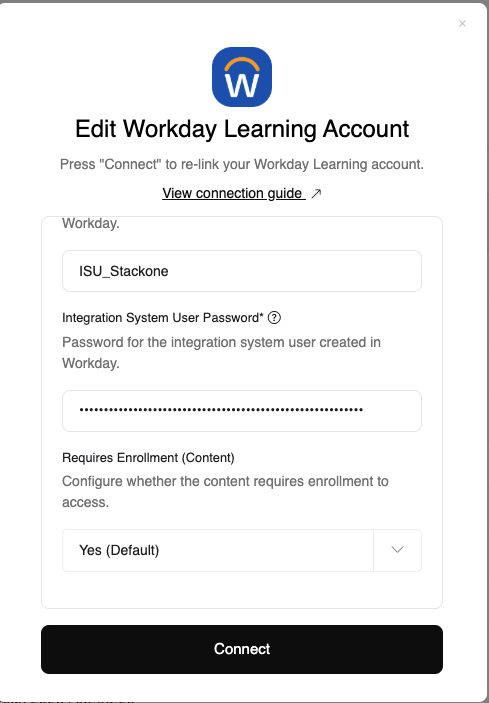
Linking your Account
Enter the following details in the connection form:- Web Service Endpoint
- Workday Tenant Domain (optional): The Domain of your Workday tenant. Can be found in the URL when logged into Workday. (e.g.
my-instance.workday.com) - Tenant
- Client ID
- Client Secret