> ## Documentation Index
> Fetch the complete documentation index at: https://hub.stackone.com/llms.txt
> Use this file to discover all available pages before exploring further.
# Workday
> If you've been directed to StackOne to integrate with Workday, the following steps will help you understand the process and any necessary actions to configure successful integration.
This guidance assumes you have Admin privileges for your Workday account.
## Finding your Workday Tenant
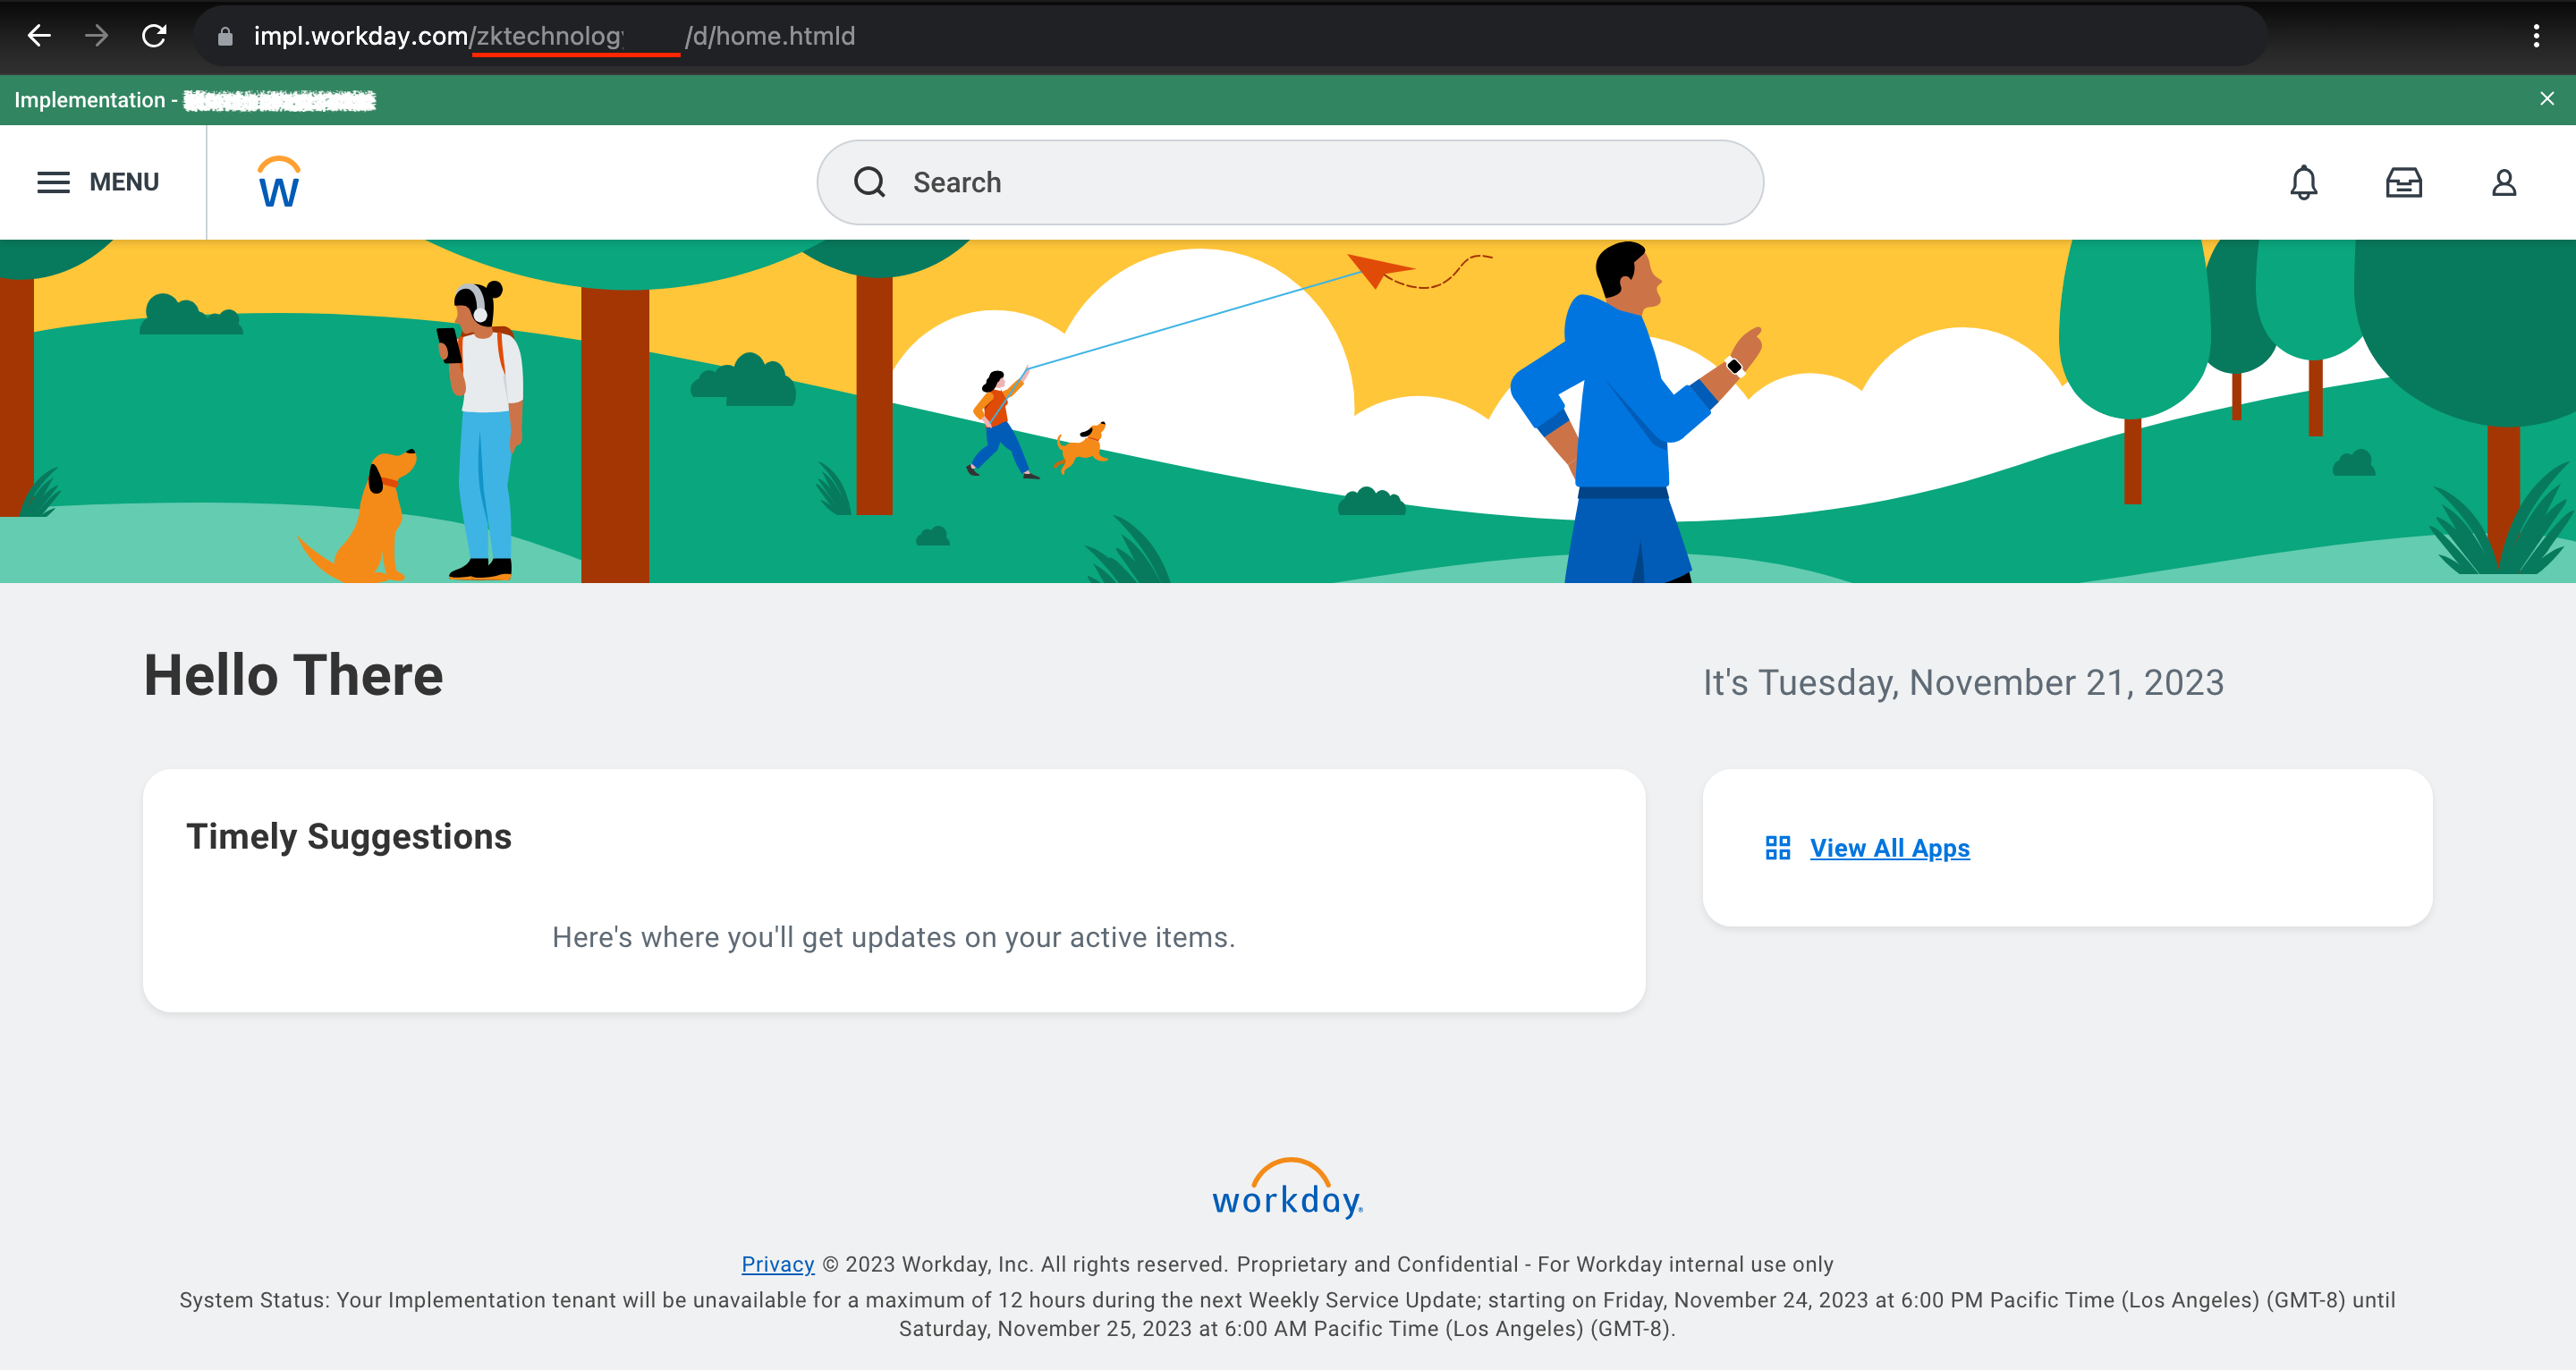
Log into your Workday account. Look at the address bar at the top of the browser window where the URL is displayed. Find your tenant immediately after `workday.com/`.
For example, if your URL is `https://my-instance.workday.com/my-tenant/d/etc`, your tenant is `my-tenant`.
 ## Finding the Web Services Endpoint
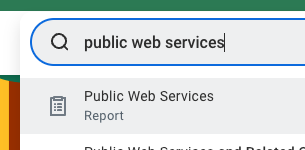
Go to the `Public Web Services` report.
## Finding the Web Services Endpoint
Go to the `Public Web Services` report.
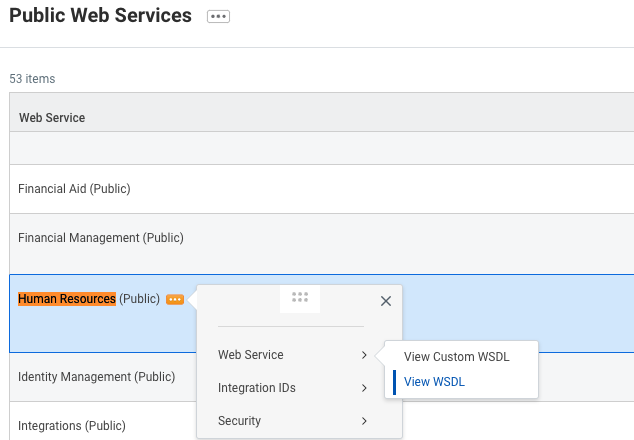
 Find Human Resources and hover over it to be able to interact with the menu. Via the three-dots menu, go to `Web Service` and click on `View WSDL` (note that the page may take a minute to fully load).
 Search for `wsdl:service` in the file OR navigate directly to the very bottom of the page. You should see something like this:
 Copy everything before `service` in the location attribute. Do not include the `https://` prefix. In the example tenant above, this would be `wd2-impl-services1.workday.com/ccx` but it may be different for your tenant (e.g., `wd5-services1.myworkday.com/ccx`).
## Set up an Integration System User
Log in to your Workday tenant in the Workday portal. In the Search field, search for "Create Integration System User".
Copy everything before `service` in the location attribute. Do not include the `https://` prefix. In the example tenant above, this would be `wd2-impl-services1.workday.com/ccx` but it may be different for your tenant (e.g., `wd5-services1.myworkday.com/ccx`).
## Set up an Integration System User
Log in to your Workday tenant in the Workday portal. In the Search field, search for "Create Integration System User".
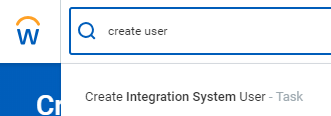 Choose the "Create Integration System User" task.
Enter a username and password in the Account Information section on the "Create Integration System User" page.
Choose the "Create Integration System User" task.
Enter a username and password in the Account Information section on the "Create Integration System User" page.
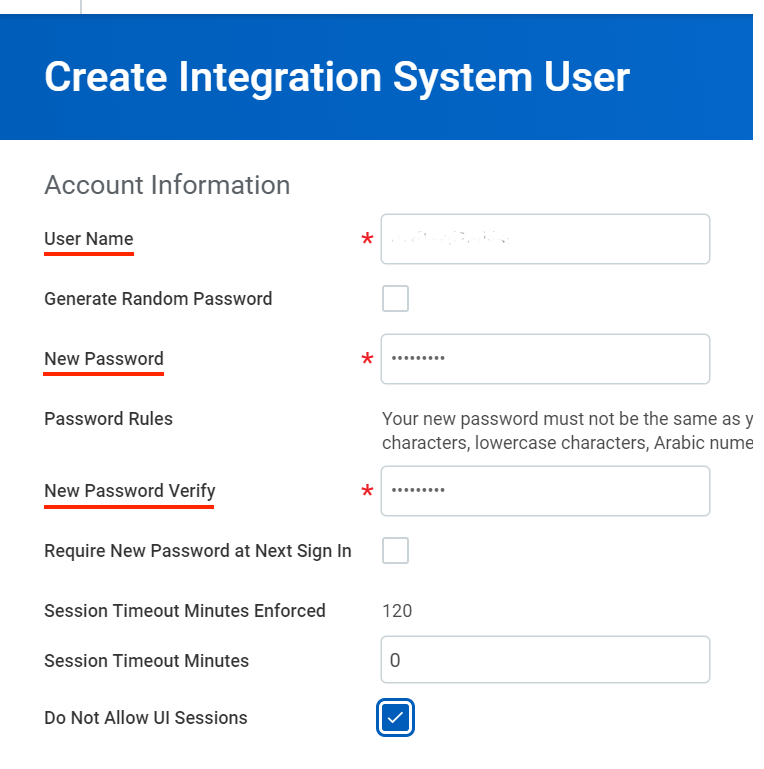 Click OK.
## Add the Integration System User to a Security Group
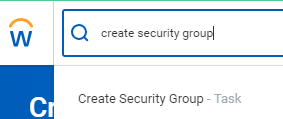
In the Search field, search for "Create Security Group". Select the "Create Security Group" task.
Click OK.
## Add the Integration System User to a Security Group
In the Search field, search for "Create Security Group". Select the "Create Security Group" task.
 On the "Create Security Group" page, select "Integration System Security Group (Unconstrained)" from the Type of Tenanted Security Group pull-down menu. Enter a name in the Name field.
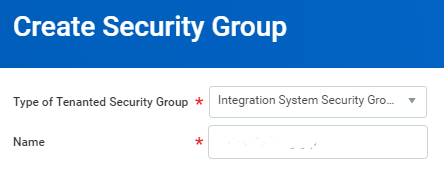 Click OK.
On the "Edit Integration System Security Group (Unconstrained)" page, enter the same name you used when creating the ISU in the first section. Click OK.
## Configure Domain Security Policy Permissions
The Workday HRIS integration currently requires **all** of the permissions listed below to be enabled for full support.
Workday's API may return an error response if any of these permissions are missing.
Edit the Domain Security Policy Permissions in the Security Group.
You can reach this interface by searching for "Maintain Permissions for Security Group" in the search bar, and selecting the name of the Security Group you created in the previous step.
This integration uses the following Workday Security Group Permissions. For each listed permission, select either **Get Only** for read-only access, or **Get and Put** for read and write access in the *View/Modify Access* column.
Click OK.
On the "Edit Integration System Security Group (Unconstrained)" page, enter the same name you used when creating the ISU in the first section. Click OK.
## Configure Domain Security Policy Permissions
The Workday HRIS integration currently requires **all** of the permissions listed below to be enabled for full support.
Workday's API may return an error response if any of these permissions are missing.
Edit the Domain Security Policy Permissions in the Security Group.
You can reach this interface by searching for "Maintain Permissions for Security Group" in the search bar, and selecting the name of the Security Group you created in the previous step.
This integration uses the following Workday Security Group Permissions. For each listed permission, select either **Get Only** for read-only access, or **Get and Put** for read and write access in the *View/Modify Access* column.
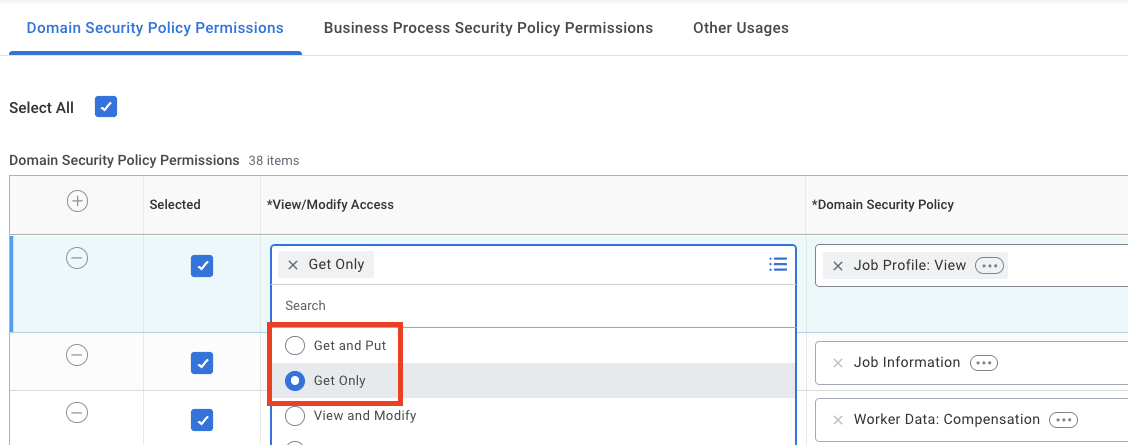 Please note that Security Group Permissions can be customized within a Workday organization, and this list does not account for such customizations.
* Job Requisition Data
* Job Information
* Job Profile: View
* **Manage:**
* Location
* Organization Integration
* **Person Data:**
* Name
* Citizenship Status
* Date of Birth
* Disabilities
* Gender
* Government IDs
* ID Information
* Marital Status
* National ID Identification
* Personal Information
* Personal Data
* Personal Photo
* Home Contact Information
* Home Address
* Home Email
* Home Phone
* Work Contact Information
* Work Address
* Work Email
* Work Phone
* **Worker Data:**
* All Positions
* Compensation
* Current Staffing Information
* Employment Data
* Organization Information
* Public Worker Reports
* **Time Off**
* Time Off
* Time Off Manager View
* Time Off Balances
* Time Off Balances Manager View
* **Leave of Absence**
* Workers
* Set Up: Time Off
* Set Up: Time Off (Calculations - Absence Specific)
* System Auditing
* View: National Identifiers - All
## Approve the Security Policy Changes
In the Search bar, search for "Activate Pending Security Policy Changes". Review the policies that need approval in the summary of the changes in the security policy. Approve the pending security policy changes to activate them.
## Linking your Account
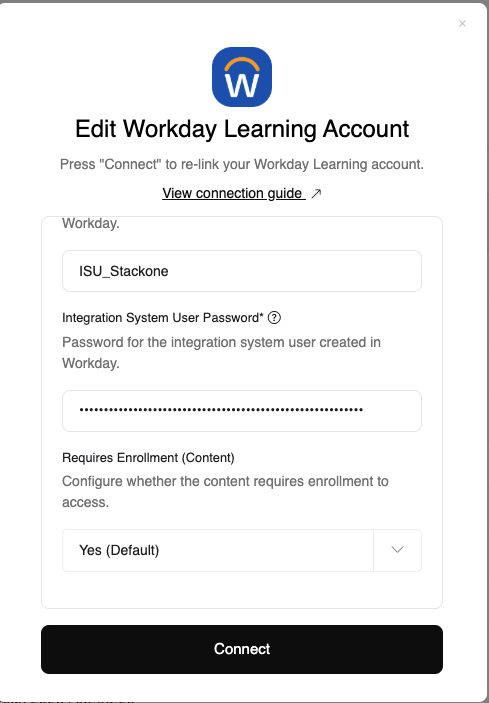
Enter the following details in the connection form:
* **[Web Service Endpoint](#finding-the-web-services-endpoint)**
* **Workday Tenant Domain** (optional): The Domain of your Workday tenant. Can be found in the URL when logged into Workday. (e.g. `my-instance.workday.com`)
* **[Tenant](#finding-your-workday-tenant)**
* **[Integration System Username](#set-up-an-integration-system-user)**
* **[Integration System User Password](#set-up-an-integration-system-user)**
Click **Connect**.
Please note that Security Group Permissions can be customized within a Workday organization, and this list does not account for such customizations.
* Job Requisition Data
* Job Information
* Job Profile: View
* **Manage:**
* Location
* Organization Integration
* **Person Data:**
* Name
* Citizenship Status
* Date of Birth
* Disabilities
* Gender
* Government IDs
* ID Information
* Marital Status
* National ID Identification
* Personal Information
* Personal Data
* Personal Photo
* Home Contact Information
* Home Address
* Home Email
* Home Phone
* Work Contact Information
* Work Address
* Work Email
* Work Phone
* **Worker Data:**
* All Positions
* Compensation
* Current Staffing Information
* Employment Data
* Organization Information
* Public Worker Reports
* **Time Off**
* Time Off
* Time Off Manager View
* Time Off Balances
* Time Off Balances Manager View
* **Leave of Absence**
* Workers
* Set Up: Time Off
* Set Up: Time Off (Calculations - Absence Specific)
* System Auditing
* View: National Identifiers - All
## Approve the Security Policy Changes
In the Search bar, search for "Activate Pending Security Policy Changes". Review the policies that need approval in the summary of the changes in the security policy. Approve the pending security policy changes to activate them.
## Linking your Account
Enter the following details in the connection form:
* **[Web Service Endpoint](#finding-the-web-services-endpoint)**
* **Workday Tenant Domain** (optional): The Domain of your Workday tenant. Can be found in the URL when logged into Workday. (e.g. `my-instance.workday.com`)
* **[Tenant](#finding-your-workday-tenant)**
* **[Integration System Username](#set-up-an-integration-system-user)**
* **[Integration System User Password](#set-up-an-integration-system-user)**
Click **Connect**.
 [https://doc.workday.com](https://doc.workday.com)