Locating API Server
Find the API Server
SAP uses multiple API server addresses. You will need to look up the API server that corresponds to your tenant domain on this table under the 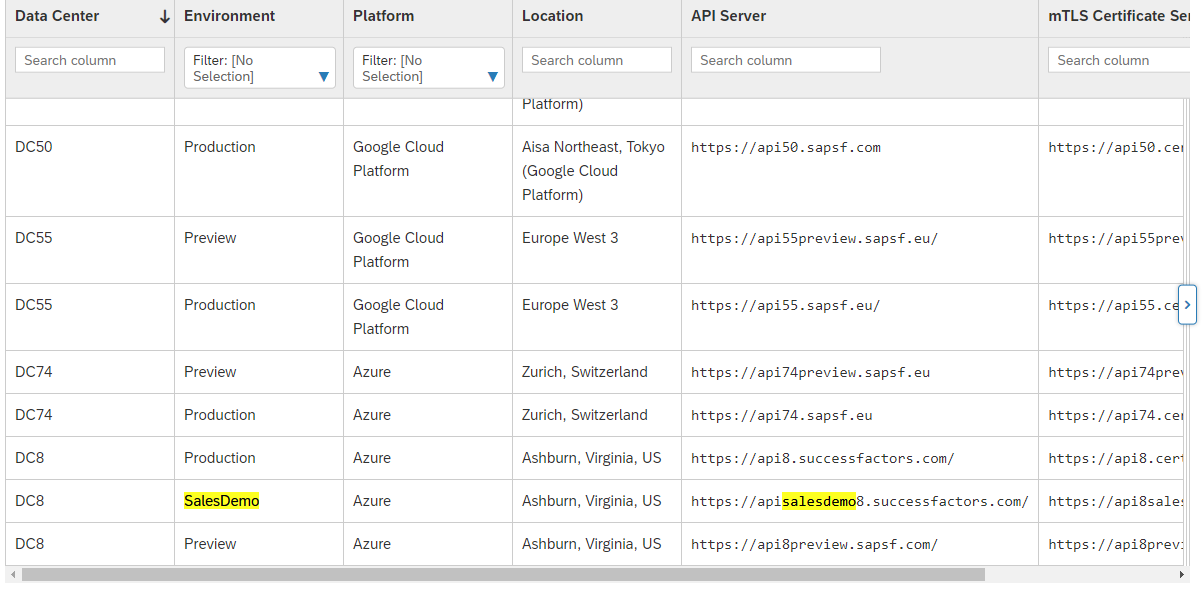
API Server column.For example, if your domain was https://pmsalesdemo8.successfactors.com/ you would search for salesdemo8 in the table.API Server column (remove the final forward-slash /). In this example, the value would be https://apisalesdemo8.successfactors.com.Use this value as the API Server value when connecting SAP SuccessFactors to StackOne.Finding Username
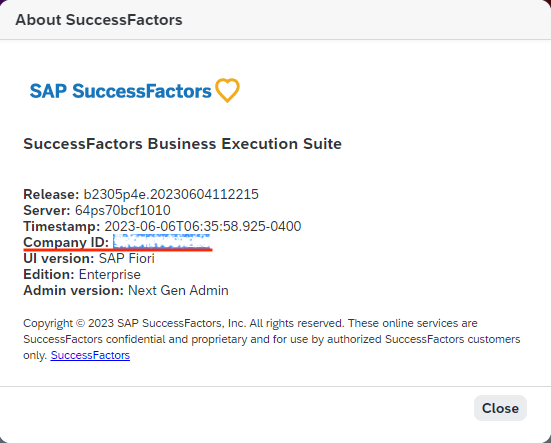
Finding Company ID
Show Version Information
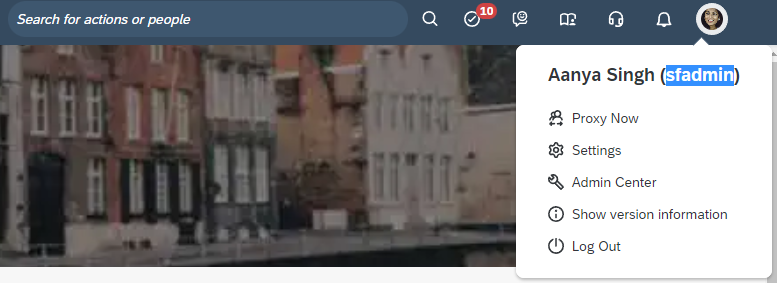
Within the same dropdown from Step 2, select the Show version information option.
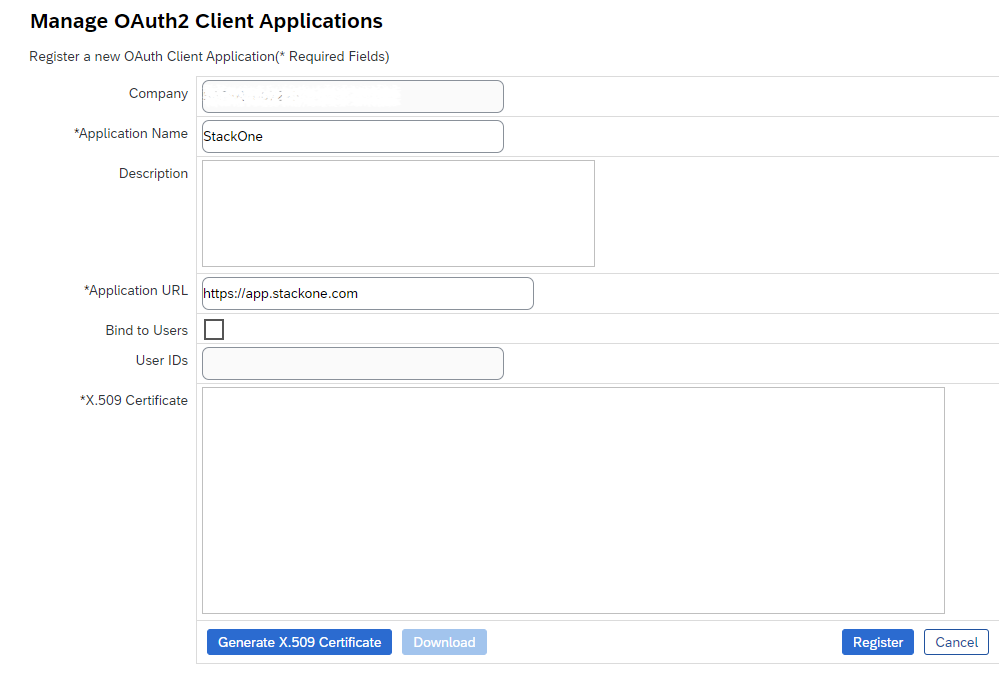
Registering a new Client Application
Search for Manage OAuth2 Client Applications
In the upper right search bar, search for Manage OAuth2 Client Applications and select the option under Actions.
Generating X.509 Certificate
Generate X.509 Certificate
Press the Generate X.509 Certificate button.Enter any Common Name(CN) for the certificate, e.g. 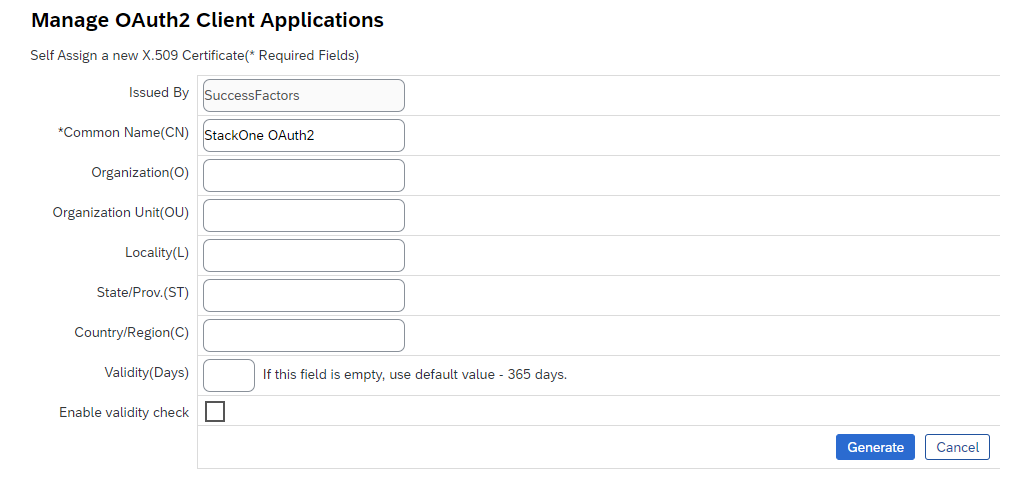
StackOne OAuth2.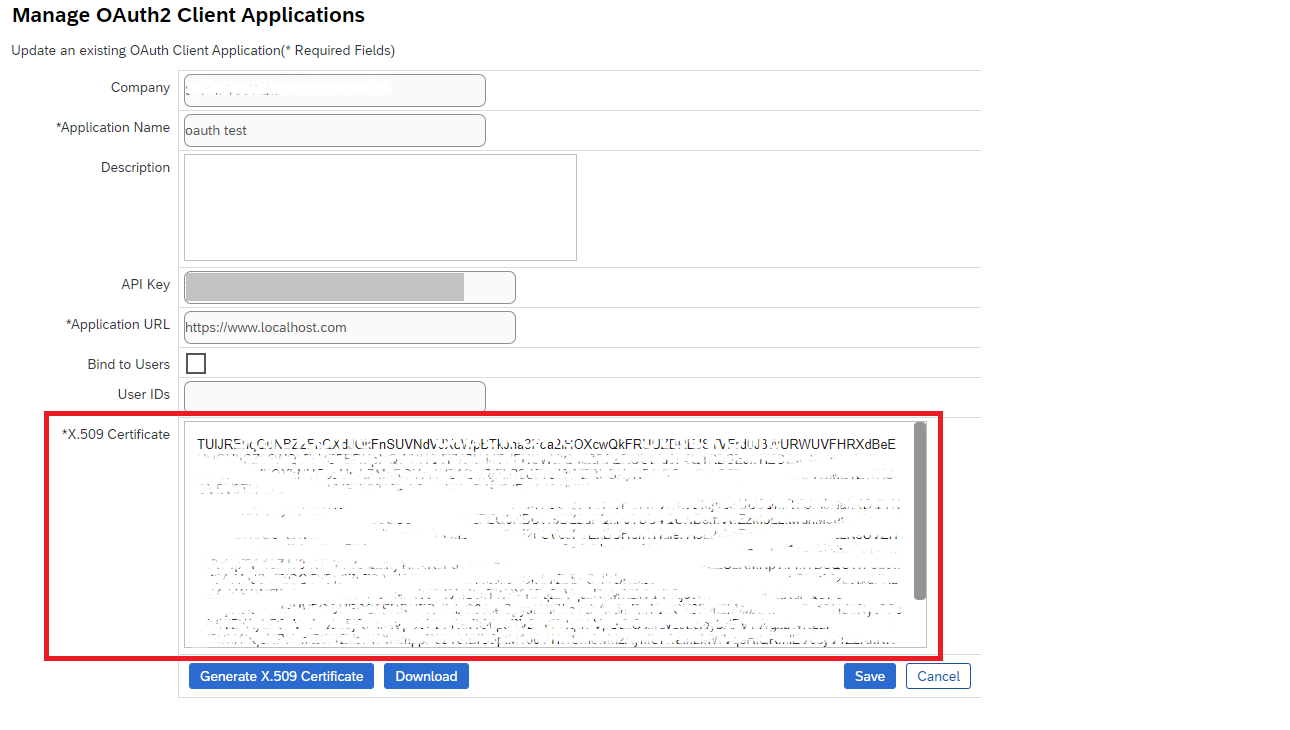
Downloading Private Key
Download Private Key
Press the Download button.❗Caution: The downloaded file contains your private key. This should be handled securely, and this local file should be deleted after your StackOne account has been linked.
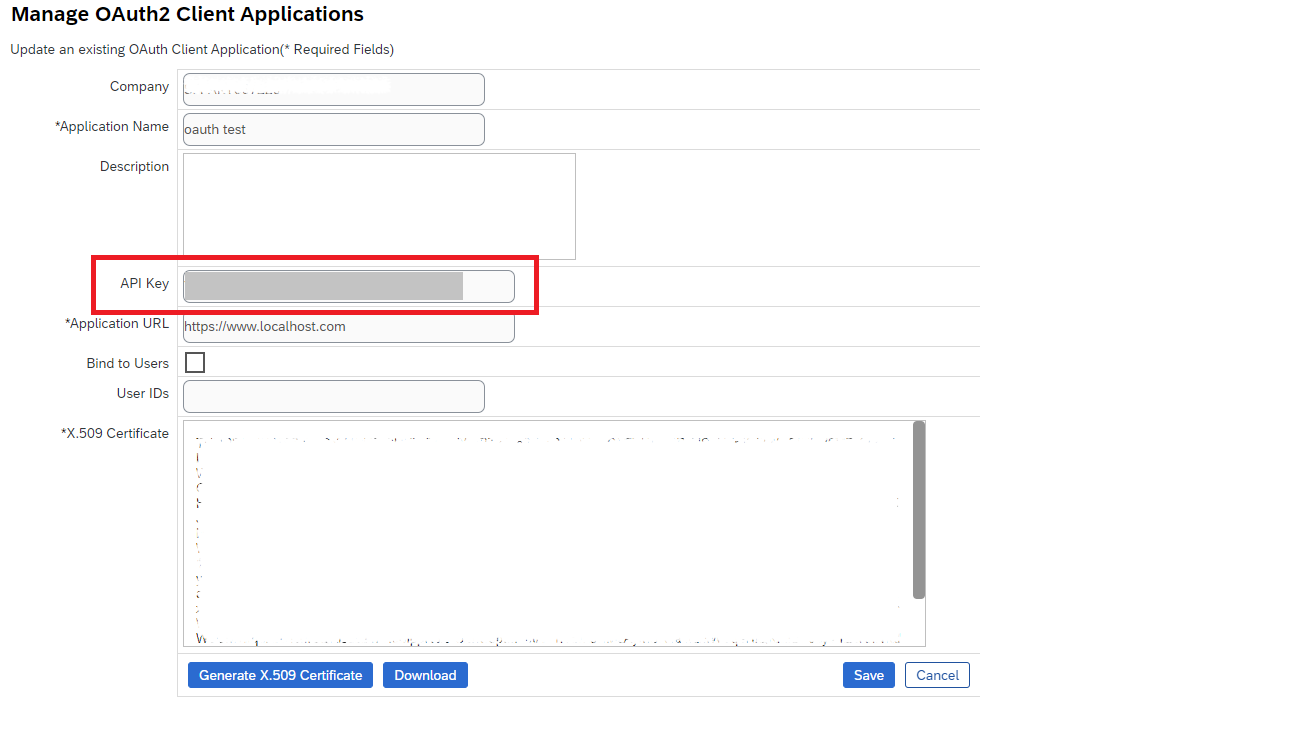
Finding API Key
Connecting with StackOne
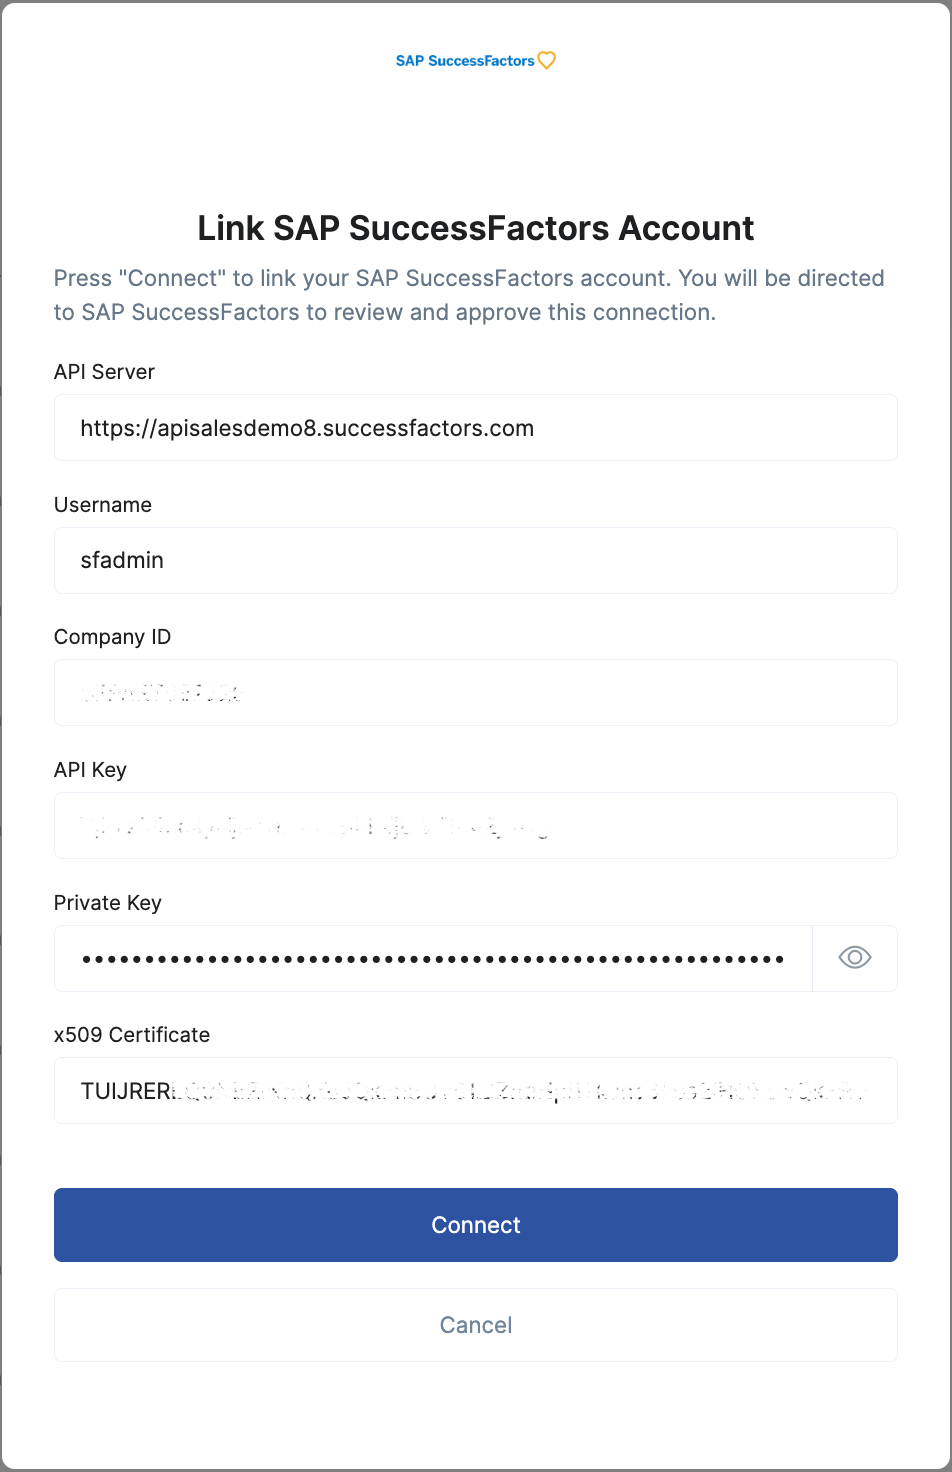
Note: The integration may take up to 15 minutes to initially authenticate once the account has been connected. In the meantime, requests will return a 401: Unauthorized response.
Congratulations, you’re all set! If you face any issues with the steps mentioned above, please contact us by emailing integrations@stackone.com. We’re always here to assist you!