> ## Documentation Index
> Fetch the complete documentation index at: https://hub.stackone.com/llms.txt
> Use this file to discover all available pages before exploring further.

# Personio - Custom Integrations

> Follow these steps to connect Personio with StackOne Hub successfully.

<Warning>
  Ensure you have Admin privileges for your Personio account.
</Warning>

If you've been directed to StackOne to integrate with Personio, the following steps will help you understand the process and any necessary actions to configure successful integration.

## Generating your API credentials

<Steps>
  <Step title="Sign in and open Settings">
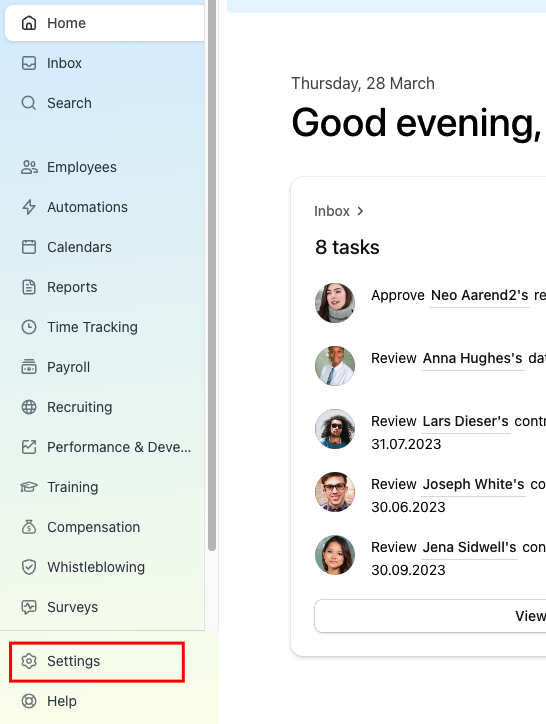
    Sign in to the Personio website and click on the Settings tab on the left-hand side menu.
    <Frame>
      <img className="rounded-md" style={{ margin: '0 auto', border: '1px solid #efefef' }} alt="Settings" src="https://mintcdn.com/stackone-hub/BgOrelPgZGaVd2dz/images/personio-custom-integrations/image1.png?fit=max&auto=format&n=BgOrelPgZGaVd2dz&q=85&s=f3443bb2cc976c0d080a760b76084962" width="546" height="724" data-path="images/personio-custom-integrations/image1.png" />
    </Frame>
  </Step>

  <Step title="Open API credentials">
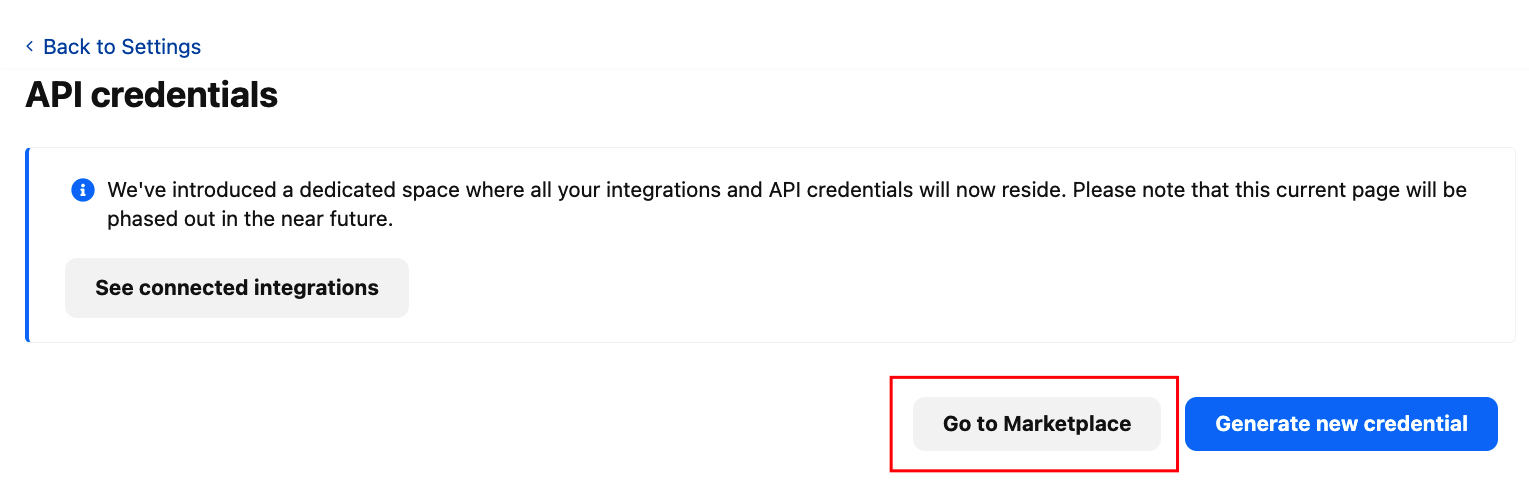
    Click on the API credentials inside the integration box.
    <Frame>
      <img className="rounded-md" style={{ margin: '0 auto', border: '1px solid #efefef' }} alt="API Credentials" src="https://mintcdn.com/stackone-hub/BgOrelPgZGaVd2dz/images/personio-custom-integrations/image2.png?fit=max&auto=format&n=BgOrelPgZGaVd2dz&q=85&s=b7a0d64f31d8445b576efe00dcb5b8fa" width="1529" height="503" data-path="images/personio-custom-integrations/image2.png" />
    </Frame>
  </Step>

  <Step title="Go to Marketplace">
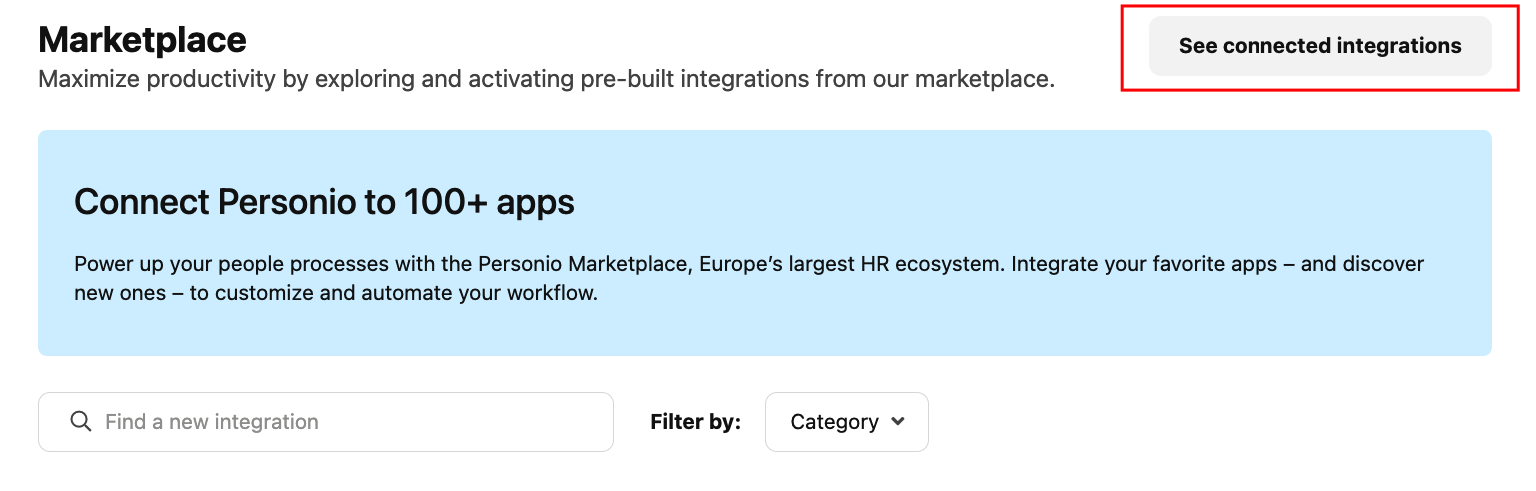
    Click on the Go to Marketplace button. It'll direct to the Marketplace page.
    <Frame>
      <img className="rounded-md" style={{ margin: '0 auto', border: '1px solid #efefef' }} alt="Marketplace" src="https://mintcdn.com/stackone-hub/BgOrelPgZGaVd2dz/images/personio-custom-integrations/image3.png?fit=max&auto=format&n=BgOrelPgZGaVd2dz&q=85&s=0fe21b35efb759db095df56d75fa7fff" width="1536" height="491" data-path="images/personio-custom-integrations/image3.png" />
    </Frame>
  </Step>

  <Step title="See Connected Integrations">
    Click on the See Connected Integrations button. It'll direct to the Connected Integration page. Here, click on the Create Custom Integration button.

    <Frame>
      <img className="rounded-md" style={{ margin: '0 auto', border: '1px solid #efefef' }} alt="Connected Integrations" src="https://mintcdn.com/stackone-hub/BgOrelPgZGaVd2dz/images/personio-custom-integrations/image4.png?fit=max&auto=format&n=BgOrelPgZGaVd2dz&q=85&s=b410b58ad0c5af221b5c6d1b386cd83e" width="1527" height="163" data-path="images/personio-custom-integrations/image4.png" />
    </Frame>
  </Step>

  <Step title="Create Custom Integration">
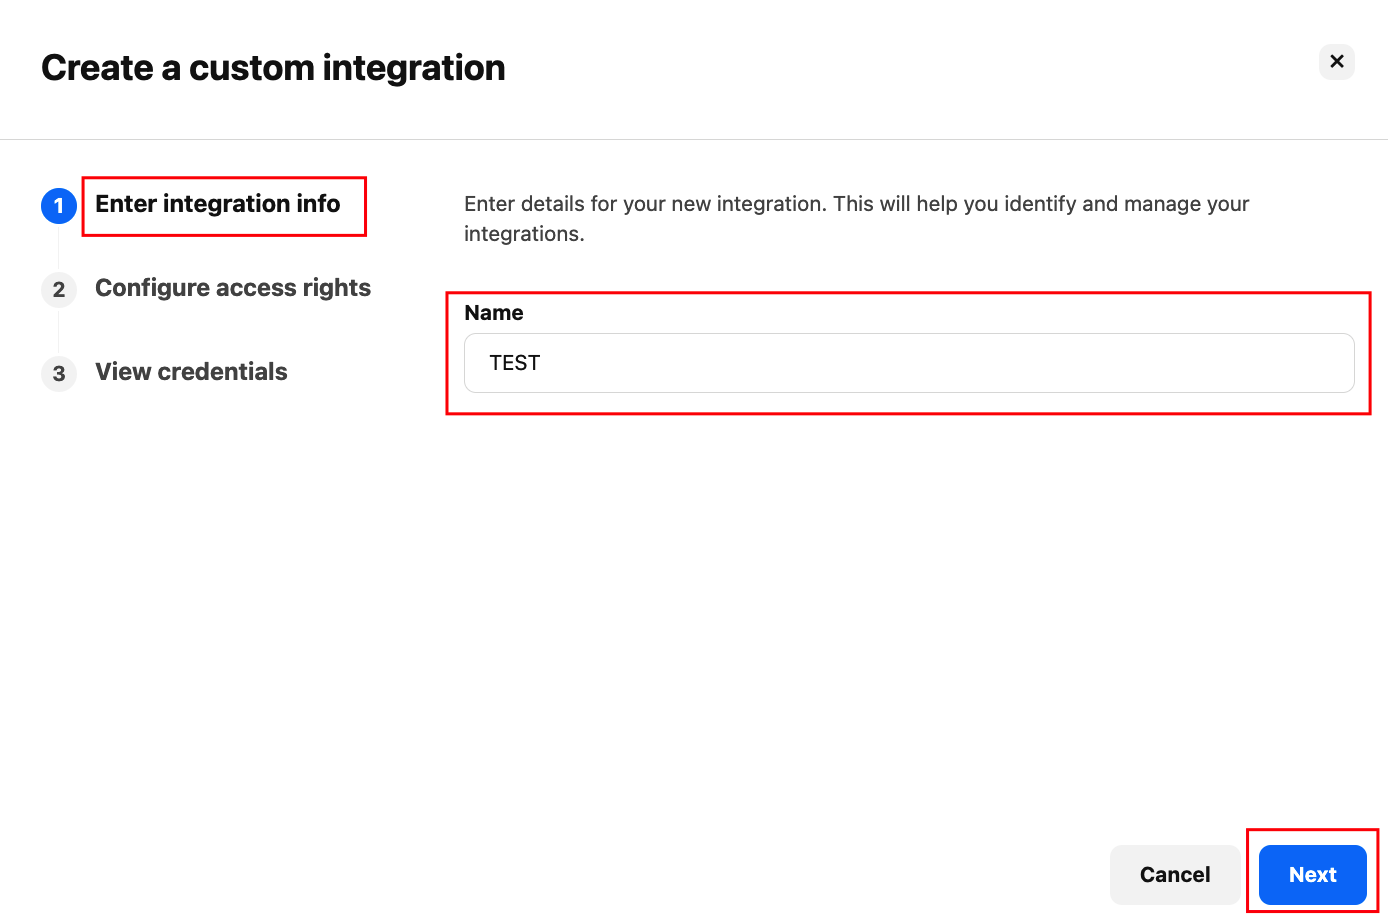
    Write your company name inside the name field, and please make sure your company name is in capital letters and click on Next button.
    <Frame>
      <img className="rounded-md" style={{ margin: '0 auto', border: '1px solid #efefef' }} alt="Custom Integration Name" src="https://mintcdn.com/stackone-hub/BgOrelPgZGaVd2dz/images/personio-custom-integrations/image5.png?fit=max&auto=format&n=BgOrelPgZGaVd2dz&q=85&s=7851a830f1006248d11628b94883bf5f" width="1388" height="920" data-path="images/personio-custom-integrations/image5.png" />
    </Frame>
  </Step>

  <Step title="Select Permissions">
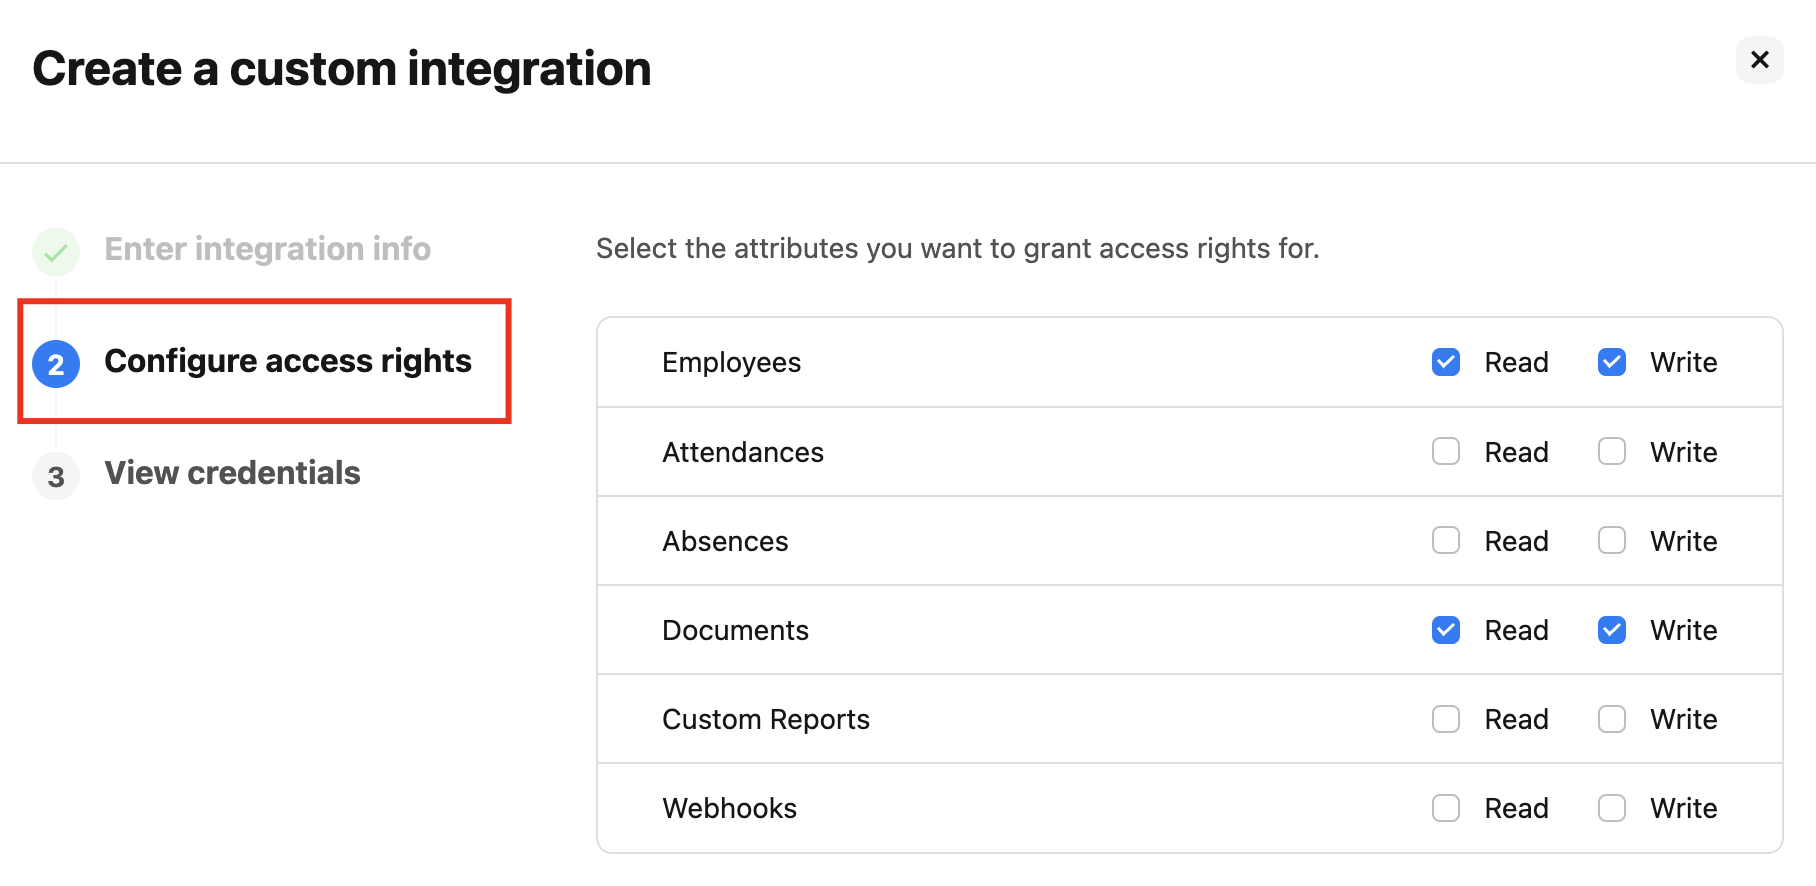
    Select at least one permission to continue; for example, to get Employees data, select Employees or to get Documents data, select Documents too.
    <Frame>
      <img className="rounded-md" style={{ margin: '0 auto', border: '1px solid #efefef' }} alt="Permissions" src="https://mintcdn.com/stackone-hub/BgOrelPgZGaVd2dz/images/personio-custom-integrations/image6.png?fit=max&auto=format&n=BgOrelPgZGaVd2dz&q=85&s=88dc3dc32b1dc4ad87085ecffcc24261" width="1816" height="886" data-path="images/personio-custom-integrations/image6.png" />
    </Frame>
  </Step>

  <Step title="Choose Attributes">
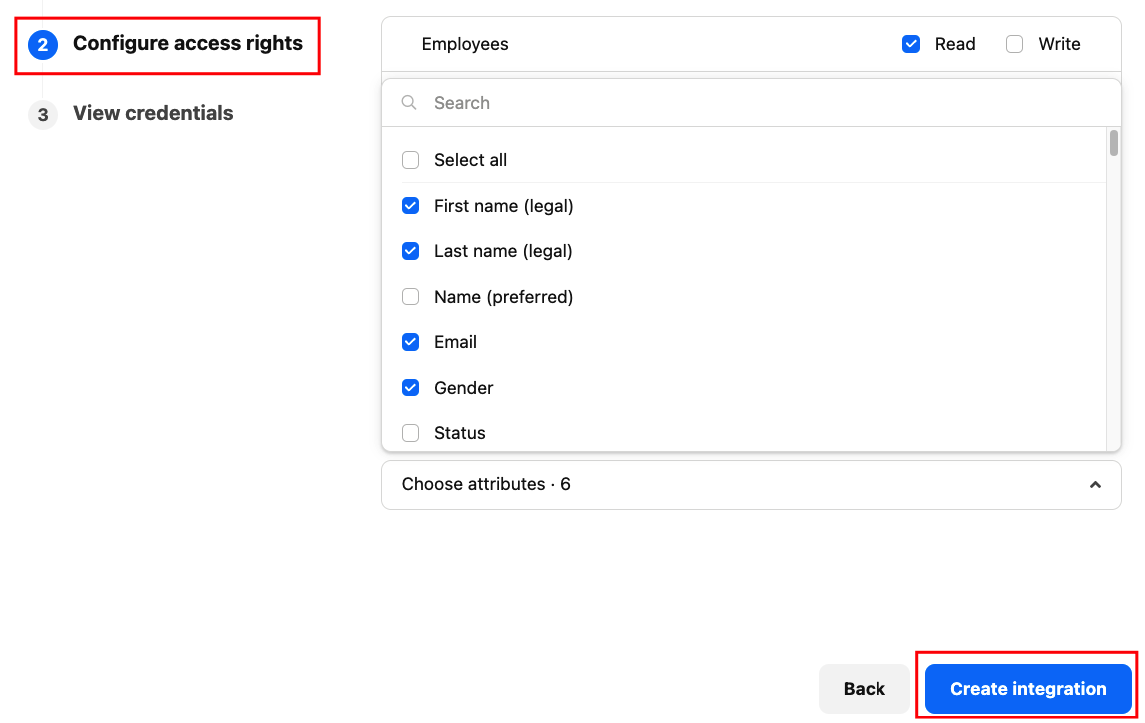
    Click on Choose attributes. Select those attributes you want to show in your data, or select all attributes.
    <Frame>
      <img className="rounded-md" style={{ margin: '0 auto', border: '1px solid #efefef' }} alt="Attributes" src="https://mintcdn.com/stackone-hub/BgOrelPgZGaVd2dz/images/personio-custom-integrations/image7.png?fit=max&auto=format&n=BgOrelPgZGaVd2dz&q=85&s=74b8c120263efb6c10a95f31ebac5e87" width="1145" height="723" data-path="images/personio-custom-integrations/image7.png" />
    </Frame>
  </Step>

  <Step title="Create Integration">
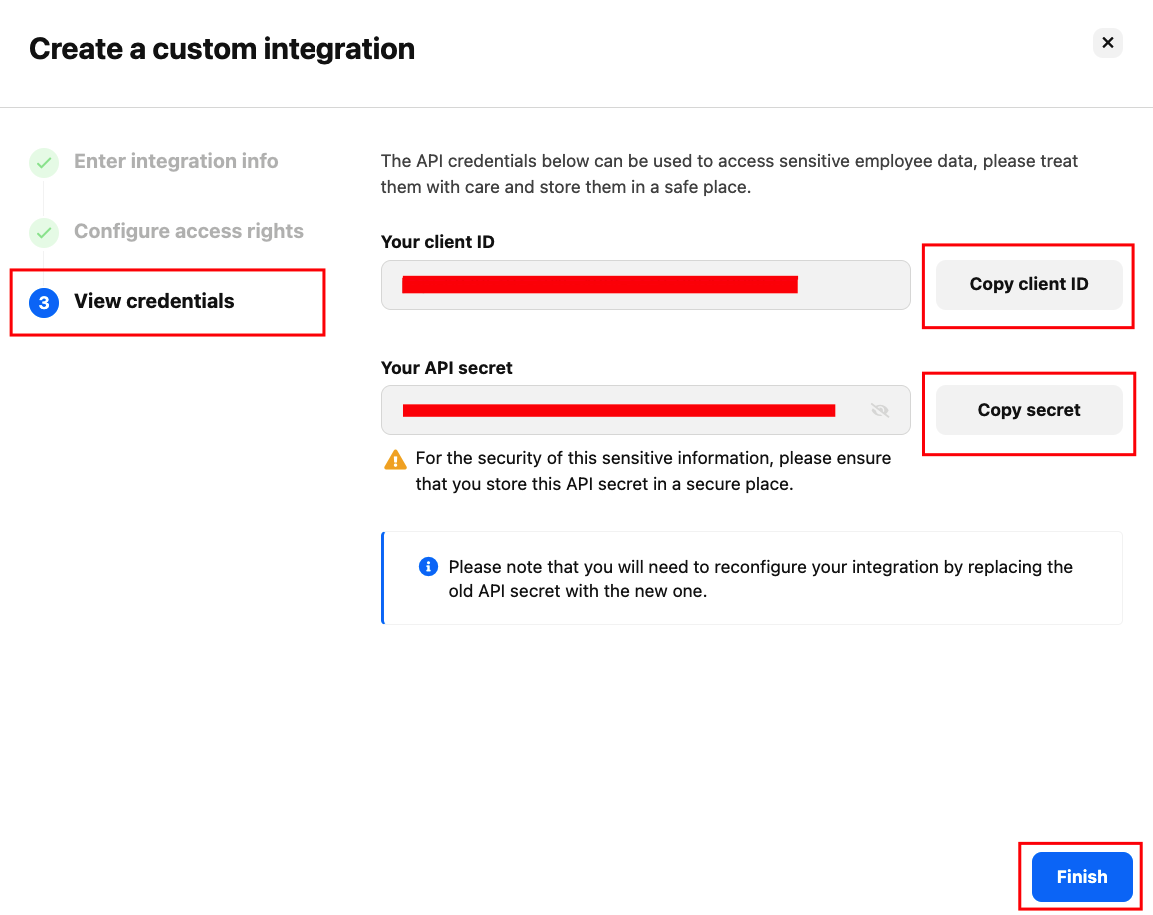
    Click on the Create Integration button. Make sure your credential is generated successfully, then click on the Finish button.
    <Frame>
      <img className="rounded-md" style={{ margin: '0 auto', border: '1px solid #efefef' }} alt="Create Integration" src="https://mintcdn.com/stackone-hub/BgOrelPgZGaVd2dz/images/personio-custom-integrations/image8.png?fit=max&auto=format&n=BgOrelPgZGaVd2dz&q=85&s=2b2194ab2e03a5035dc172b70cec62f0" width="1153" height="915" data-path="images/personio-custom-integrations/image8.png" />
    </Frame>
  </Step>
</Steps>

NOTE: Copy your API credentials – client ID and client secret to a safe place.

## Connecting with StackOne Hub

<Steps>
  <Step title="Enter API Credentials">
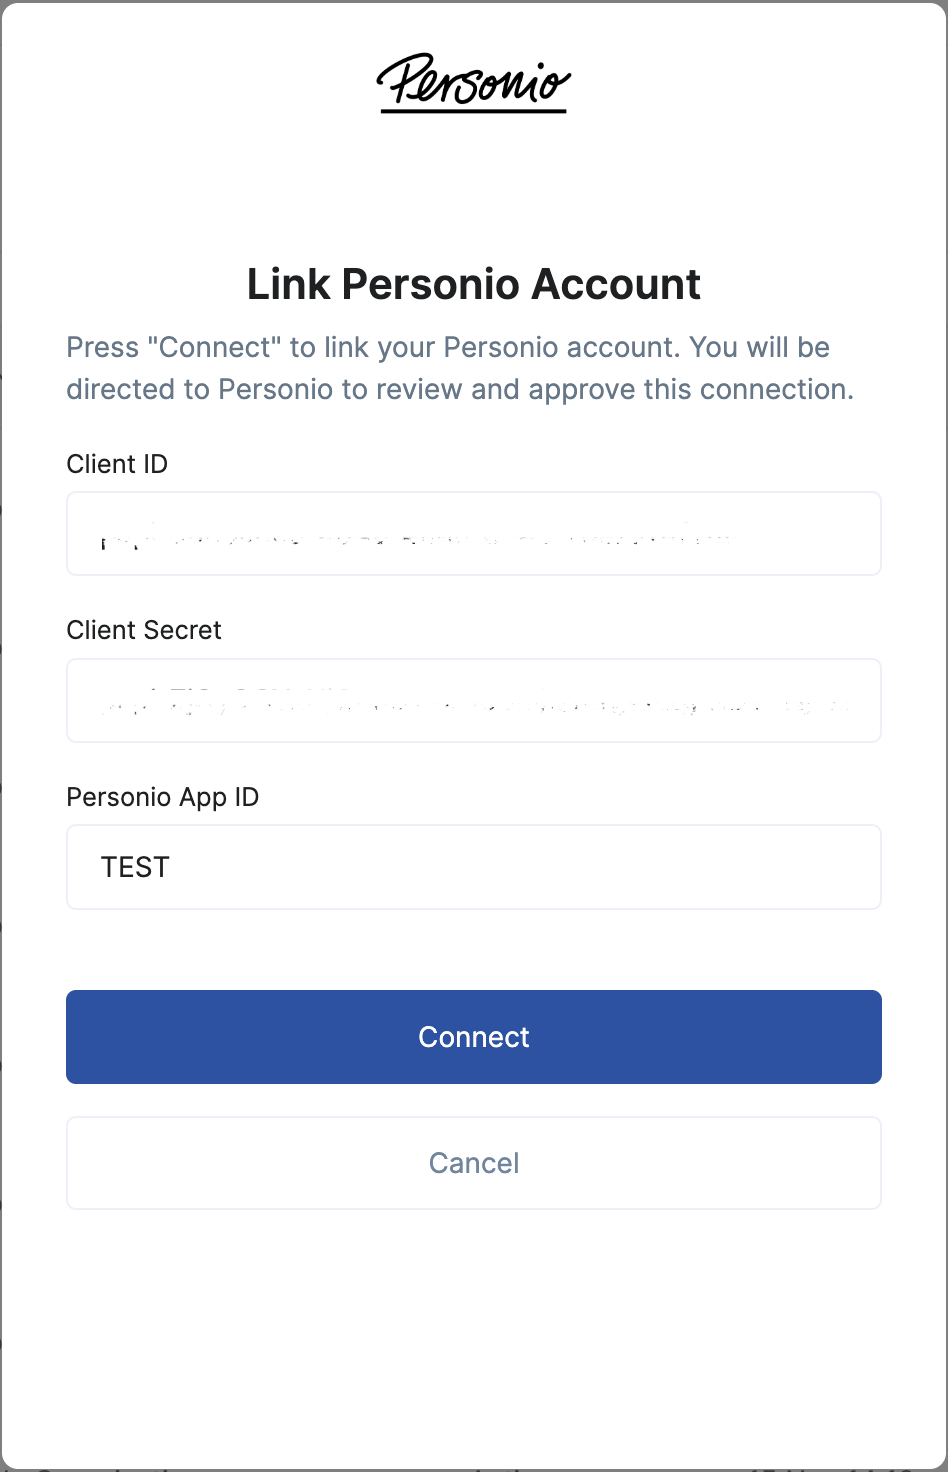
    Paste the API client ID, and client secret in the StackOne Hub after selecting Personio as your HRIS provider.
  </Step>

  <Step title="Enter Company Name">
    Copy your company name from your Personio account, then paste your company name inside the Personio app id; please make sure the name is in capital letters.
    <Frame>
      <img className="rounded-md" style={{ margin: '0 auto', border: '1px solid #efefef' }} alt="Company Name" src="https://mintcdn.com/stackone-hub/BgOrelPgZGaVd2dz/images/personio-custom-integrations/image9.png?fit=max&auto=format&n=BgOrelPgZGaVd2dz&q=85&s=0b9086244d4461ccd3e80cd8bc70714a" width="948" height="1472" data-path="images/personio-custom-integrations/image9.png" />
    </Frame>
  </Step>
</Steps>
