Generating your API credentials
Sign in to Personio
Sign in to the Personio website and click on the Settings tab on the left-hand side menu.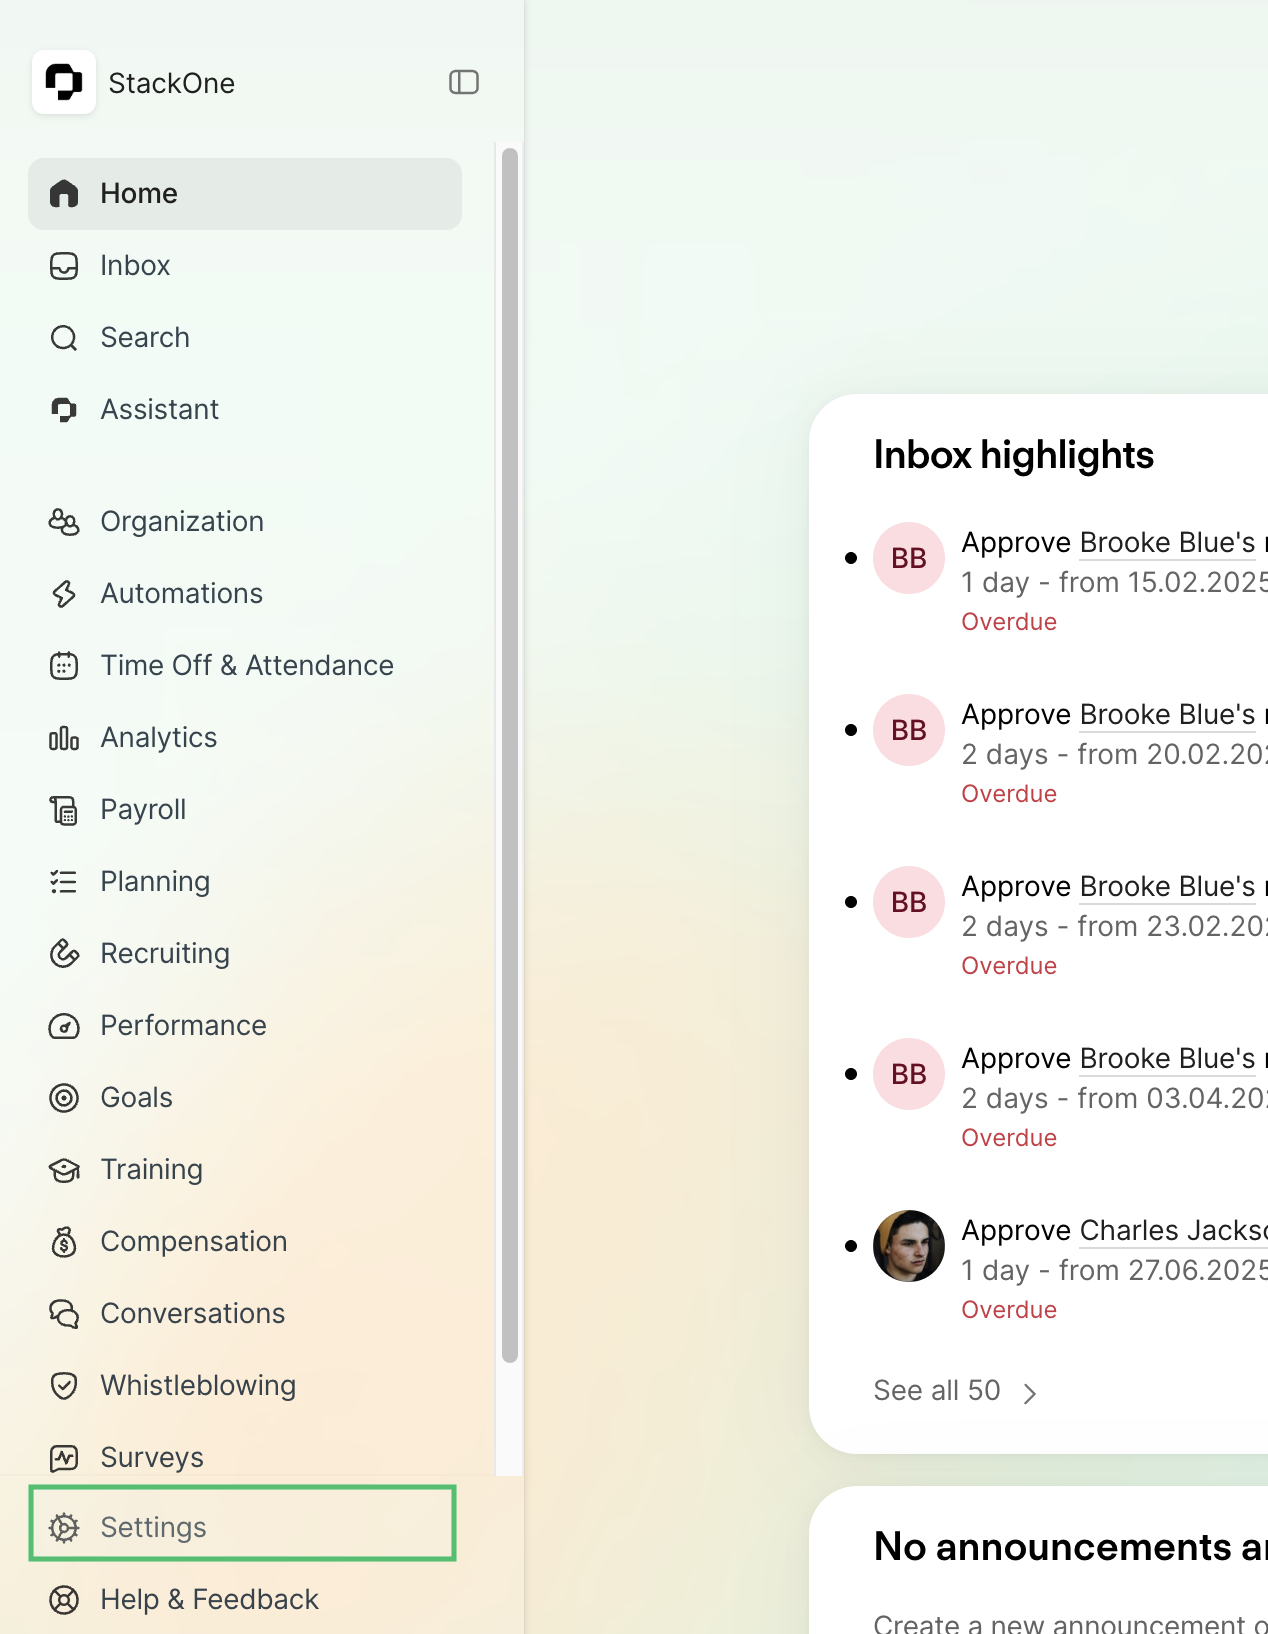
Navigate to API credentials
In the Settings menu, scroll down to the “Integrations” section and click on “API credentials”.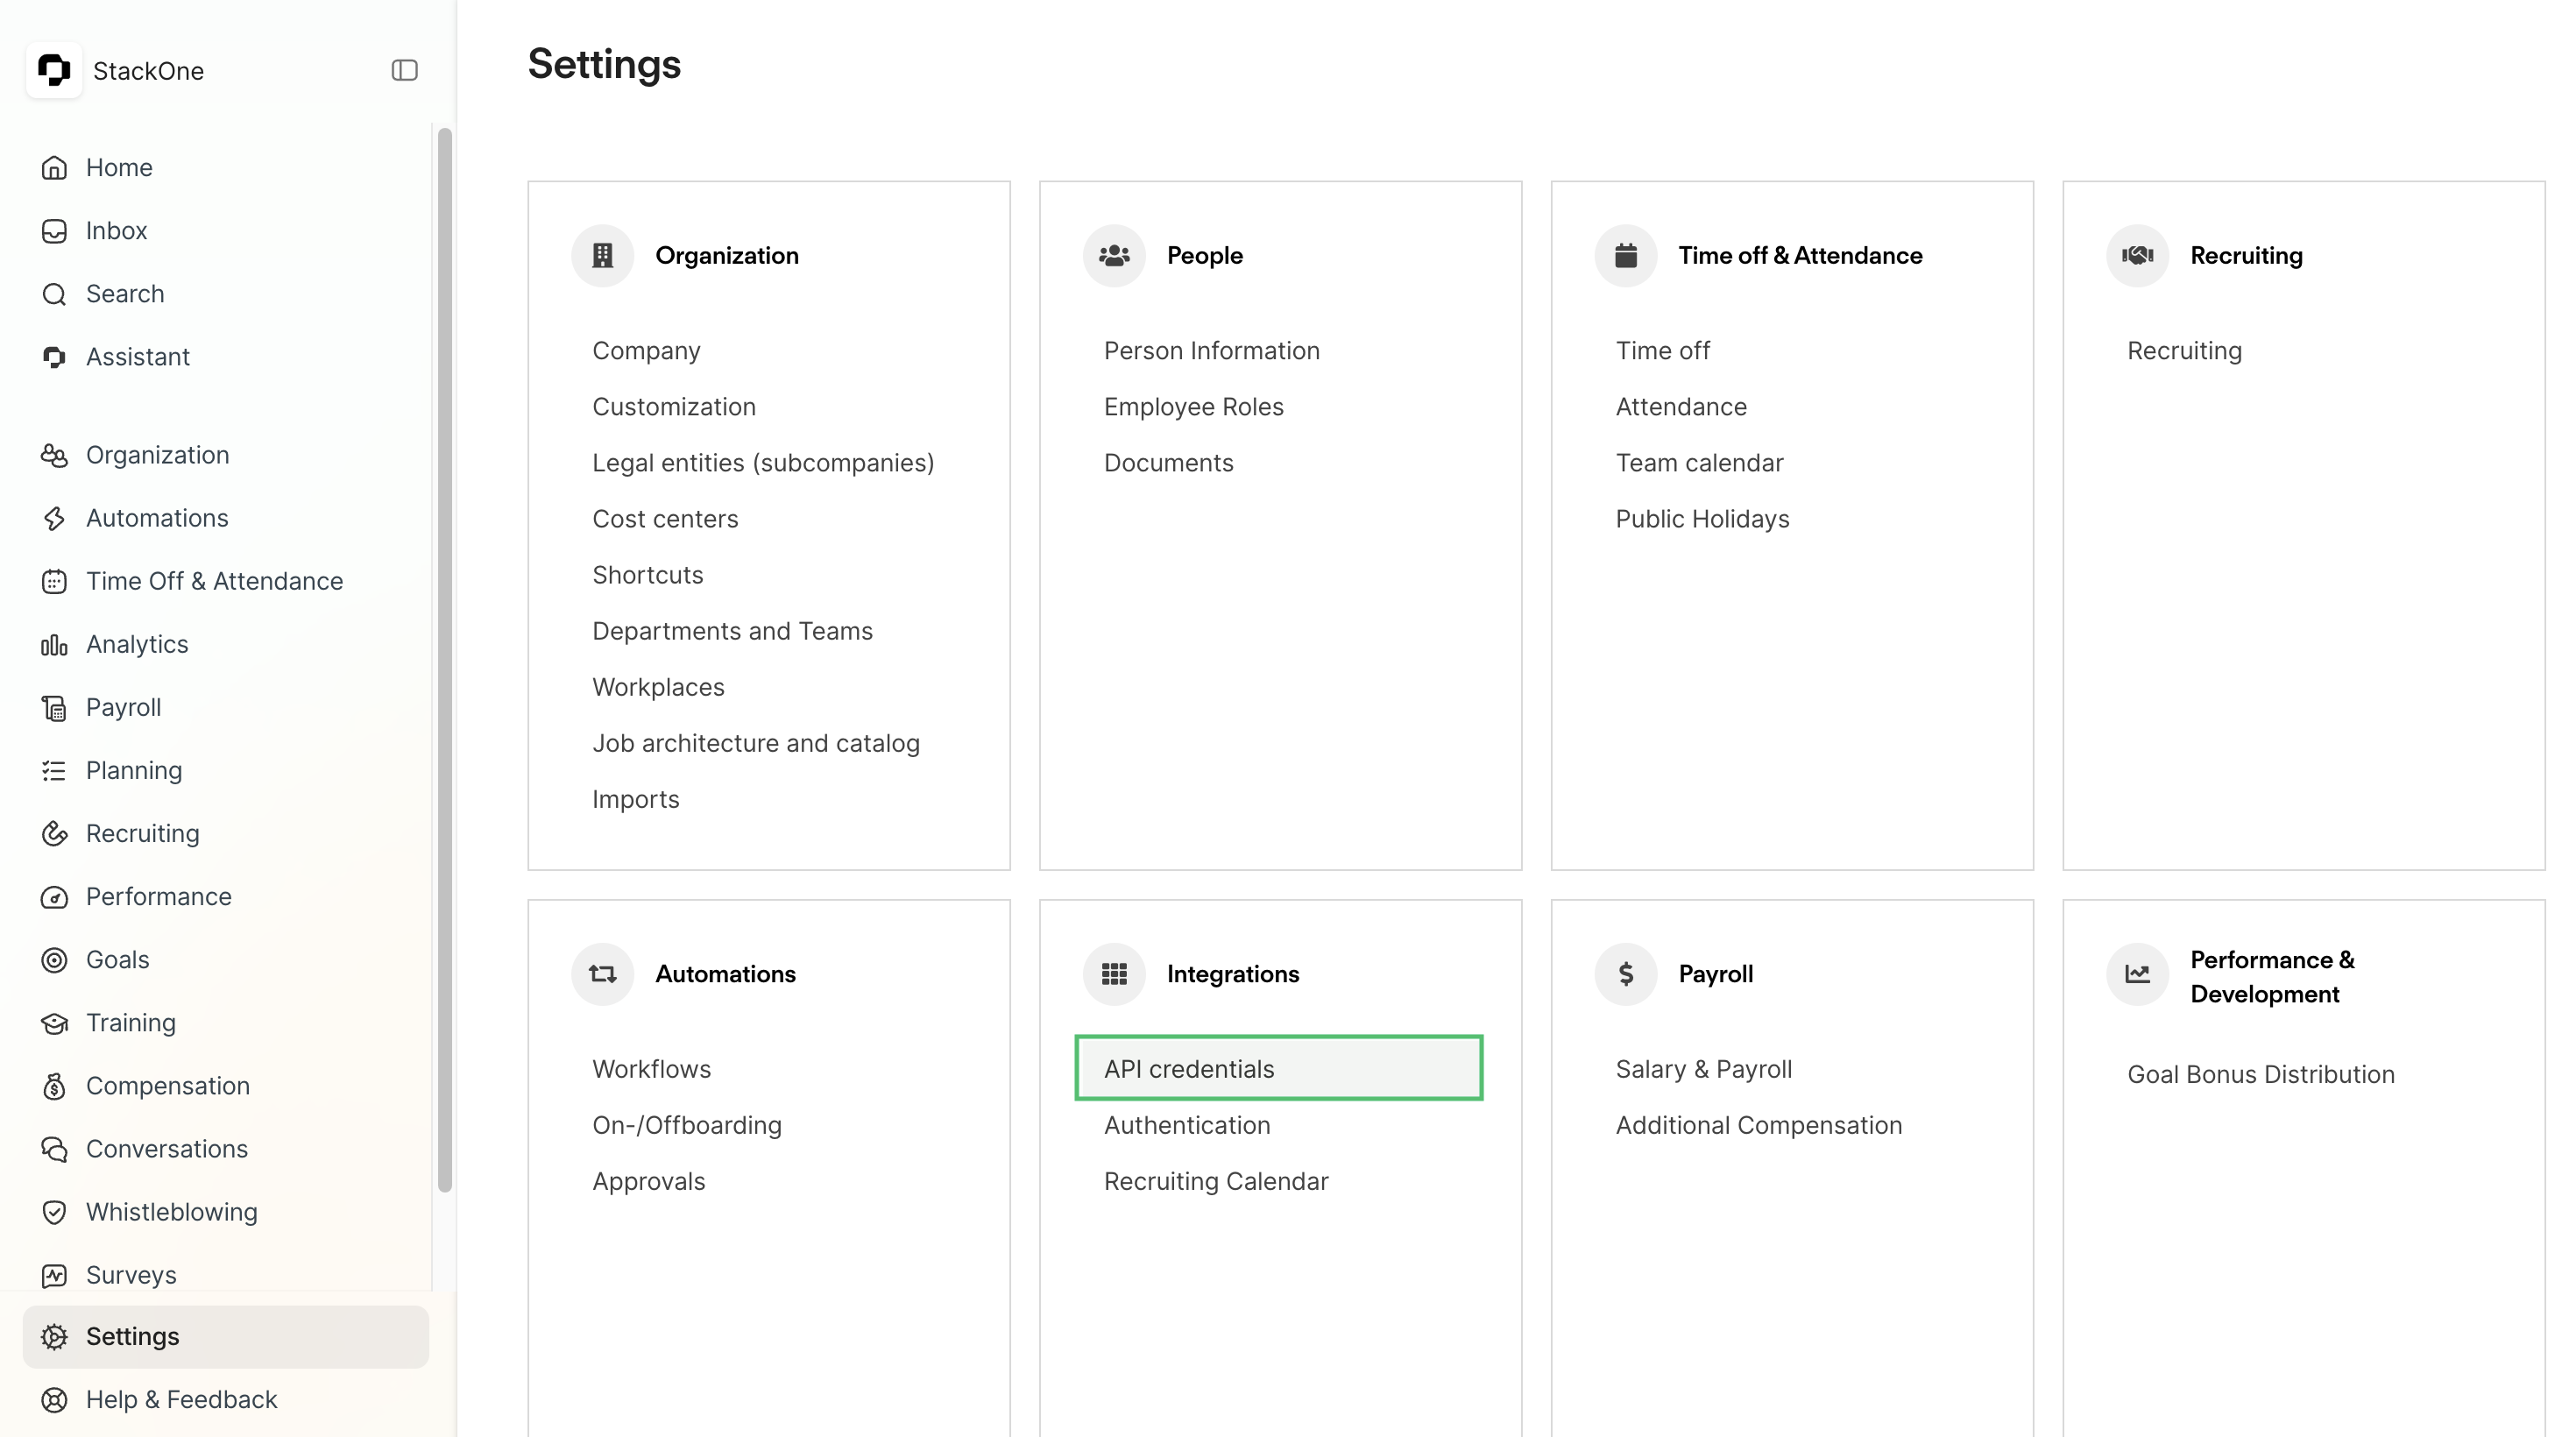
Create custom integration
On the “Connected integrations” page, click the “Create custom integration” button.
Enter integration details
In the first step of the integration creation dialog, enter a name for your integration, and then click on the Next button.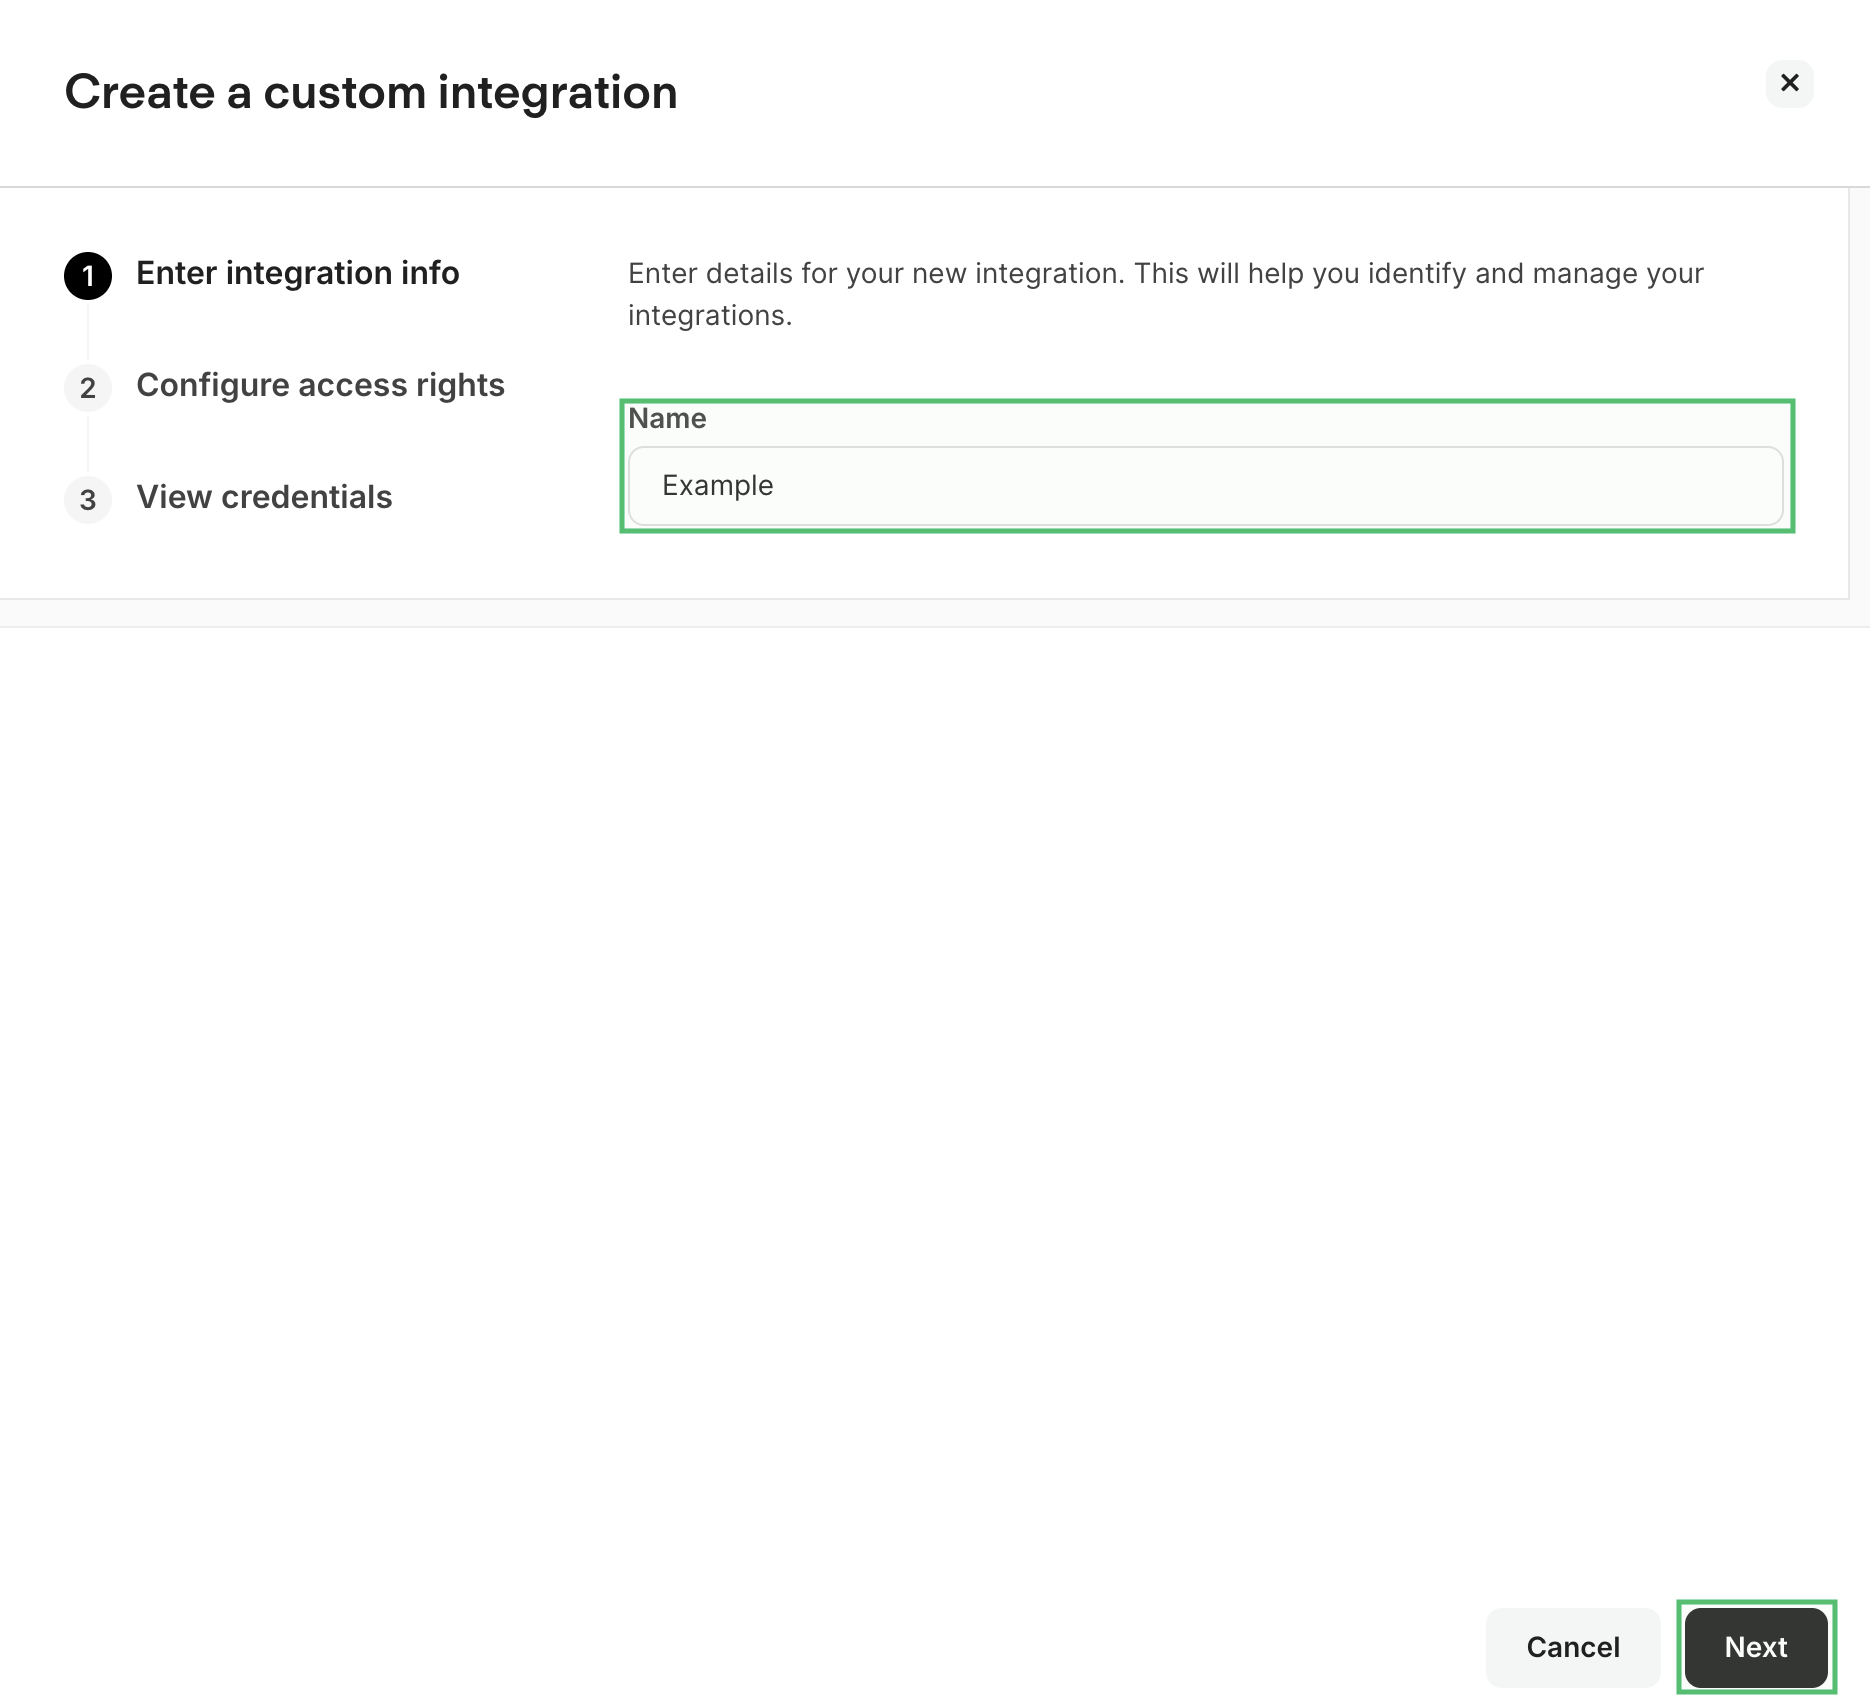
Select permissions
In the second step, select the data types you want to grant access to. You must select at least one permission to continue. Common options include: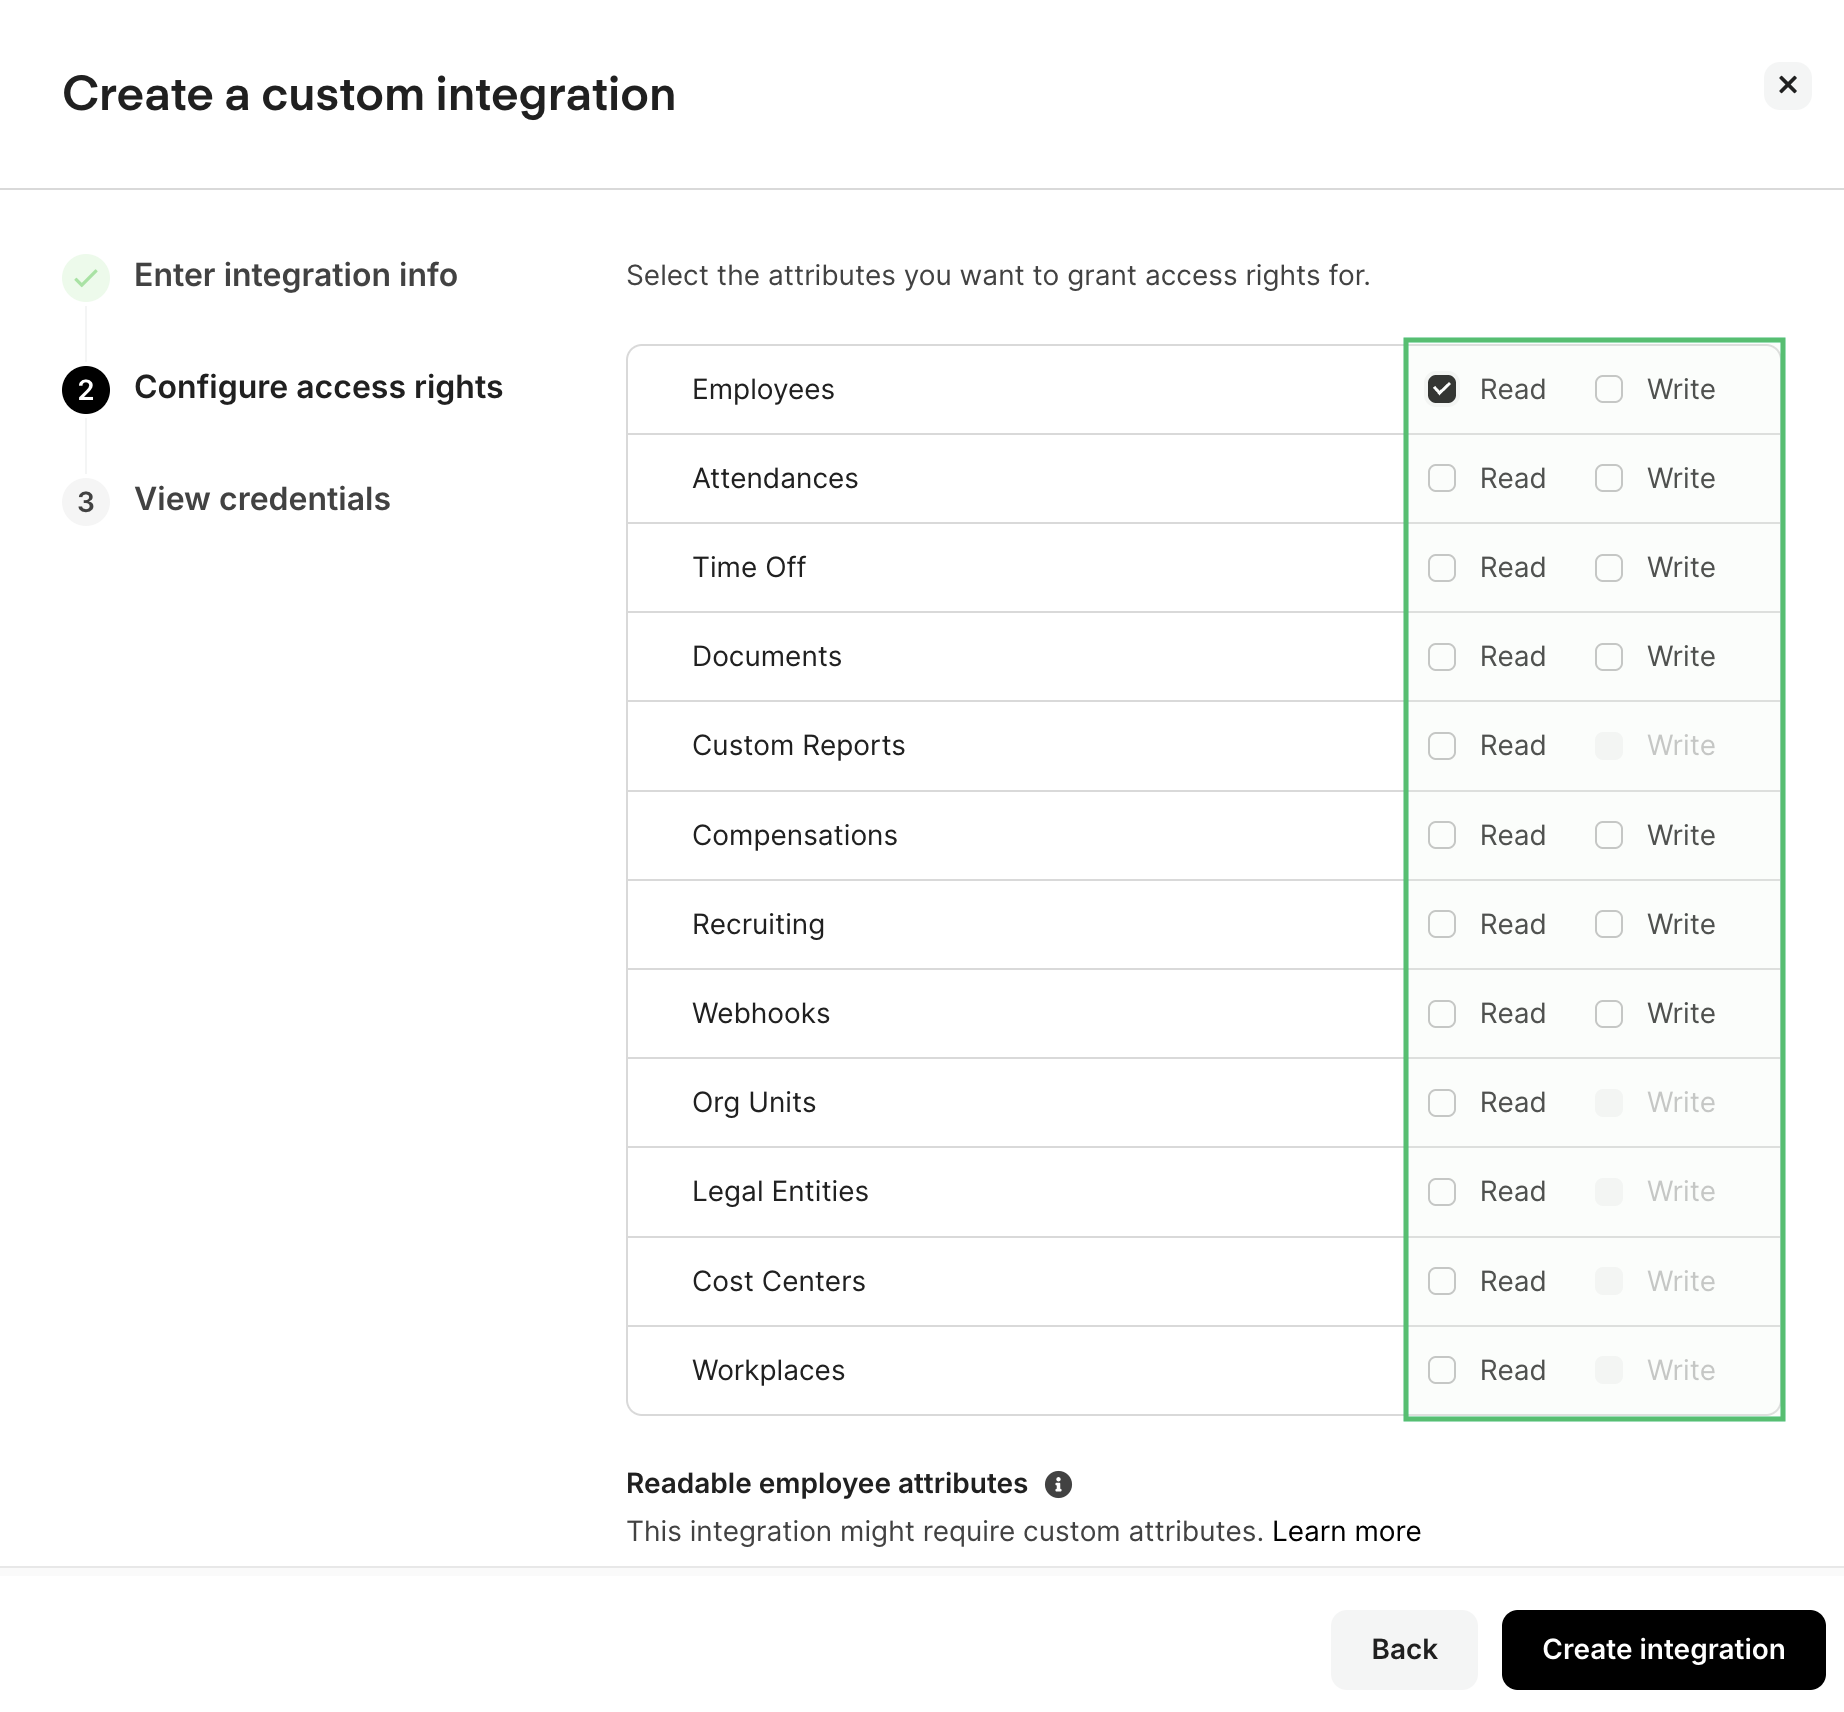
- employees (Read/Write)
- attendances (Read/Write)
- Time off (Read/Write)
- documents (Read/Write)
- Recruiting (Read/Write)
- Webhooks (Read/Write)
Choose employee attributes (Optional)
If you selected “employees” permissions, you can optionally click “Choose attributes” to select specific employee attributes you want to include in your data. You can also select all attributes.
Create integration
After selecting your permissions, click “Create integration” to generate your API credentials.
Copy API credentials
Once the integration is created, you’ll see your API credentials displayed: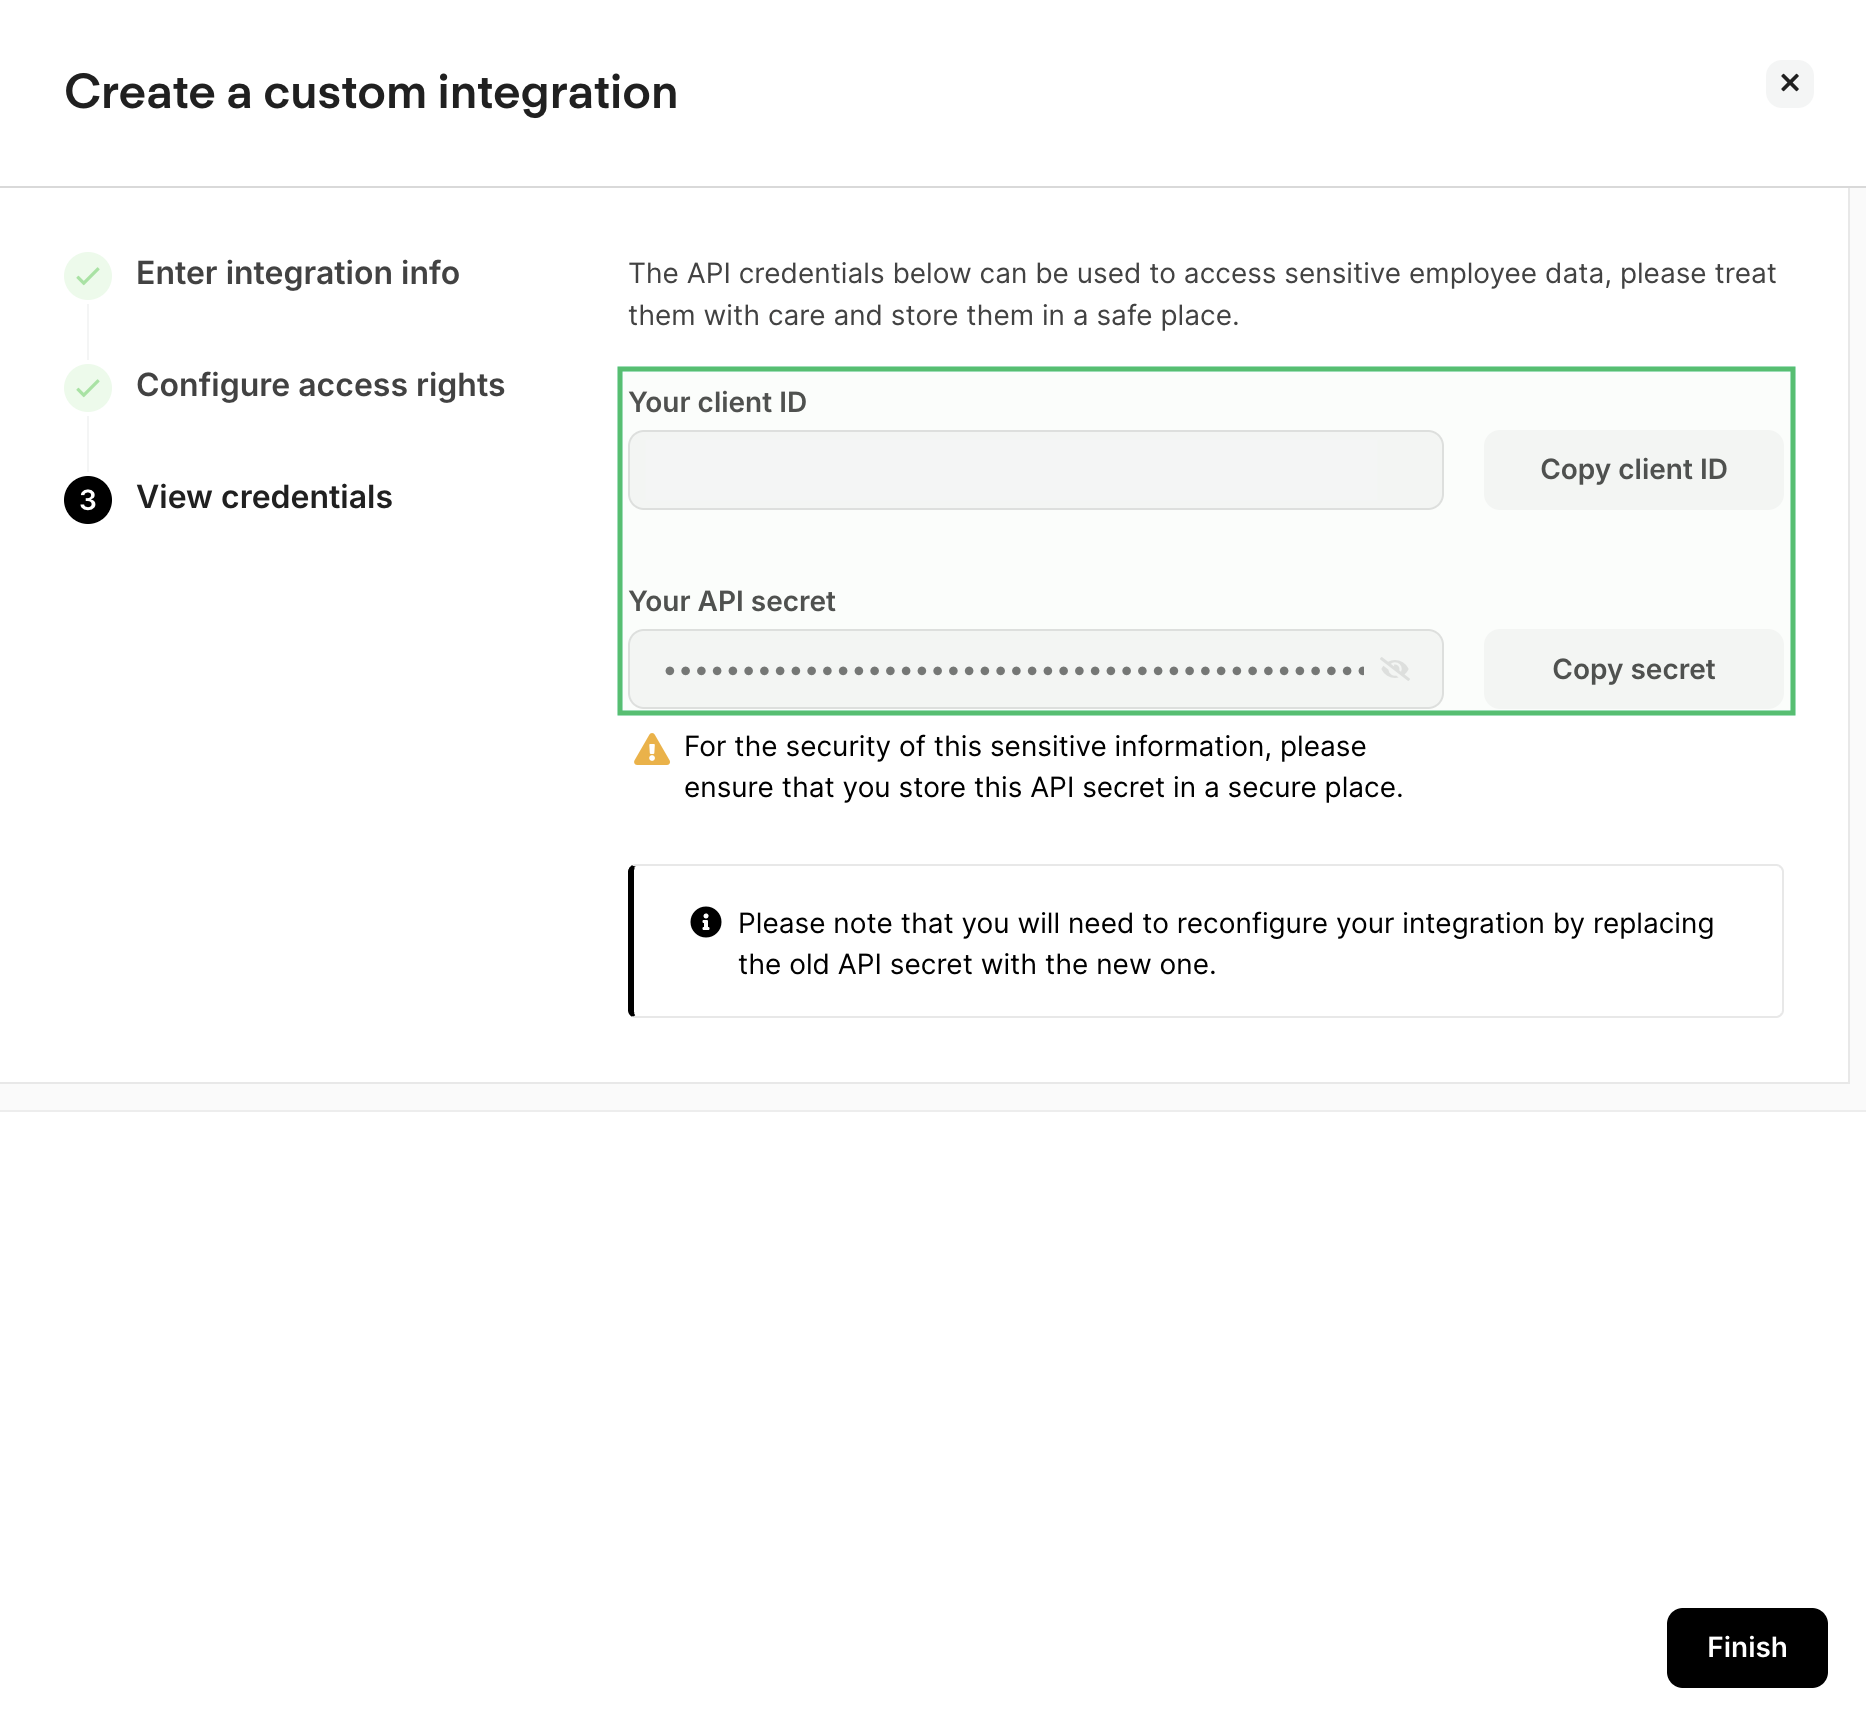
- Client ID: A unique identifier for your integration
- API Secret: A secret key for authentication
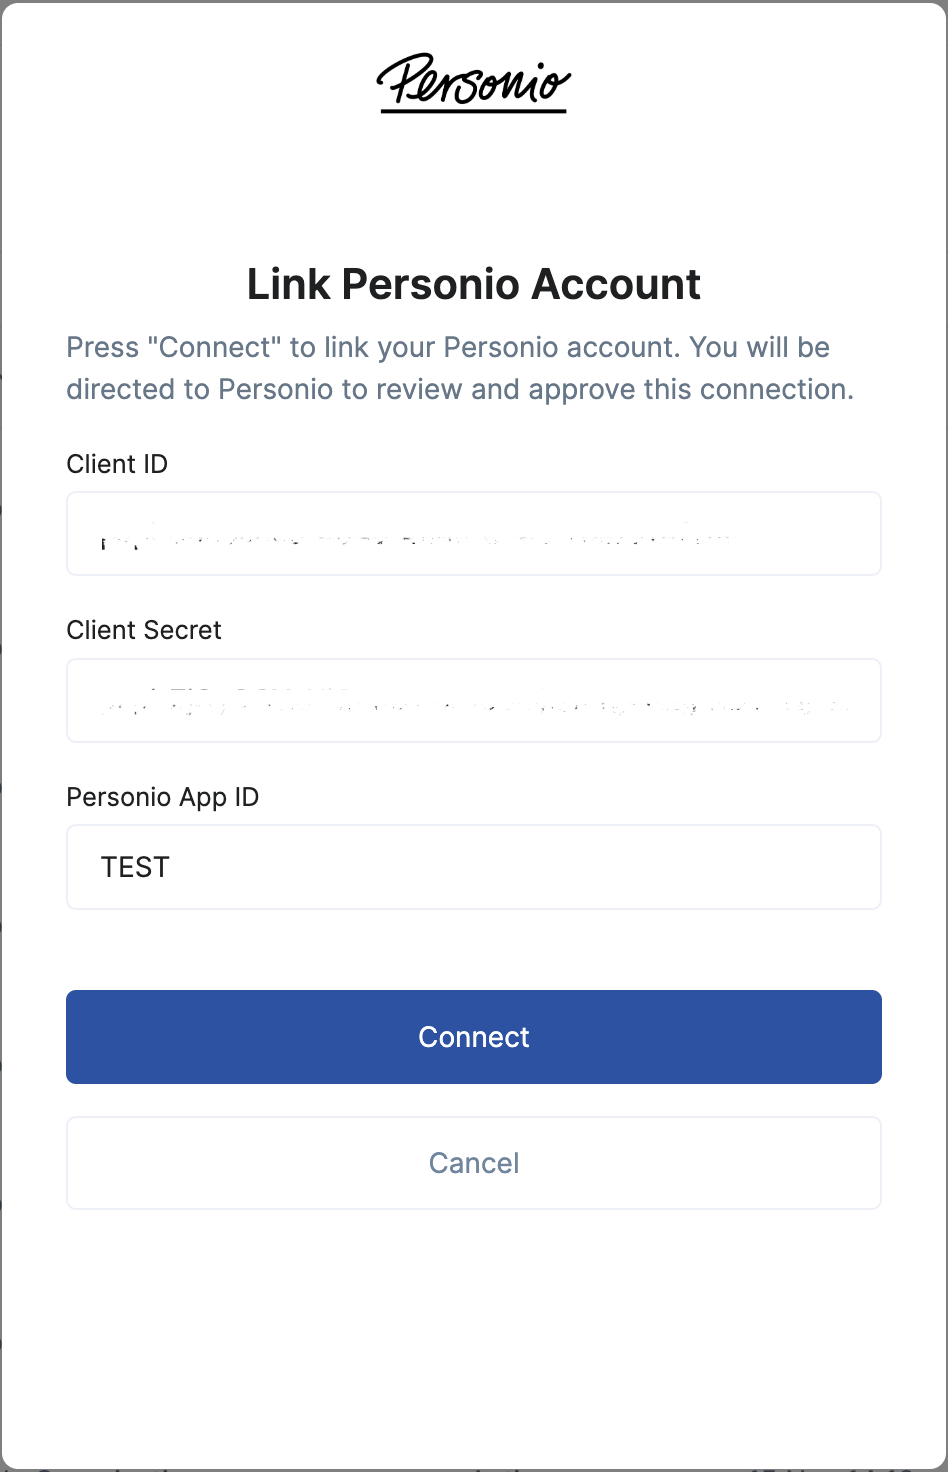
Connecting with StackOne Hub
Paste API credentials
Paste the API client ID and client secret in the StackOne Hub after selecting Personio as your HRIS provider.