Ensure you have Admin privileges for your Teamtailor account.

If you’ve been directed to StackOne to integrate with Teamtailor, the following steps will help you understand the process and any necessary actions to configure successful integration.

Generating API key and getting Company ID

1

Navigate to Settings

In your Teamtailor account, click on Settings.

Settings
2

Find API Keys

On the left-hand menu under the integrations header, find API keys.
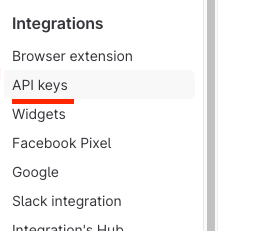
API Keys
3

Create a New API Key

Click the New API Key button at the top right of the page.

New API Key
4

Set Name and Permissions

Enter a descriptive name, set the scope to
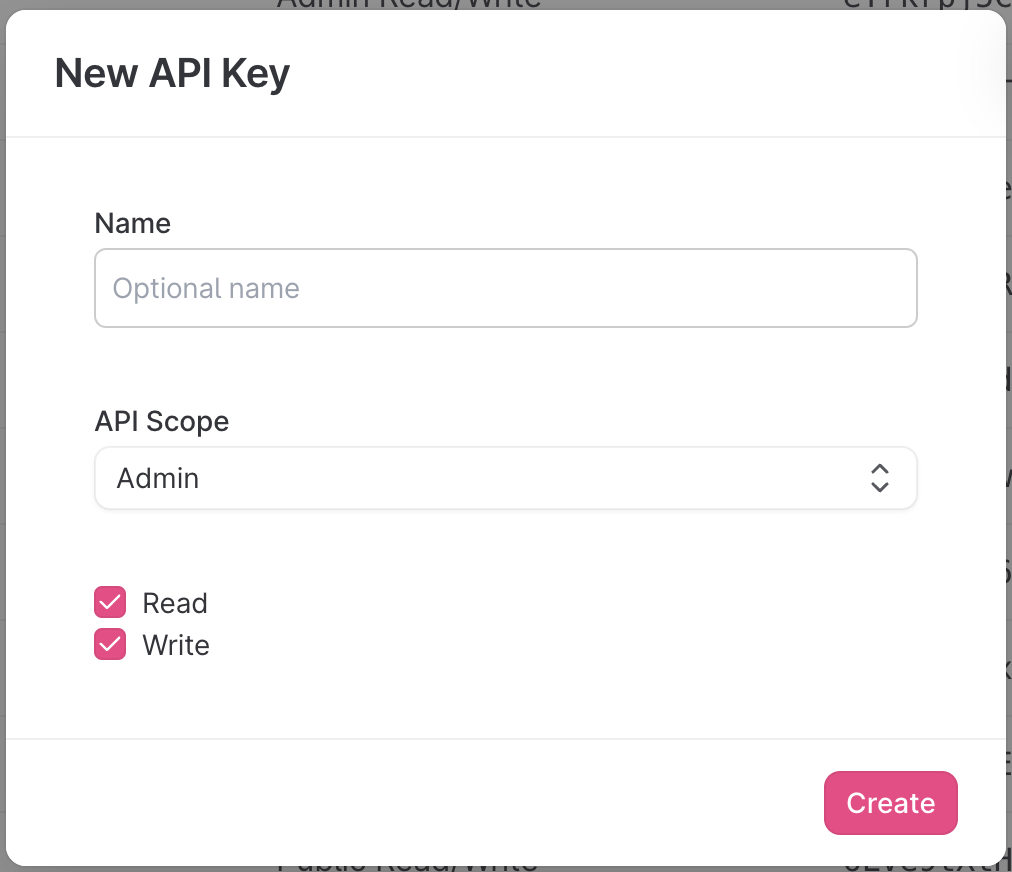
 admin and permissions, where only Read is required.

Set Permissions
5

Copy API Key

Copy the API key to a safe place.
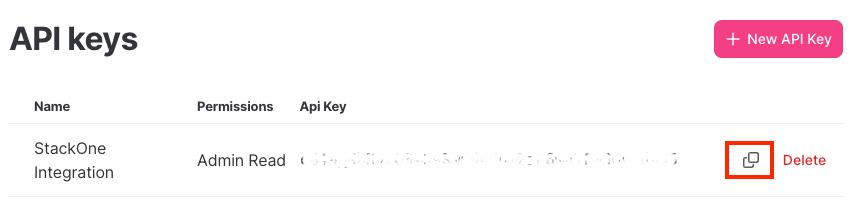
Copy API Key
6

Get Company ID

Make a note of the 
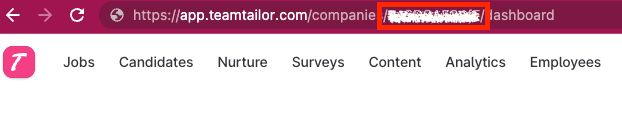
company ID, which is part of the URL as shown below:

Company ID

Get user credentials

You will also need to provide a user email and password. It is recommended that you set up a new account for integration purposes.

1

Create a New Employee

Find the employees tab and click the ➕ to create a new employee.

New Employee
2

Fill Out Required Fields

Fill out the required fields and set the Role to Recruitment Admin. This will ensure the account has the correct permissions.

Set Role
3

Add Employee

Click Add employee.

Add Employee
4

Create Account

The email address you entered will receive an invitation. Click Create account, you may have to log out of your current account to create the password.

Create Account
5

Find the Invitation Link

If you have not received an invitation, you can go to the Employees tab again and click on the user’s pencil ✏️ icon to edit their profile. You will see a link to the invitation, and you can click through this to set up the account.

Invitation Link
6

Get Account Email and Password

You should now have the account email address and password to proceed with the Hub.

⚠️ If your account uses SSO, you may have to create the account differently:

Accounts with Single Sign-On (SSO)

Follow steps 2.1 to 2.2 inclusive to create the employee, you will then have to exclude the employee from SSO, under the heading Exclude individual users from SSO login, as detailed here:

1

Exclude from SSO

After the user has been excluded, ensure a password is set. You may have to edit the permissions of the user by accessing the Employees tab and clicking on the gear ⚙️ here.

Exclude from SSO
2

Set Role

You will see a page similar to step 2.2, where you can set the role to Recruitment admin.

Set Role

Input the collected inputs into the StackOne Hub

1

Link Account

Upon reaching the Link Account page, enter the gathered details and proceed by clicking the
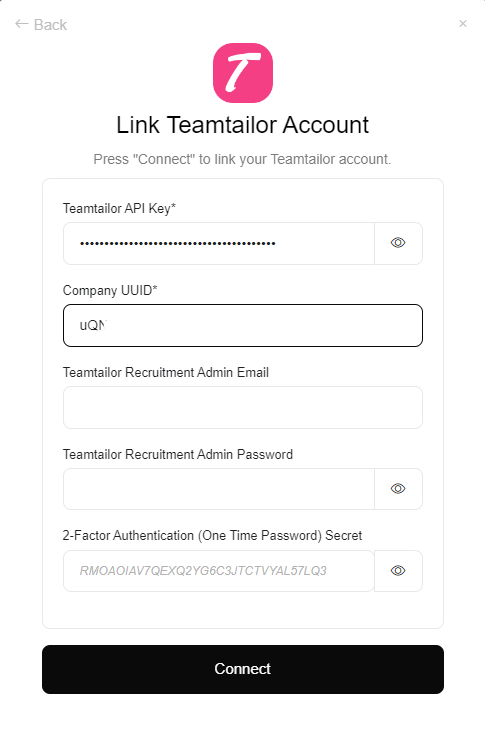
 Connect button.

Link Account

Congratulations, you’re all set! If you face any issues with the steps mentioned above, please contact us by emailing integrations@stackone.com. We’re always here to assist you!